

Keyboard Shortcuts
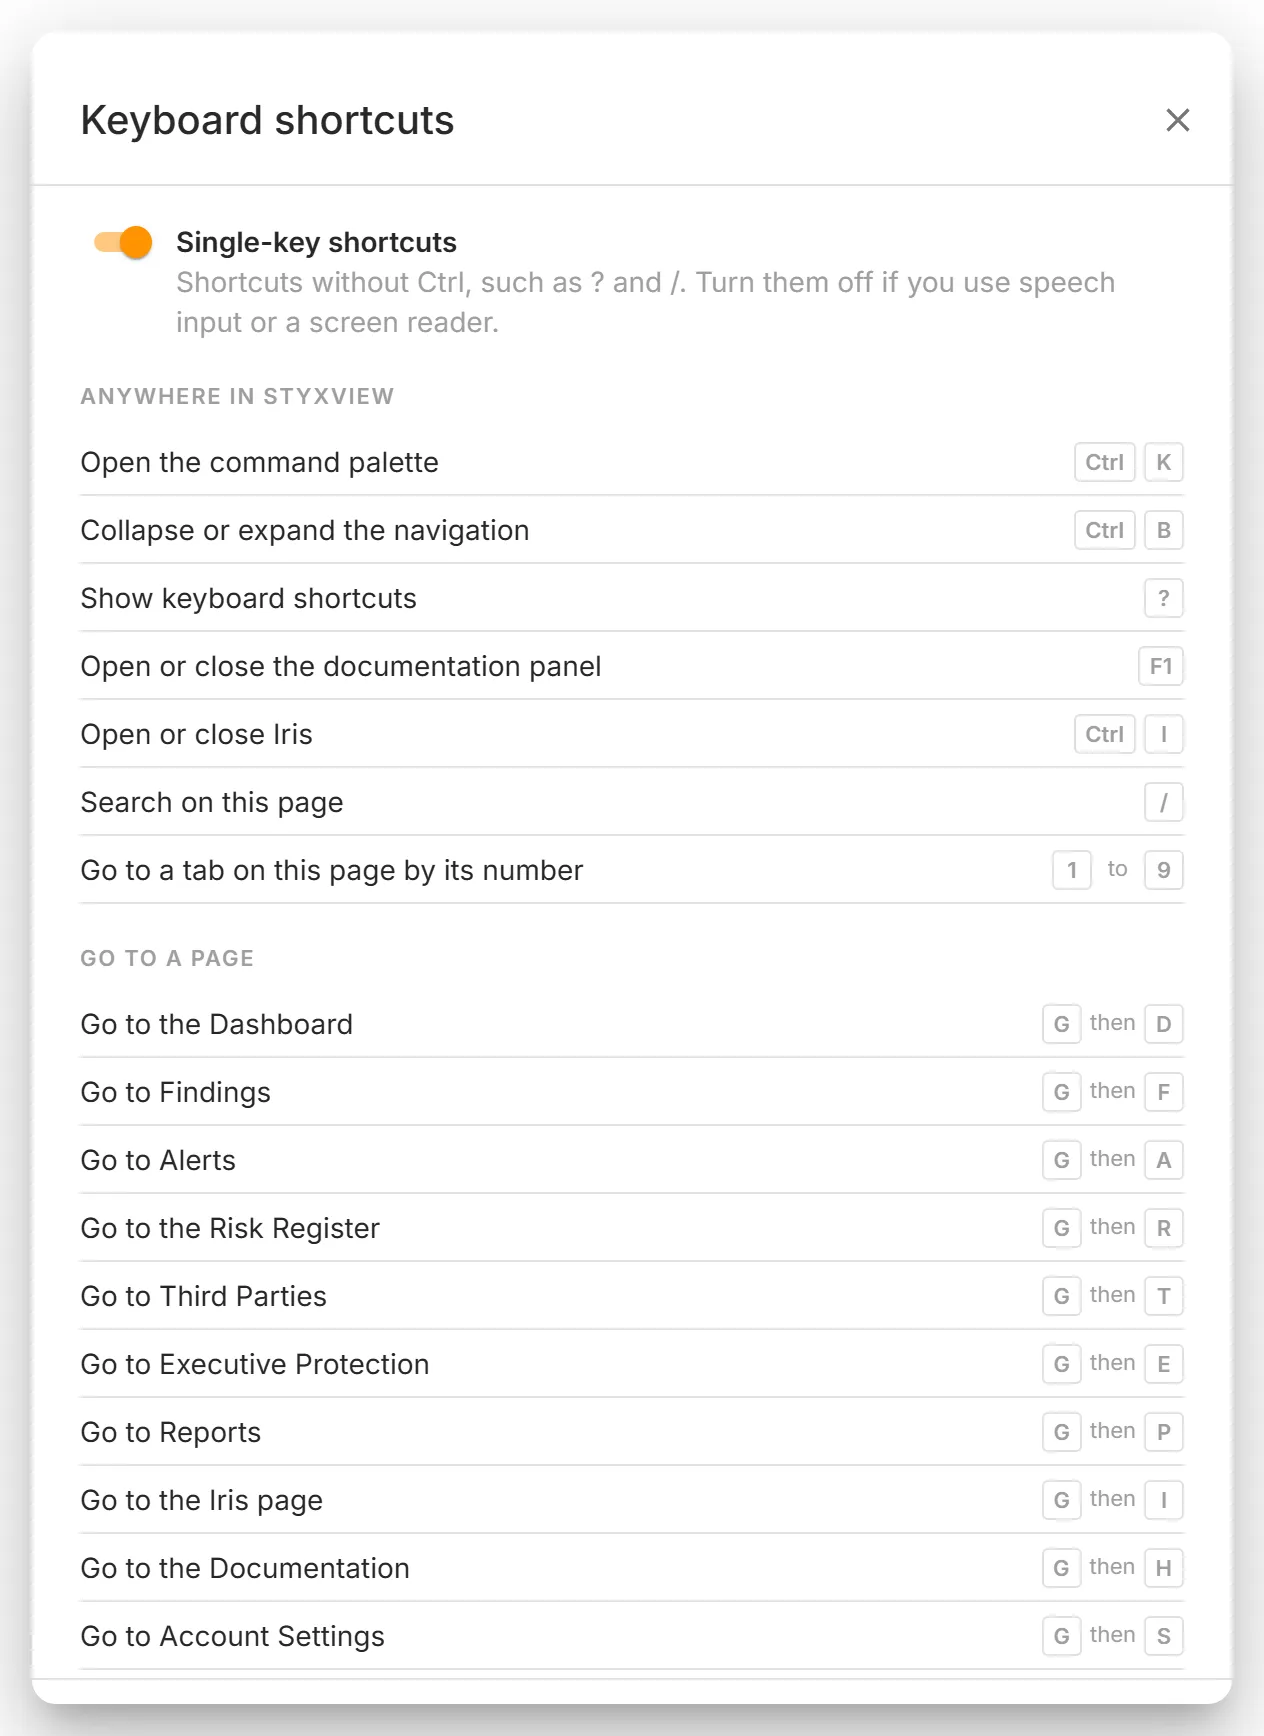
StyxView can be used from the keyboard. Press ? on any screen, or open your profile menu and select "Keyboard shortcuts", to see the shortcuts that work where you are.
On a Mac, press Cmd wherever this page says Ctrl. StyxView shows Cmd as ⌘ and Shift as ⇧, so Ctrl + K appears as ⌘K.
Seeing the Keys on Screen
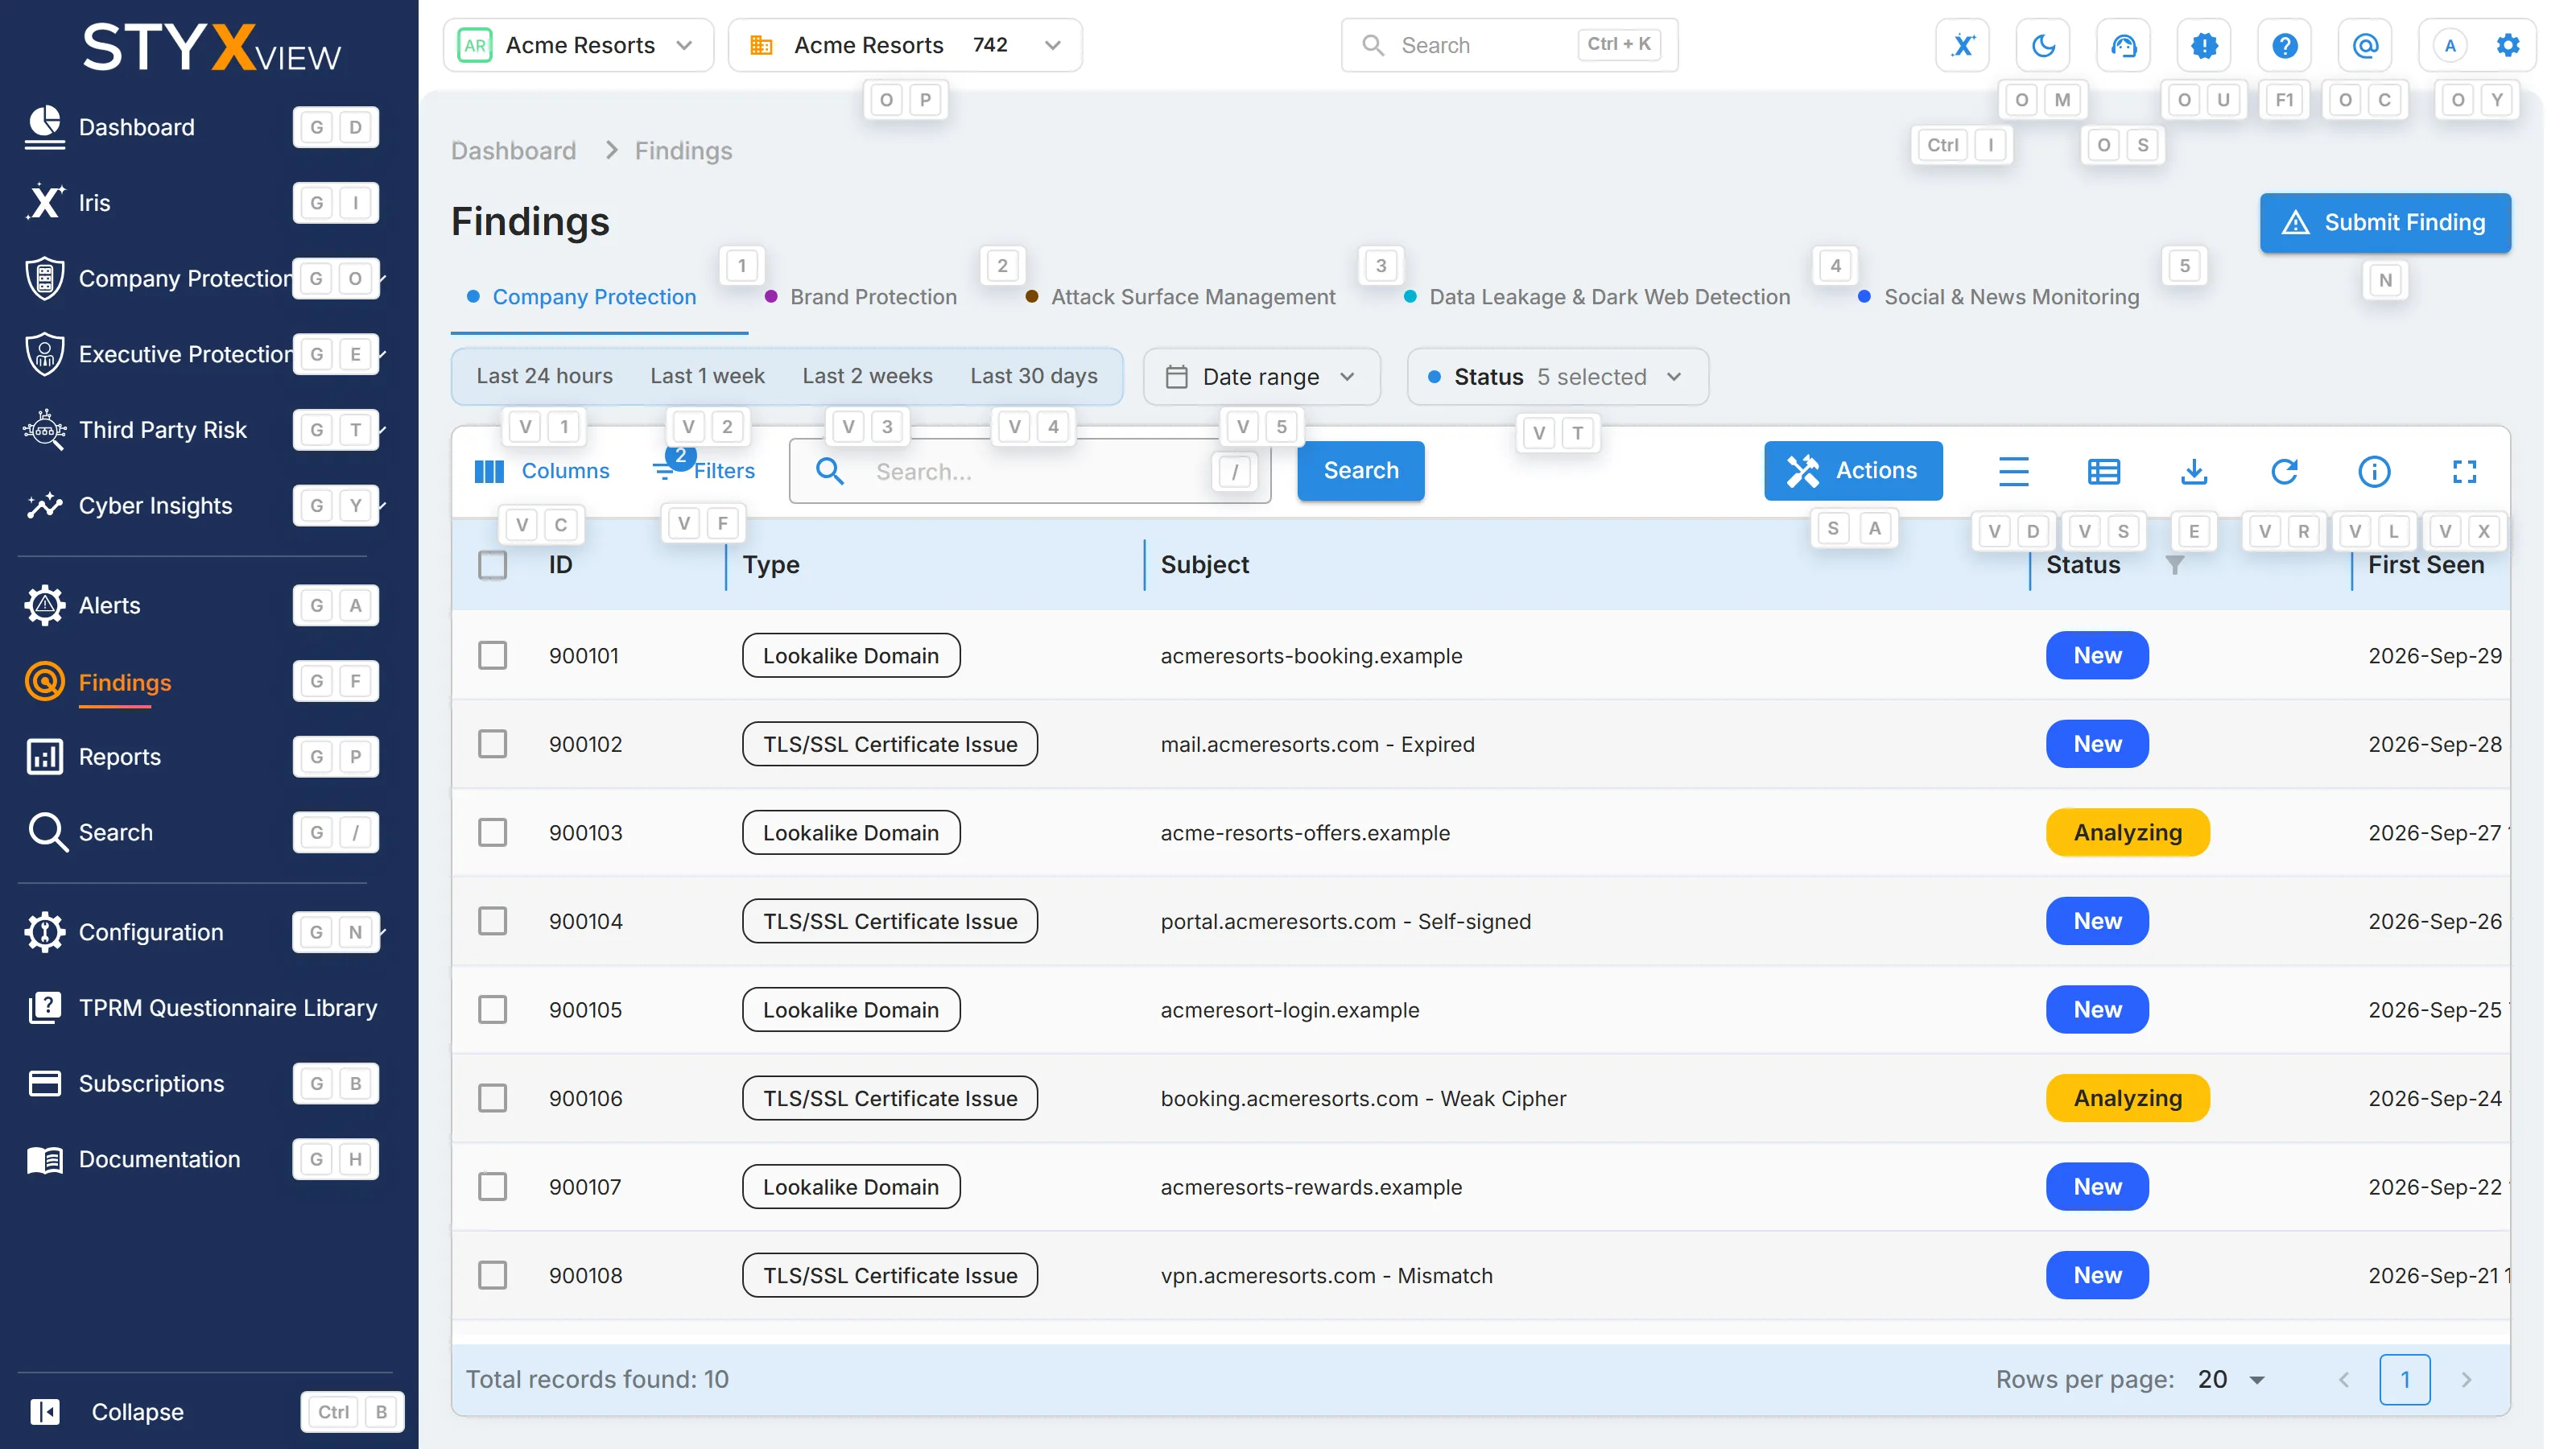
Section titled “Seeing the Keys on Screen”- Hold Ctrl on its own for half a second. Every button, field, tab, and sidebar item that has a shortcut shows its keys. Let go to hide them.
- Rest the pointer on a button or sidebar item for half a second to see its keys beside it. On the icon buttons in the top bar, such as Iris, Support, and Help, and on "Collapse" at the foot of the sidebar, the keys are in the button's own tooltip.
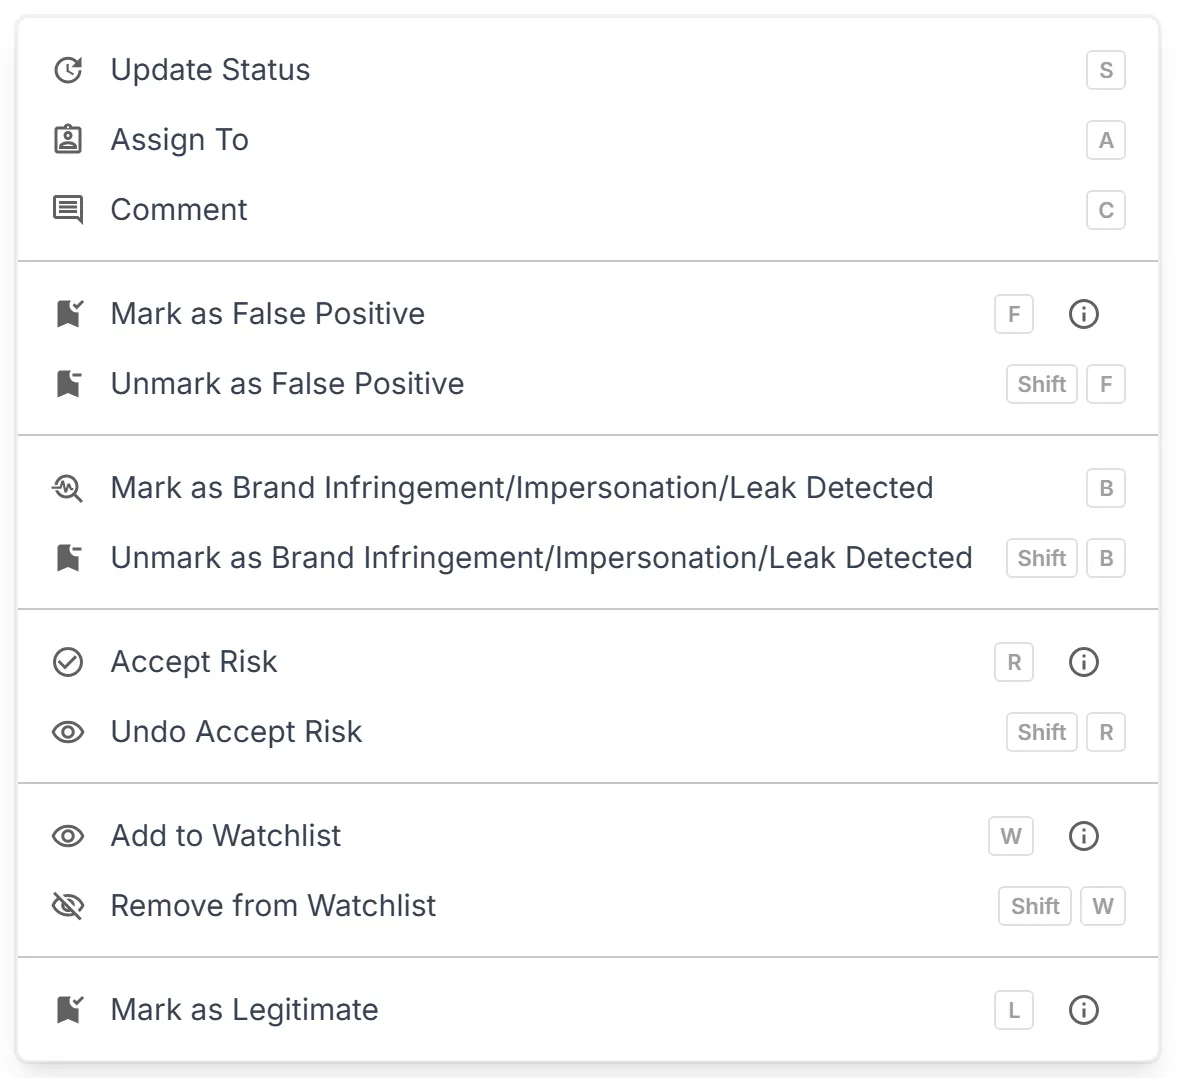
Menu items show their keys at the end of the row whenever the menu is open.
Anywhere in StyxView
Section titled “Anywhere in StyxView”| Keys | What they do |
|---|---|
| Ctrl + K | Search pages, findings, and help, or run a command by name |
| Ctrl + B | Collapse or expand the sidebar |
| ? | Show the keyboard shortcuts |
| F1 | Open or close the documentation panel beside the current screen |
| Ctrl + I | Open or close Iris |
| / | Go to the search field on the current page, when it has one |
| 1 to 9 | Select that tab on the current page, counting from the first |
In the Top Bar
Section titled “In the Top Bar”Press O, then a letter, within a second.
| Keys | What they do |
|---|---|
| O then M | Switch between light and dark mode |
| O then S | Open "Support" in a new tab |
| O then U | Open "Product Updates" |
| O then C | Open "Contact Us" |
| O then Y | Open your profile menu |
Go to a Page
Section titled “Go to a Page”Press G, then a letter, within a second. A key only works for pages your sidebar shows you.
| Keys | Page |
|---|---|
| G then D | "Dashboard" |
| G then F | "Findings" |
| G then A | "Alerts" |
| G then R | "Risk Register" |
| G then T | "Third Parties" |
| G then E | "Executive Protection" |
| G then P | "Reports" |
| G then I | "Iris" |
| G then H | "Documentation" |
| G then S | "Account Settings" |
| G then C | "Policies" |
| G then O | "Company Protection" |
| G then Y | "Cyber Insights" |
| G then / | "Search" |
| G then N | "Configuration" |
| G then B | "Subscriptions" |
| G then U | "Users" |
Every other page is a search away: press Ctrl + K and type its name.
In a List
Section titled “In a List”| Keys | What they do |
|---|---|
| J and K | Move to the next or previous row. The arrow keys also work once a row is highlighted. |
| Enter | Open the highlighted row |
| Ctrl + Enter | Open the highlighted row in a new tab |
| X | Select or clear the highlighted row |
| Shift + X | Select every row back to the last one you selected |
| Esc | Clear the selection |
| [ and ] | Go to the previous or next page of the list |
| E | Open "Export" |
The "Actions" Menu
Section titled “The "Actions" Menu”With rows selected, each item in the "Actions" menu has a key, shown at the end of its row. A key opens the same window as the menu item, and nothing changes until you confirm there. Shift with a key undoes that mark.
| Keys | Menu item |
|---|---|
| S | "Update Status" |
| A | "Assign To" |
| C | "Comment" |
| F and Shift + F | "Mark as False Positive" and "Unmark as False Positive" |
| B and Shift + B | "Mark as Brand Infringement/Impersonation/Leak Detected" and "Unmark as Brand Infringement/Impersonation/Leak Detected" |
| R and Shift + R | "Accept Risk" and "Undo Accept Risk" |
| W and Shift + W | "Add to Watchlist" and "Remove from Watchlist" |
| L | "Mark as Legitimate" |
| T | "Request Takedown" |
| N | "Create Risk", on a third party's findings |
| D | "Mark as Closed", on alerts |
The List's Own Controls
Section titled “The List's Own Controls”Press V, then a letter, within a second.
| Keys | Control |
|---|---|
| V then C | "Columns" |
| V then F | "Filters" |
| V then D | "Density" |
| V then S | "Views" |
| V then R | "Refresh" |
| V then X | "Full Screen" |
| V then L | The legend that explains the marks on a row |
On the Findings Page
Section titled “On the Findings Page”| Keys | What they do |
|---|---|
| N | Open "Submit Finding" |
| V then 1 to V then 4 | Show the last 24 hours, week, 2 weeks, or 30 days |
| V then 5 | Choose a date range |
| V then T | Filter by status |
On a Finding or Alert
Section titled “On a Finding or Alert”These keys work on a finding, or another record, that you opened as a page from a list. If you open findings in a pop-up ("Open findings in a pop-up" in your profile menu), they work in the pop-up too, and U closes it.
| Keys | What they do |
|---|---|
| J and K | Open the next or previous one in that list. The right and left arrow keys also work. |
| U | Go back to the list |
| C | Start writing a comment |
| I | Open or close the "AI Overview" |
| N | "Create Risk", on a third party's finding |
| P | "Upload Screenshot" |
The letters of the "Actions" menu in a list also work on a finding: S, A, F, B, R, W, L, and T, with Shift to undo a mark. Each opens the same window as the menu and still asks for your comment.
On an alert's page, S opens its status and C starts a note. On the "Alerts" page, each alert opens in the summary beside the list, so J and K with Enter move from alert to alert there.
In Editors and Lists
Section titled “In Editors and Lists”| Keys | What they do |
|---|---|
| Ctrl + Enter | Post a comment, save a policy row and add the next one, or send an API console request |
| Shift + Enter | Start a new line in a message to Iris |
| Ctrl + click | Open a row in a new tab |
Turning Single-Key Shortcuts Off
Section titled “Turning Single-Key Shortcuts Off”Shortcuts without Ctrl, such as ?, /, and G then F, never act while you are typing in a field. If you use speech input or a screen reader, you can turn them off: press ?, or select "Keyboard shortcuts" in your profile menu, and switch off "Single-key shortcuts". Shortcuts with Ctrl, F1, Enter, Esc, and the arrow keys keep working. The setting applies to the browser you set it in.