

Integrations
"Integrations" connects StyxView with the tools your team already uses. The page has three tabs:
| Tab | What you do there |
|---|---|
| Integrations | Synchronise your email account list from Microsoft Entra ID, and send notifications to your IT service management (ITSM) product. |
| Connectors | Connect third-party tools to automate alert workflows. |
| API Keys | Create and manage the keys that call the StyxView API. |
Navigation Path
Section titled “Navigation Path”In the left menu, go to "Configuration" → "Integrations". Only users with the Admin role see this page.
Integrations
Section titled “Integrations”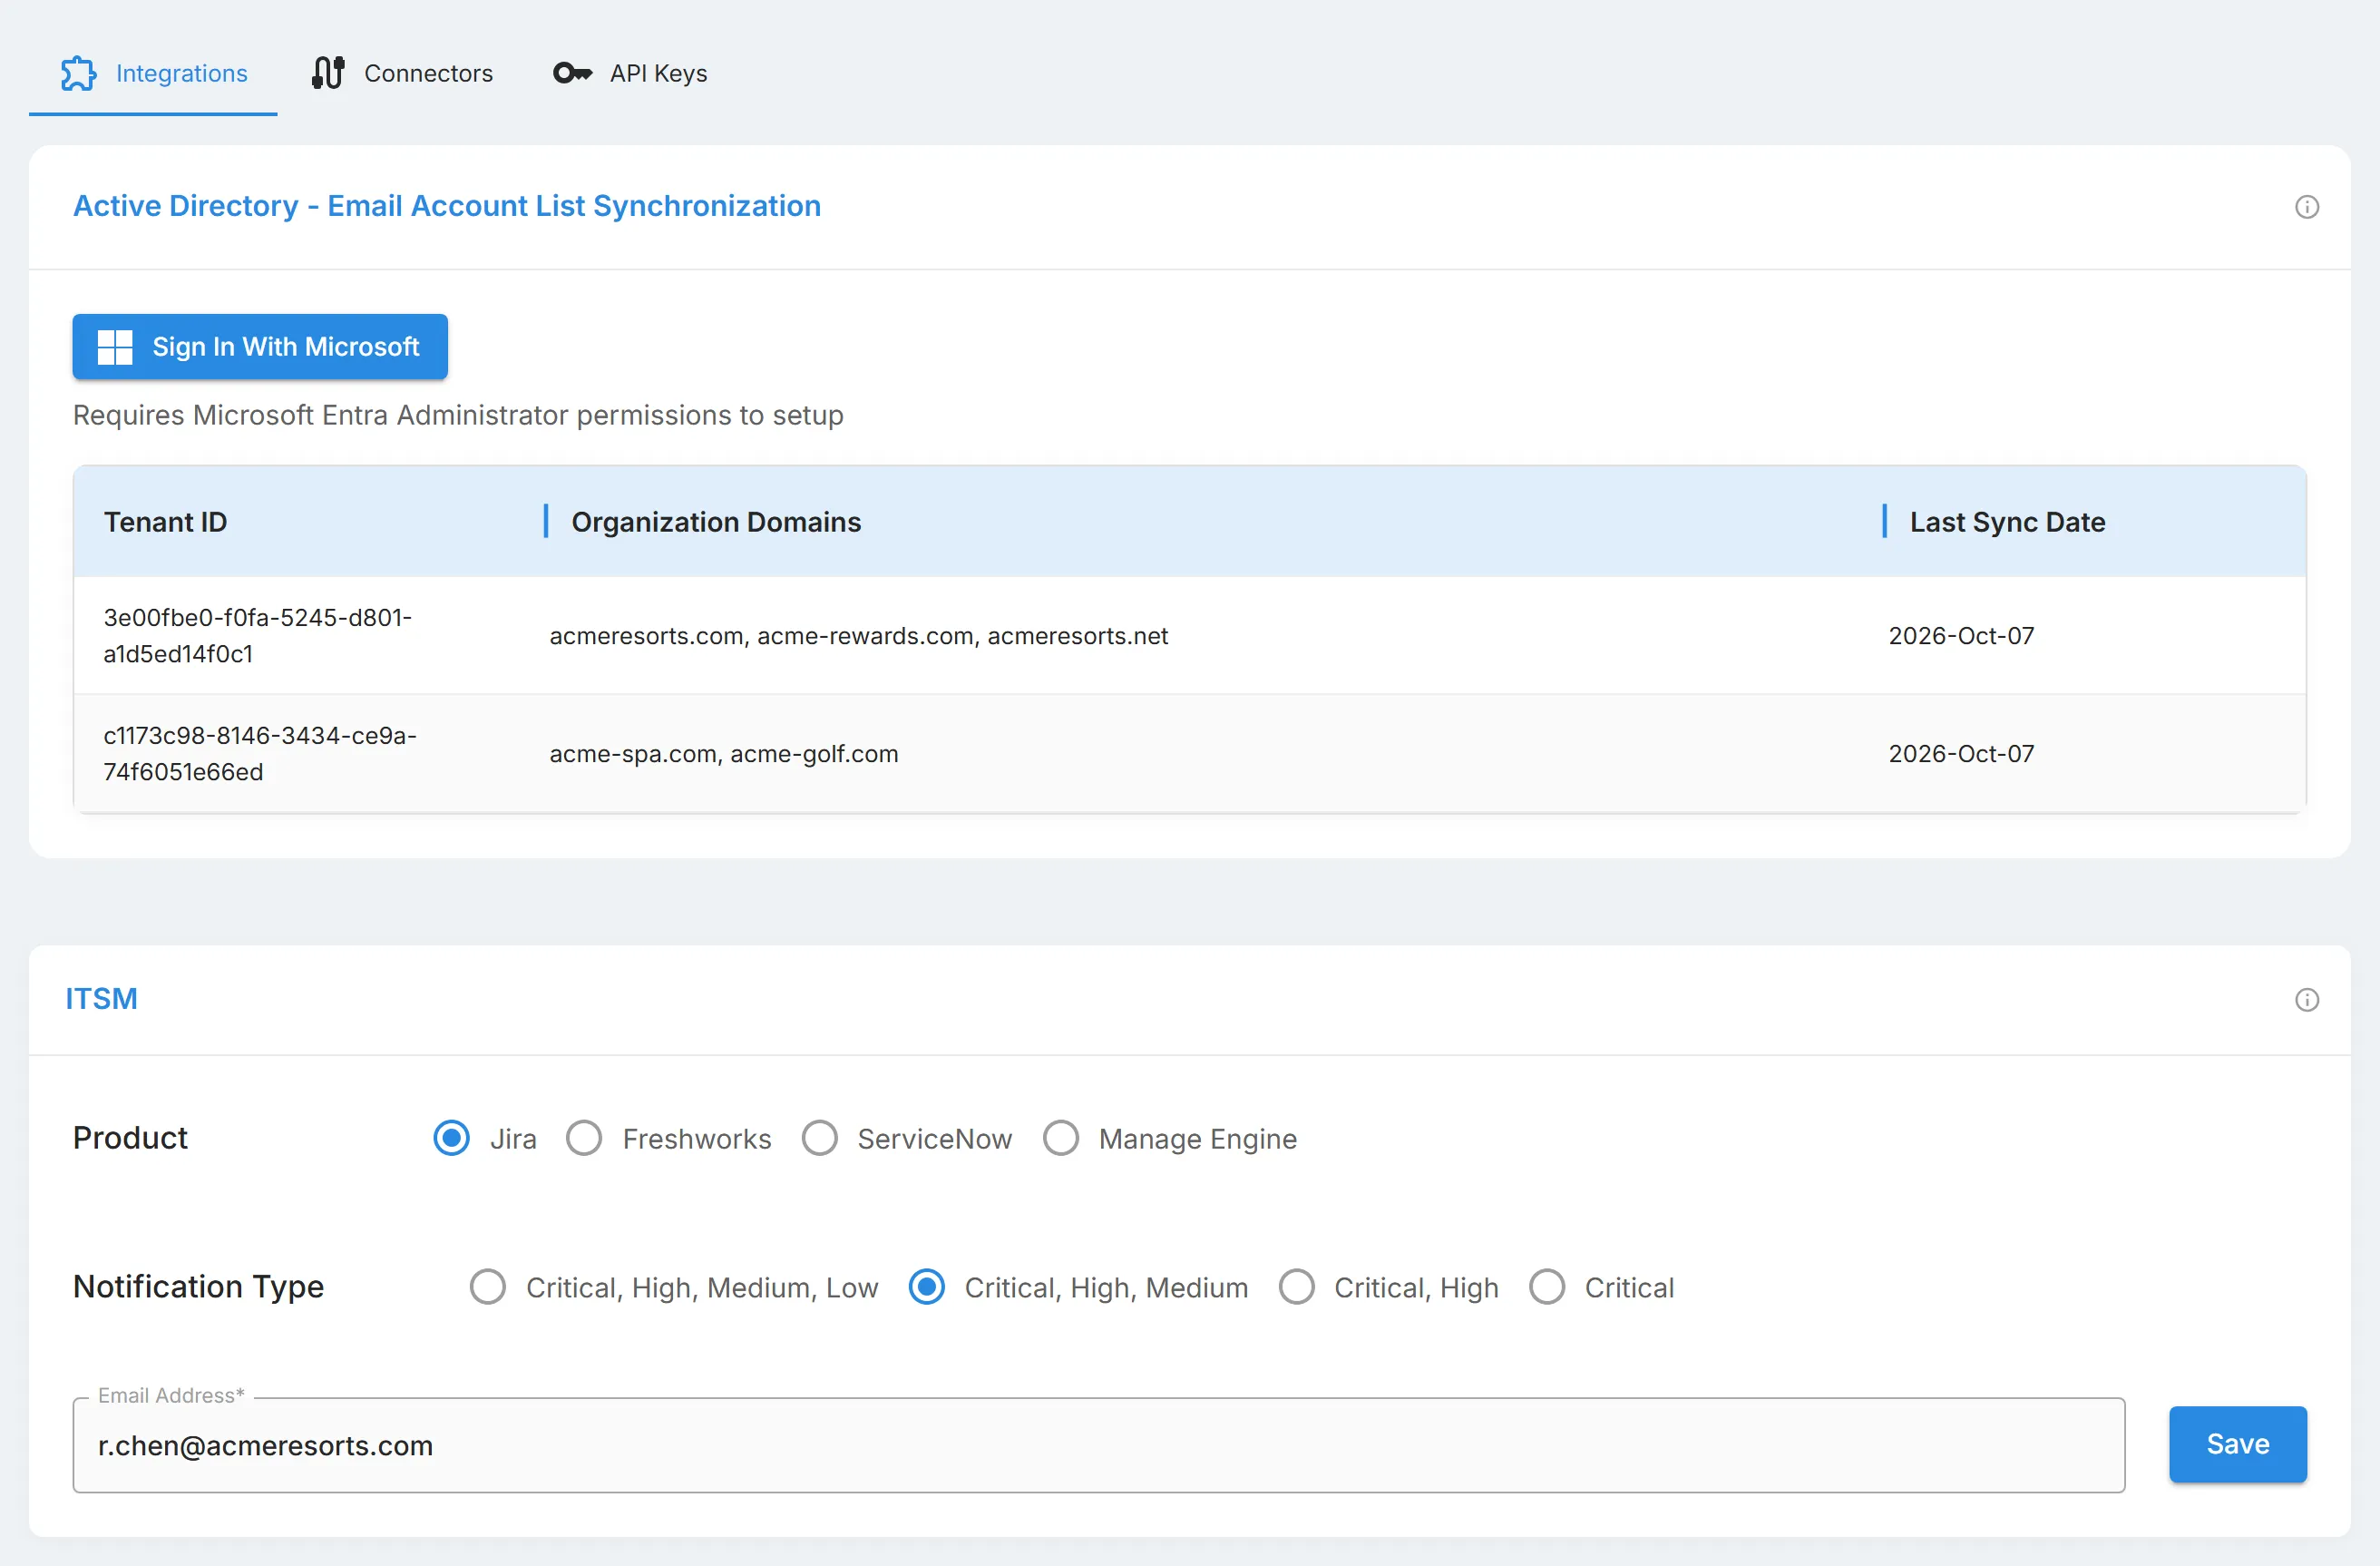
Active Directory - Email Account List Synchronization
Section titled “Active Directory - Email Account List Synchronization”This panel connects your Microsoft Entra ID tenant, so StyxView can read the list of email accounts in your directory.
- Select "Sign In With Microsoft". You need Microsoft Entra administrator permissions.
- Sign in and grant the permissions Microsoft asks for.
- When you return to StyxView, the panel lists each connected tenant with its "Tenant ID", "Organization Domains", and "Last Sync Date".
If the account you signed in with is not an administrator, StyxView shows "AD sync failed - please try again with admin access".
This panel sends notifications to your ITSM product.
- In "Product", select your ITSM product: Jira, Freshworks, ServiceNow, or Manage Engine.
- For ServiceNow, enter the "Username", "Password", and "Subdomain" of your ServiceNow instance. The subdomain uses lowercase letters, numbers, and hyphens only. To change saved ServiceNow details, select the pencil icon.
- In "Notification Type", choose which severities send a notification:
- Critical, High, Medium, Low
- Critical, High, Medium
- Critical, High
- Critical
- In "Email Address", enter the address the notifications go to.
- Select "Save".
Connectors
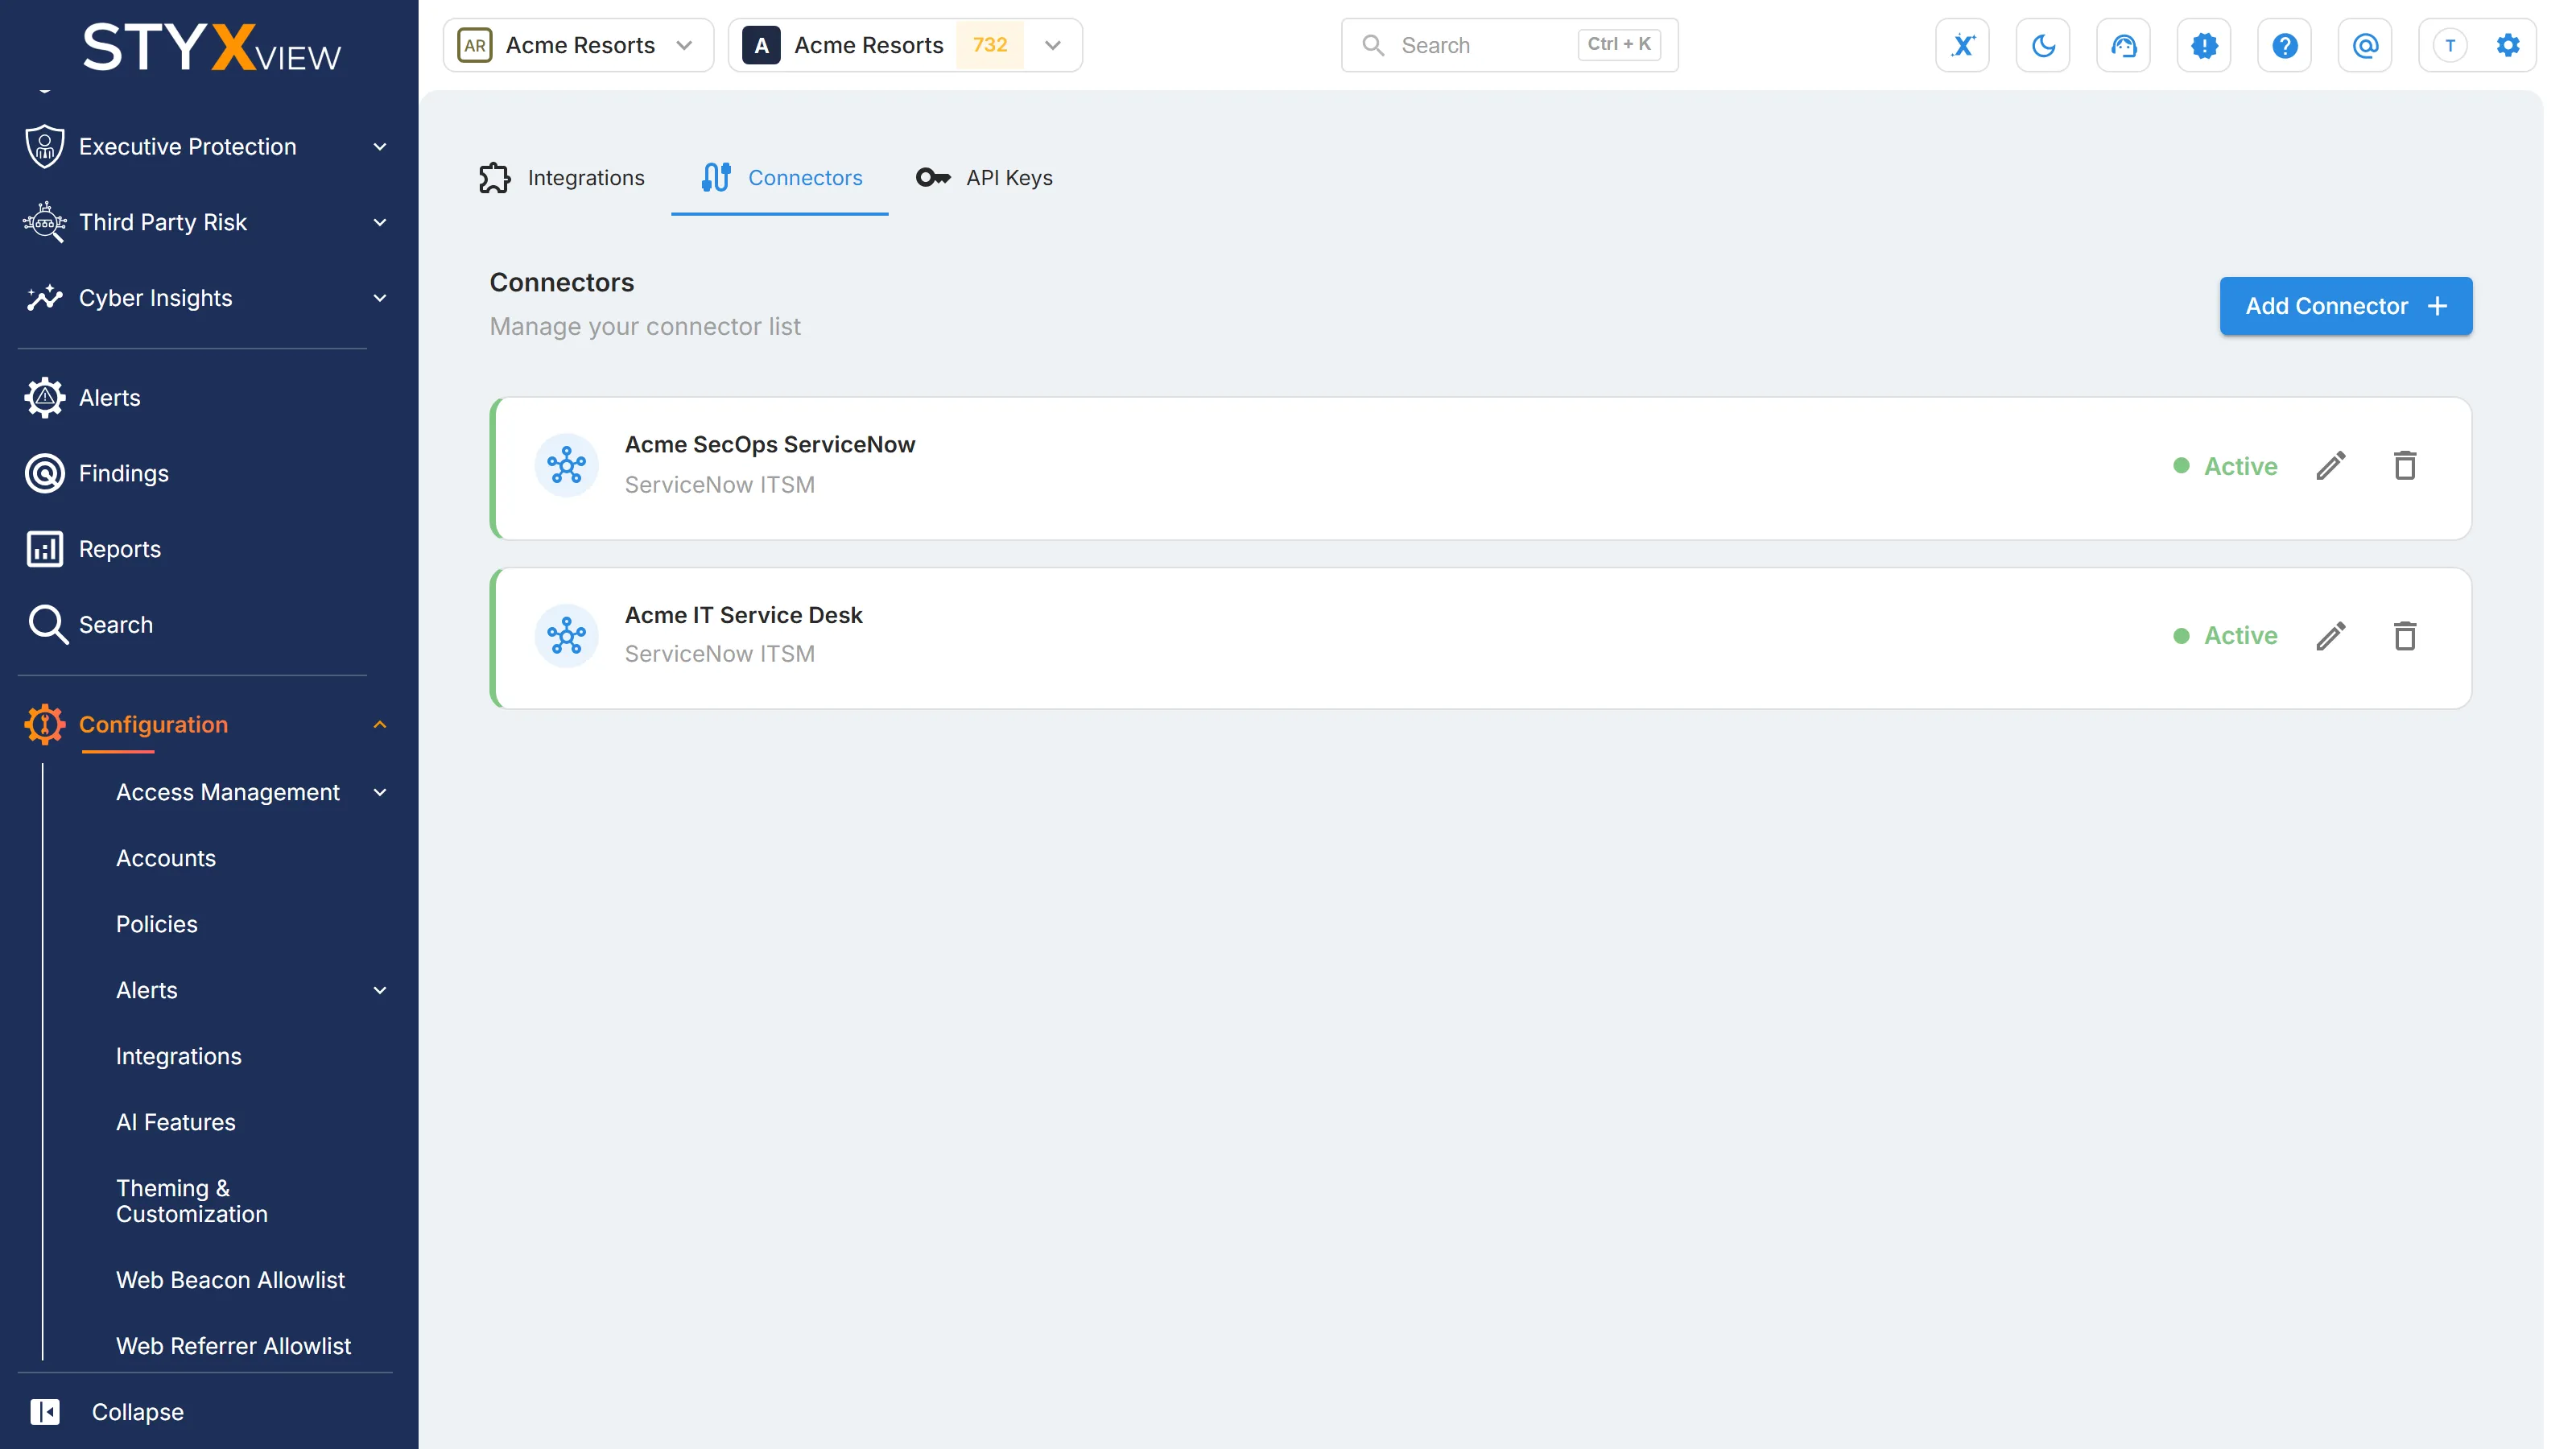
Section titled “Connectors”"Connectors" lists the third-party tools you have connected to automate alert workflows.
-
Select "Add Connector" and choose the tool.
-
In the "Configure" step, enter the "Unique Identifier Name", the "Base URL", and the credentials the tool asks for. If the tool offers more than one way to sign in, choose it in "Auth Type".
-
Select "Test Connection" to check the details.
-
Optional: in the next two steps, map how data moves from StyxView to the tool and from the tool to StyxView. Select "Skip" to leave a step out.
-
Select "Save".
To change a connector, select its "Edit Connection" icon. To remove it, select its "Delete Connector" icon, then "Delete".
API Keys
Section titled “API Keys”API keys let your own systems call the StyxView API. The API is documented in the API reference in this documentation.
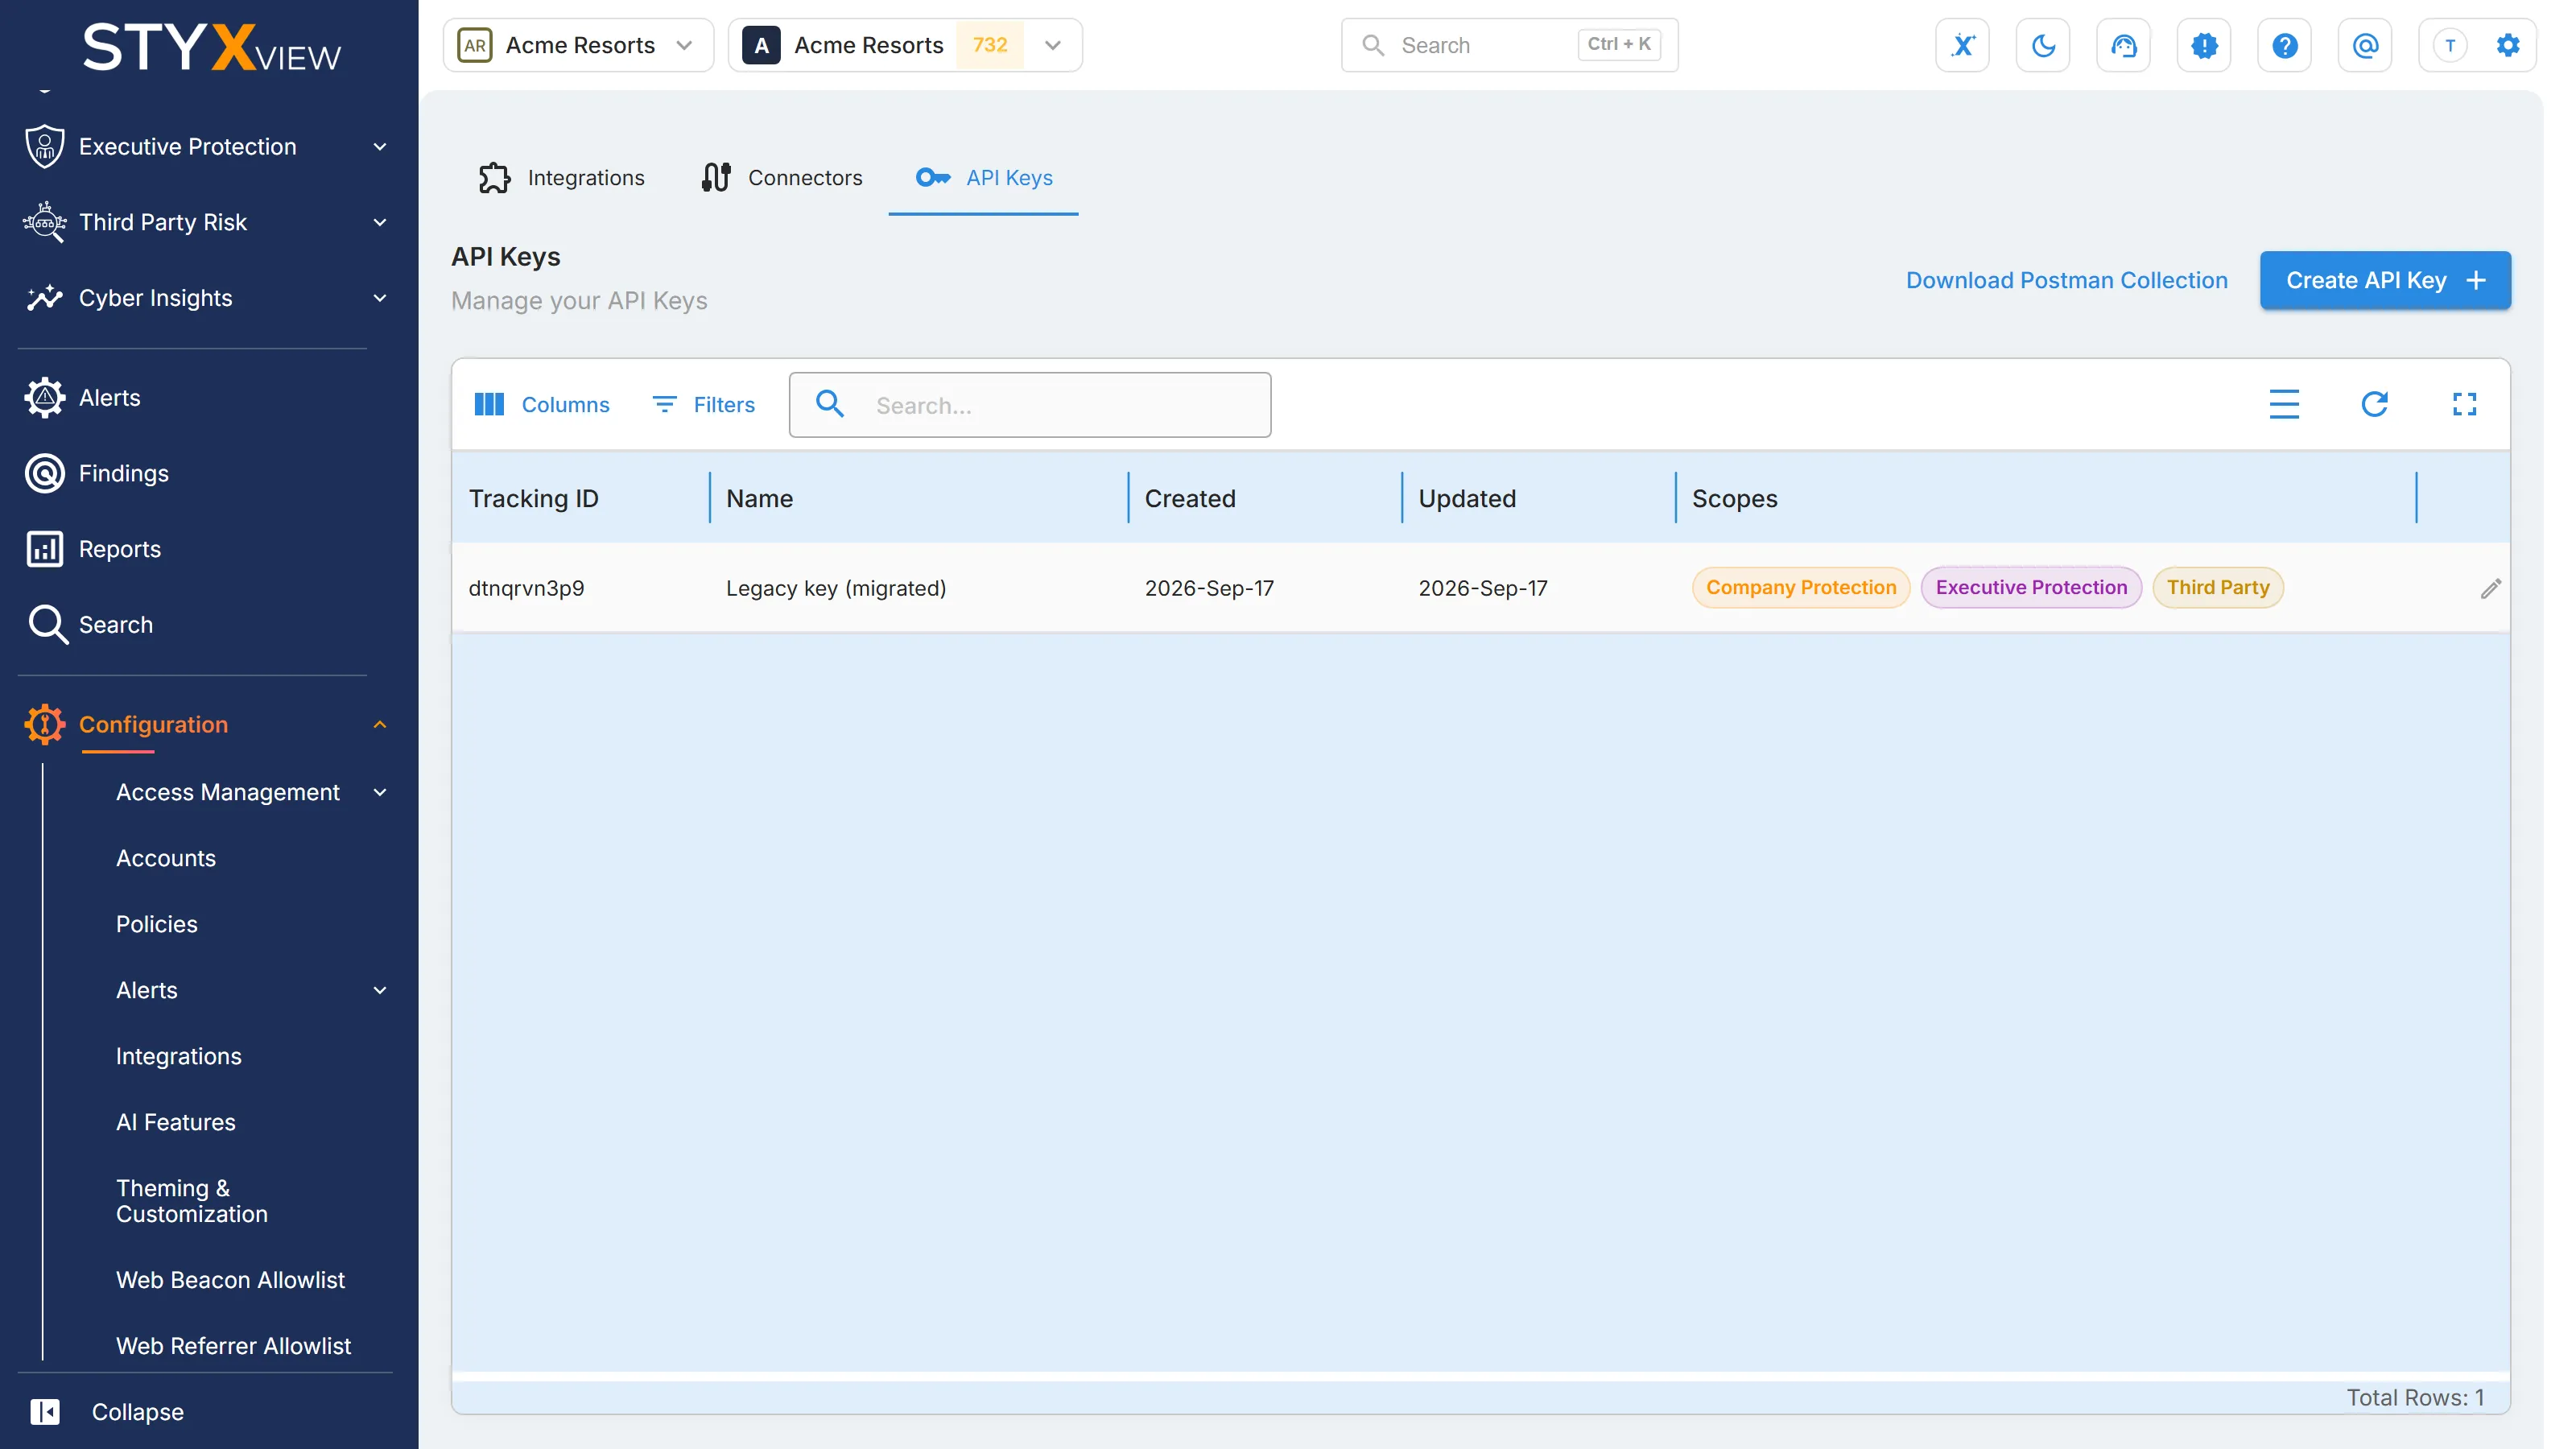
Select "Download Postman Collection" to download a Postman collection of the API.
Create an API Key
Section titled “Create an API Key”-
Select "Create API Key".
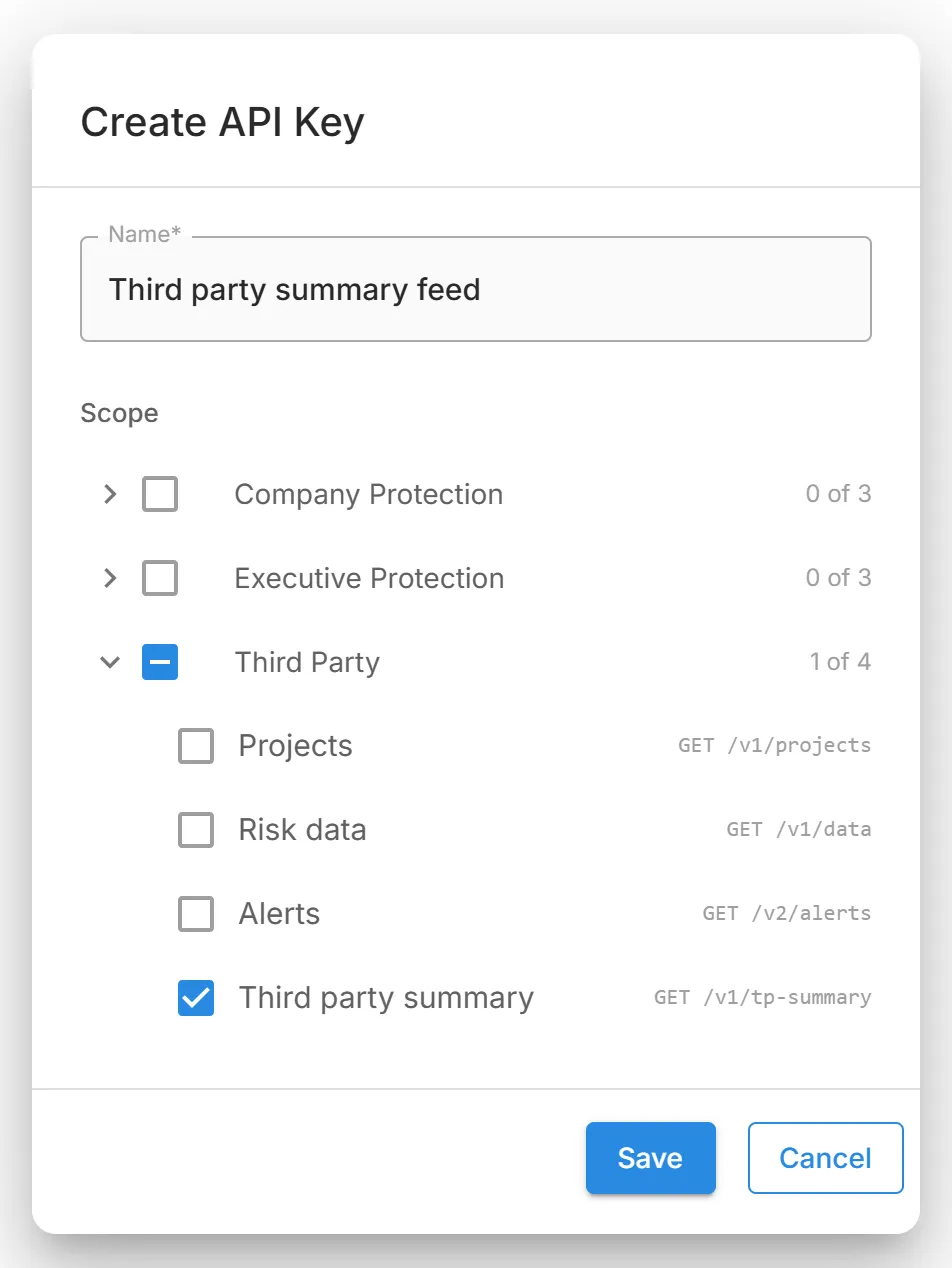
-
In "Name", enter a name that says what the key is for, for example
Reporting feed. -
Under "Scope", choose what the key can reach. Nothing is selected to begin with. Select a solution to give the key all of its endpoints, or select the arrow beside it and choose individual endpoints. The count beside each solution shows how many of its endpoints you have chosen, for example "1 of 4". See What each scope reaches.
-
Select "Save". The "Save your key" dialog shows the key and its "Permissions", for example "Third Party: Third party summary".
-
Select "Copy", store the key somewhere safe, and select "Done".
An account can have up to 5 API keys, in any combination of scopes, and two keys can have the same scope, for example one for each system that calls the API. When the account already has 5 keys, "Create API Key" shows "API key limit reached": delete a key you no longer use, or edit an existing key's scope.
What each scope reaches
Section titled “What each scope reaches”Each solution's scope is made of the endpoints below. Give a key only the endpoints the system using it needs.
| Endpoint | Request | Company Protection | Executive Protection | Third Party |
|---|---|---|---|---|
| Projects | GET /v1/projects | Yes | Yes | Yes |
| Risk data | GET /v1/data | Yes | Yes | Yes |
| Alerts | GET /v2/alerts | Yes | Yes | Yes |
| Third party summary | GET /v1/tp-summary | No | No | Yes |
A key without an endpoint in its scope gets 403 with the message API key not authorized for this endpoint! on that endpoint. A key that has an endpoint for some solutions only gets 403 with Project not accessible with this API key! when it asks for a project of another solution. For example, a key with only "Third party summary" reads the third party summary and nothing else.
Manage API Keys
Section titled “Manage API Keys”The table lists the keys of the selected account:
| Column | Description |
|---|---|
| Tracking ID | The identifier of the key. It changes when you re-roll the key. |
| Name | The name you gave the key. |
| Created | When the key was created. |
| Updated | When the key was last changed. |
| Scopes | One chip per solution the key can reach. A chip such as "Third Party · 1/4" means the key reaches only some of that solution's endpoints; hover over it to see which. |
Each row has three actions:
- Edit: change the name or the scope. The key itself does not change, and a new scope applies from the key's next request.
- Re-roll: generate a new key in place of the current one. The current key stops working immediately, and the new one is shown once.
- Delete: delete the key. Any system using it stops authenticating immediately.