

User Actions
The "Actions" menu lets analysts manage findings in Brand Protection and Data Leakage & Dark Web Detection: assign them, update their status, and record what review decided. This page covers lookalike domains, the status of Data Leakage & Dark Web Detection records, and the user accounts found in breaches.
Every finding action asks you to add context, which is saved as a comment on the finding. Finding Actions explains what each action changes and how to undo it.
Brand Protection - Lookalike Domain User Actions
Section titled “Brand Protection - Lookalike Domain User Actions”Overview
Section titled “Overview”The "Lookalike Domains" tab is under "Company Protection" → "Brand Protection" → "Domain Impersonation". There you can:
- Act on several lookalike domains at once, for example to mark them as false positive or as legitimate.
- Add a lookalike domain that StyxView did not detect.
- Act on a single domain from its finding page.
Apply a bulk action (Mark as False Positive / Mark as Legitimate)
Section titled “Apply a bulk action (Mark as False Positive / Mark as Legitimate)”When to use: to update many lookalike domains in one go, for example to clear obvious false alarms or to record domains that belong to your organization.
-
Optional: search or filter the list so it shows only the domains you want to act on.
-
Select each domain with the checkbox at the left of its row. To select every domain on the current page, select the checkbox in the header row.
-
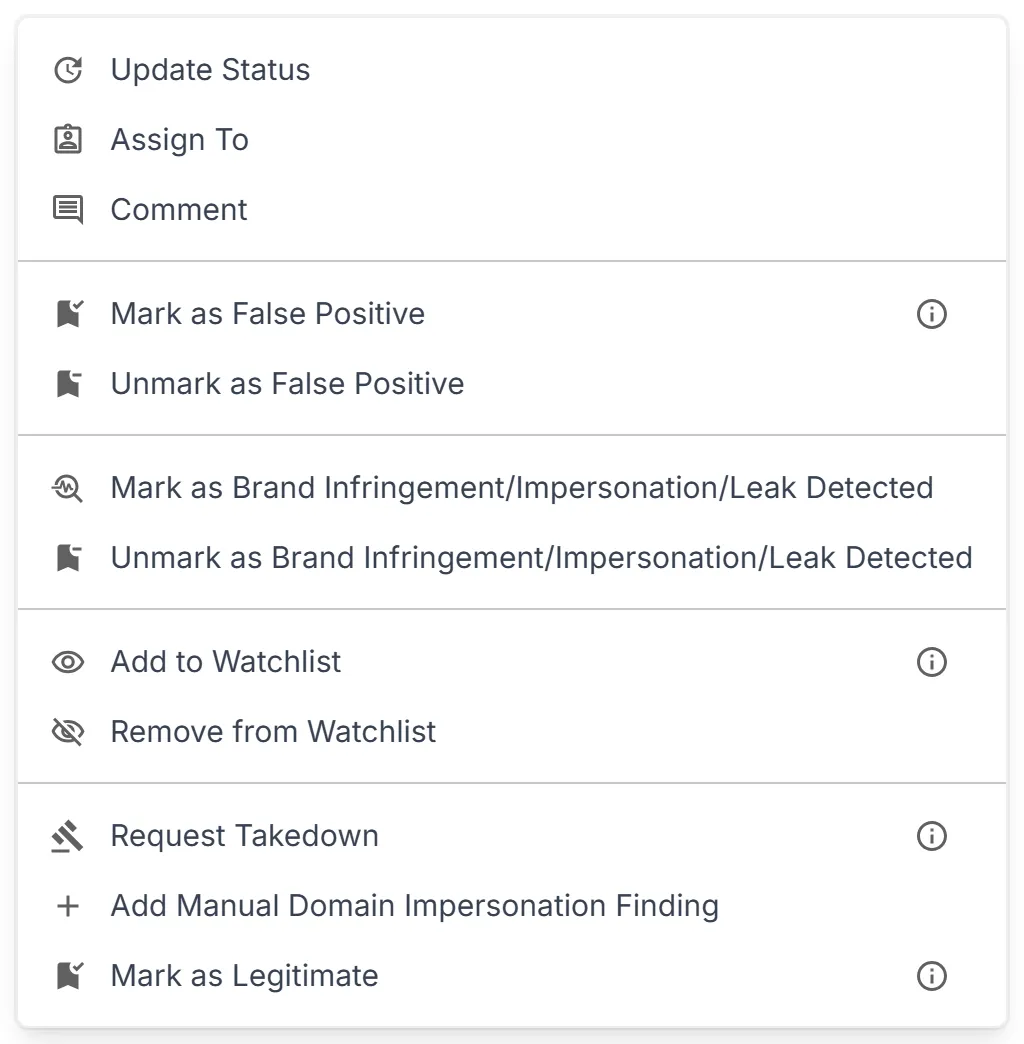
Select "Actions" at the top right of the list.
-
Choose the action:
- "Mark as False Positive": the domain was flagged in error. It leaves the open list. Detection may still find the same domain again.
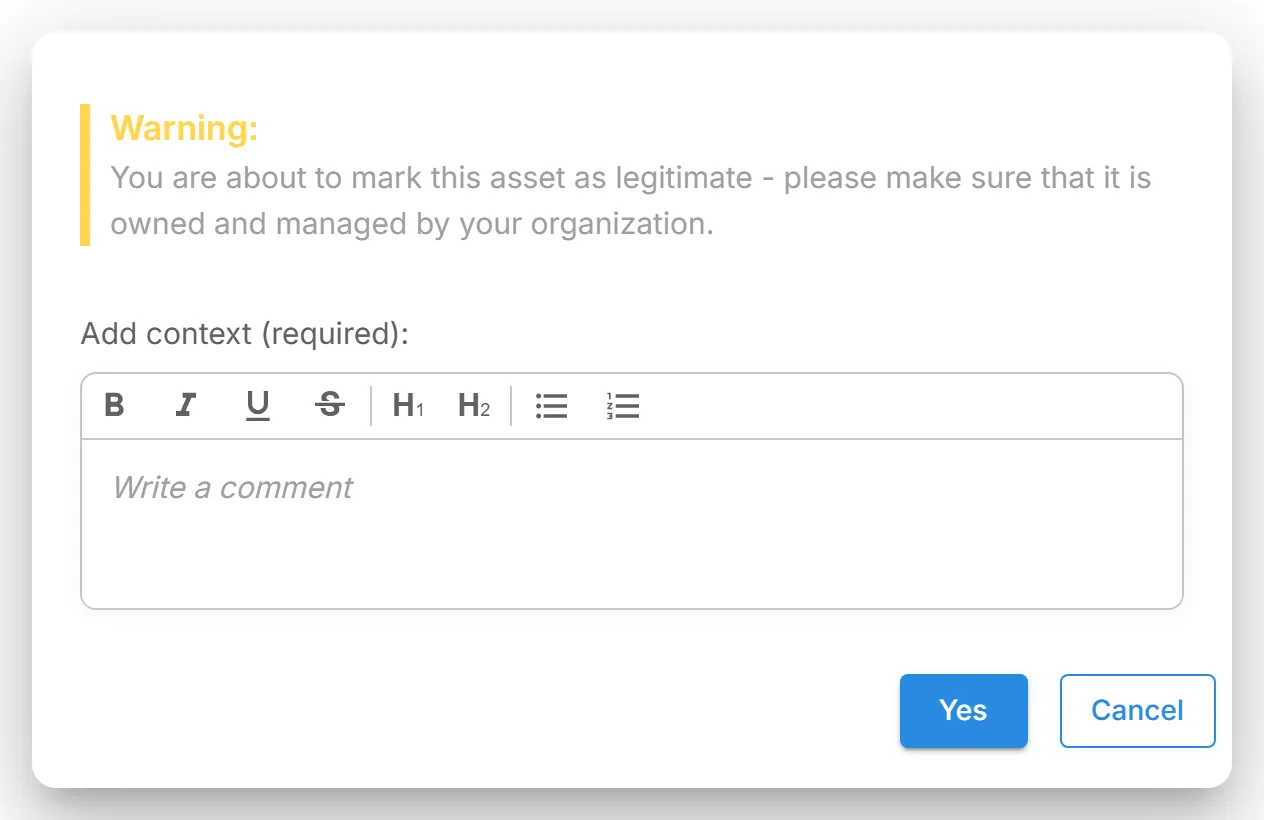
- "Mark as Legitimate": the domain belongs to your organization. The dialog asks you to confirm that the selected assets are owned and managed by your organization.
- The menu also has "Update Status", "Assign To", "Comment", "Mark as Brand Infringement/Impersonation/Leak Detected", "Add to Watchlist", and "Request Takedown". A takedown is requested for one domain at a time.
-
In the dialog, enter the context under "Add context (required):" and select "Confirm". Select "Cancel" to make no change.
-
The table refreshes. Marks next to each domain's ID show the result. The legend icon in the toolbar explains each mark.
Add Manual Domain Impersonation Finding
Section titled “Add Manual Domain Impersonation Finding”When to use: when you find a lookalike or impersonating domain that StyxView did not detect.
-
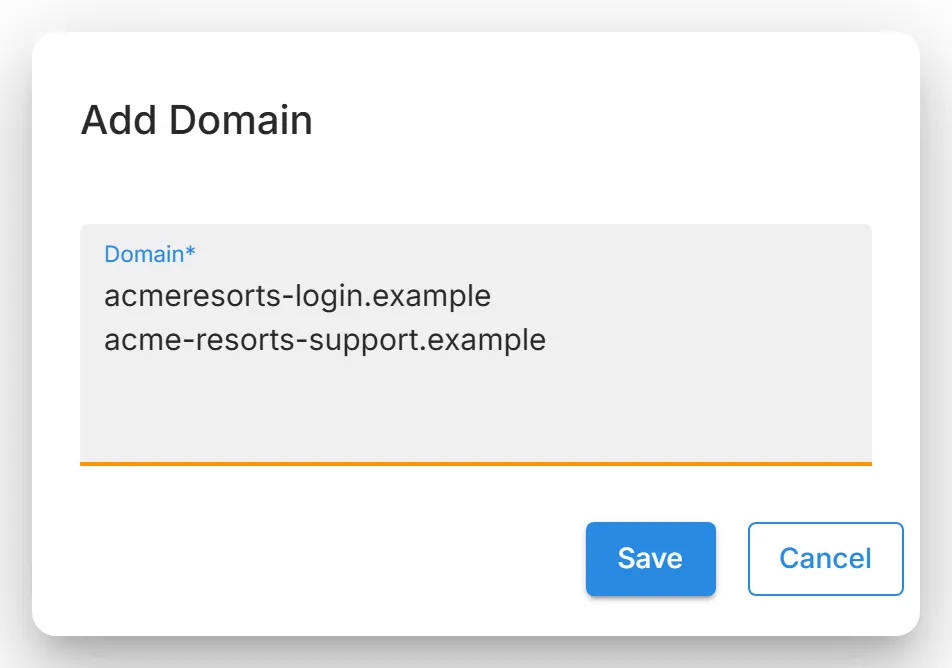
On the "Lookalike Domains" tab, select "Actions" → "Add Manual Domain Impersonation Finding". You do not need to select any rows first.
-
In the "Add Domain" dialog, enter the domain in "Domain". To add several, enter one domain per line. Domains with non-Latin characters are accepted.
-
Select "Save".
-
Search for the domain in the "Lookalike Domains" table to find it.
Single Domain Actions
Section titled “Single Domain Actions”Select a lookalike domain in the list to open its finding page, then select "Actions" at the top right. These actions apply only to that domain.
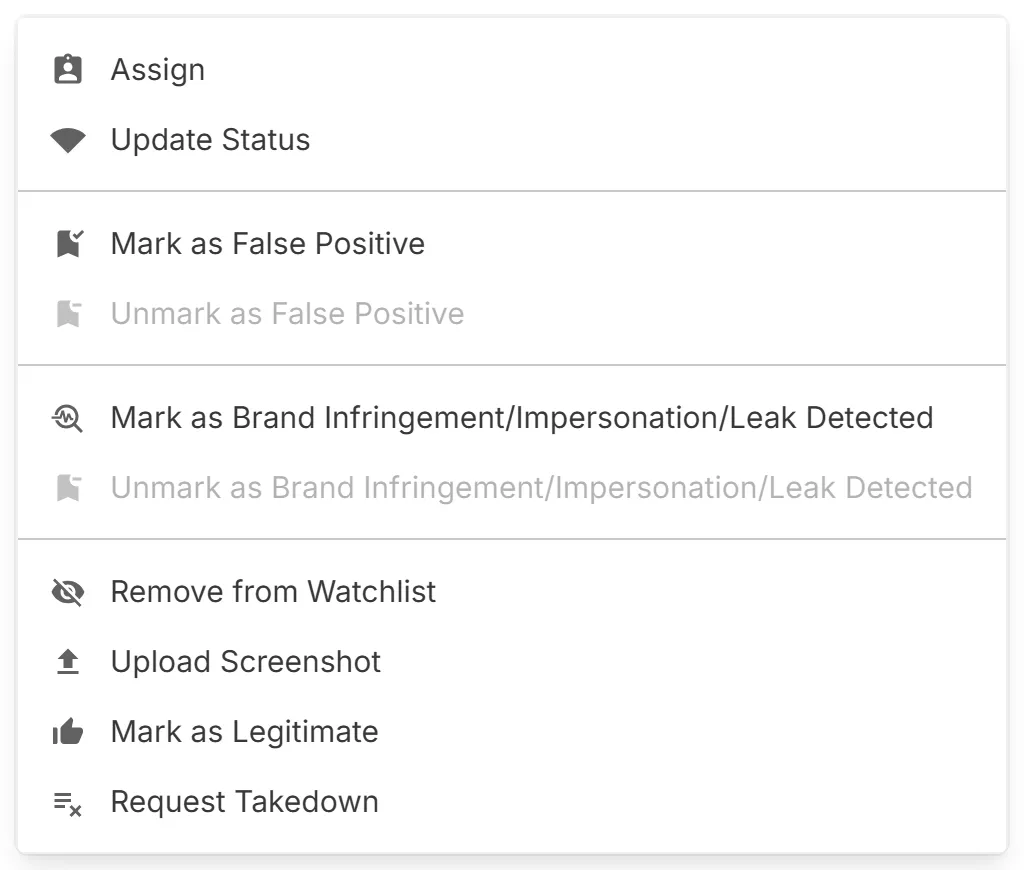
1. Assign
-
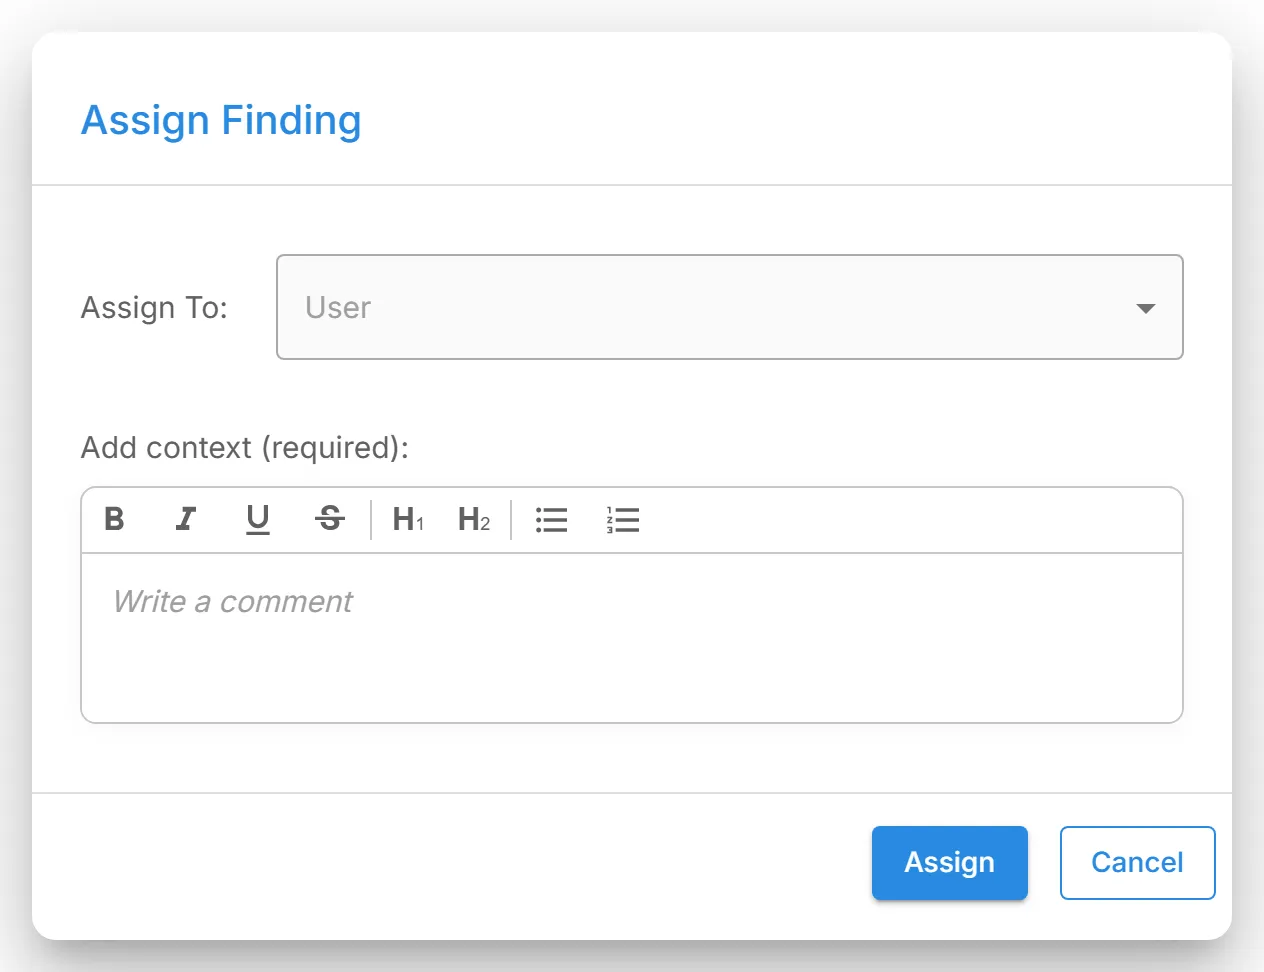
Select "Assign". The "Assign Finding" dialog opens.
-
Choose the user in "User", add context, and select "Assign". Select "Cancel" to make no change.
2. Update Status
-
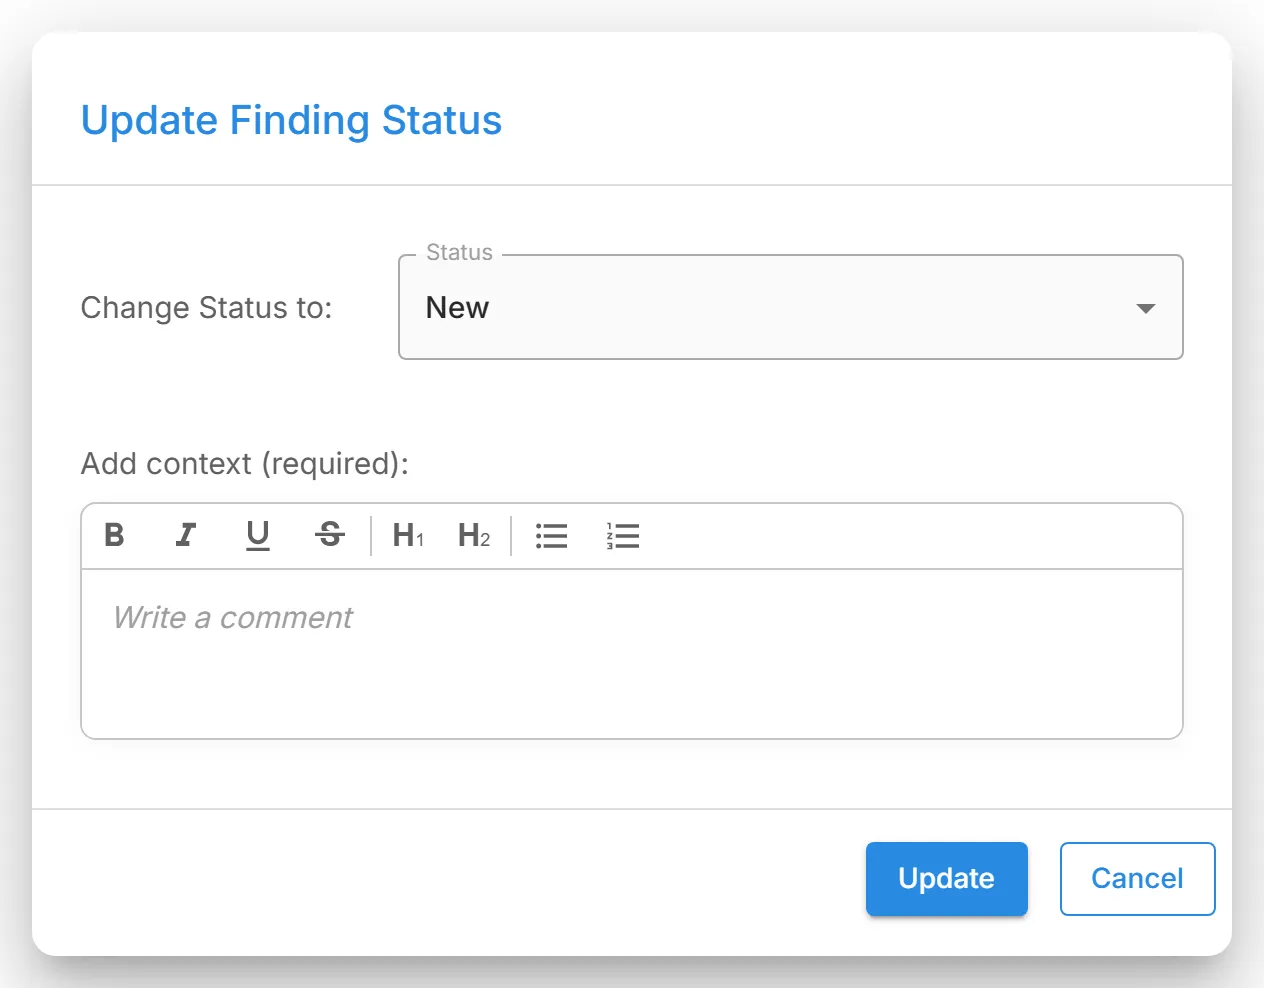
Select "Update Status". The "Update Finding Status" dialog opens.
-
Choose the new status in "Status", add context, and select "Update". Select "Cancel" to make no change.
3. Mark as False Positive
-
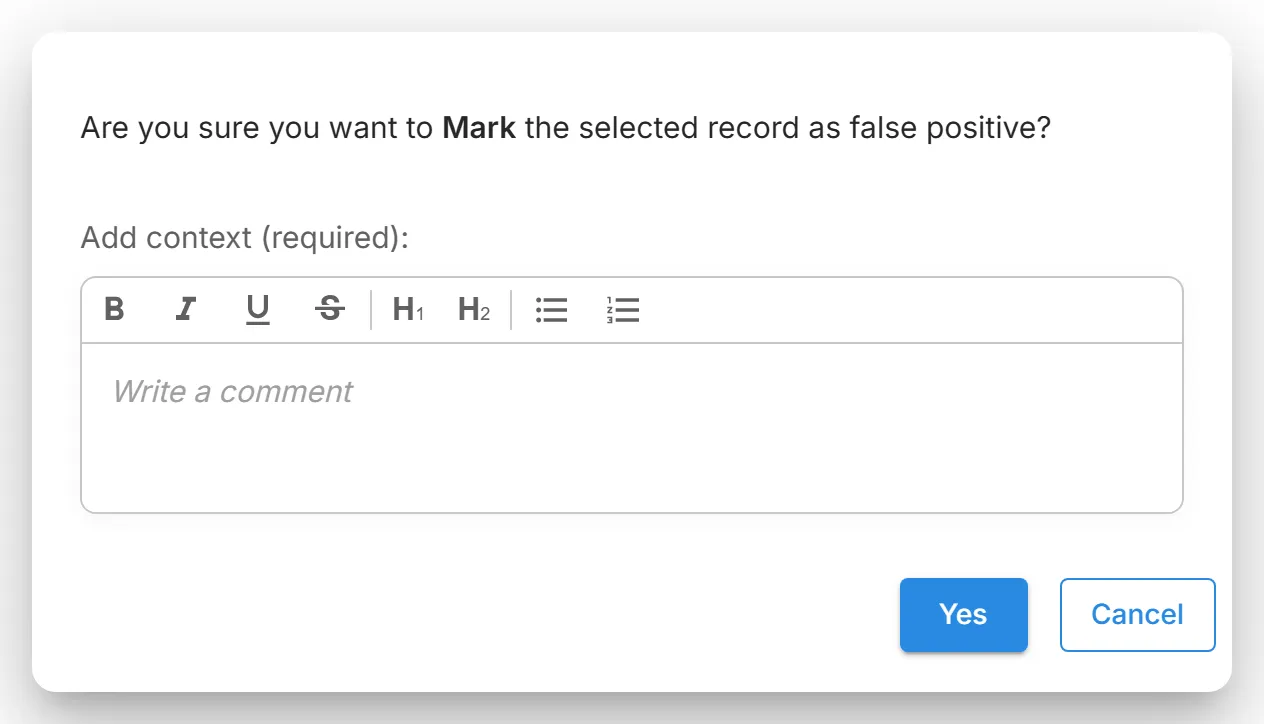
Select "Mark as False Positive".
-
Add context and select "Yes". "Unmark as False Positive" reverses it.
4. Add to Watchlist or Remove from Watchlist
-
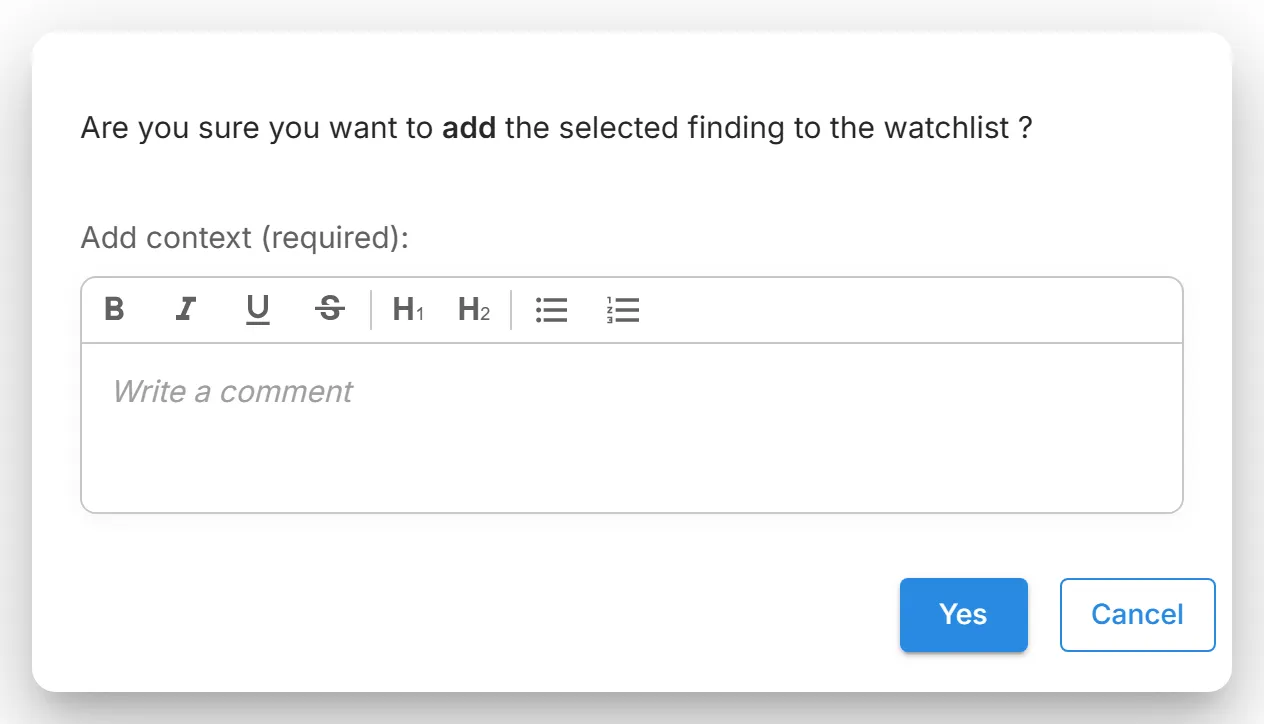
Select "Add to Watchlist" to keep the domain under observation without acting yet. On a domain already on the watchlist, the menu shows "Remove from Watchlist" instead.
-
Add context and select "Yes".
5. Mark as Brand Infringement/Impersonation/Leak Detected
-
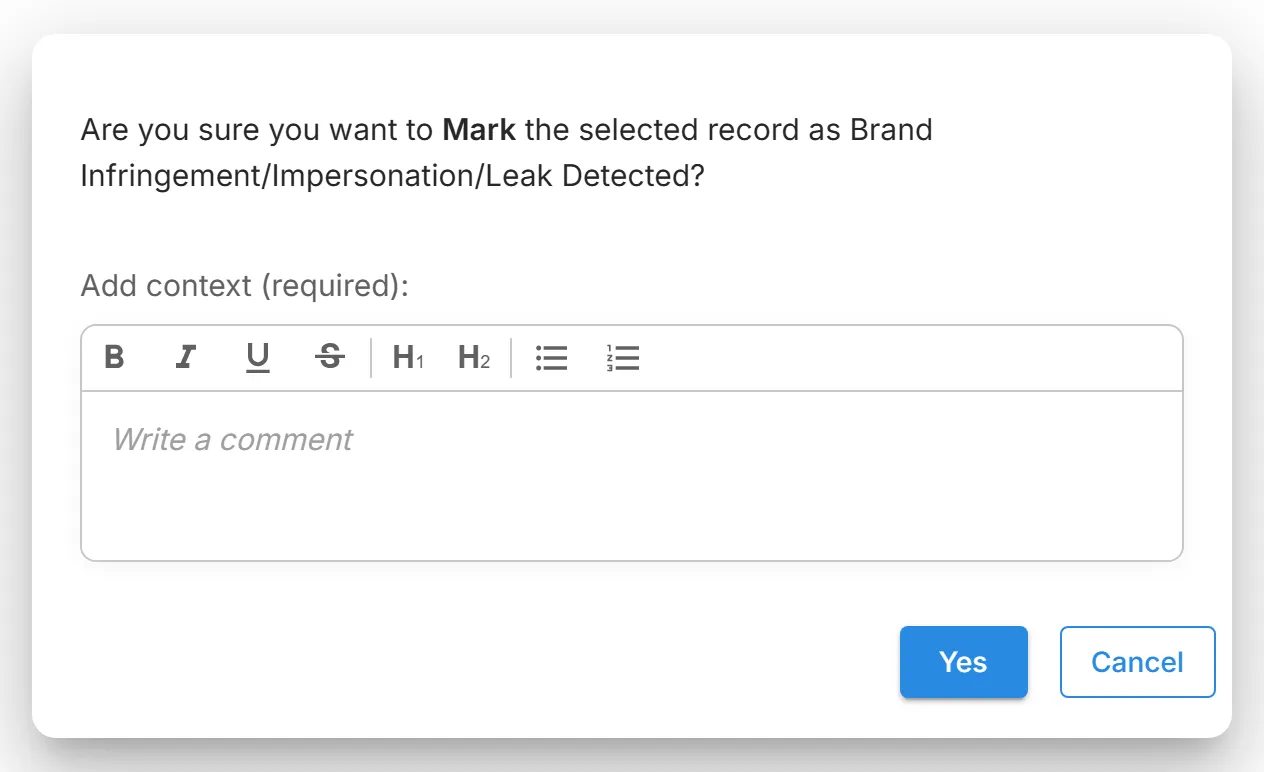
Select "Mark as Brand Infringement/Impersonation/Leak Detected" to record that the domain is confirmed to infringe on your brand.
-
Add context and select "Yes". This does not request a takedown. "Unmark as Brand Infringement/Impersonation/Leak Detected" reverses it.
6. Upload Screenshot
- Select "Upload Screenshot".
- Select "Upload" and choose a JPG, JPEG, or PNG file from your device.
- Select "Save". The screenshot is attached to the finding.
7. Mark as Legitimate
-
Select "Mark as Legitimate" when the domain belongs to your organization.
-
Confirm that the asset is owned and managed by your organization, add context, and select "Yes".
8. Request Takedown
-
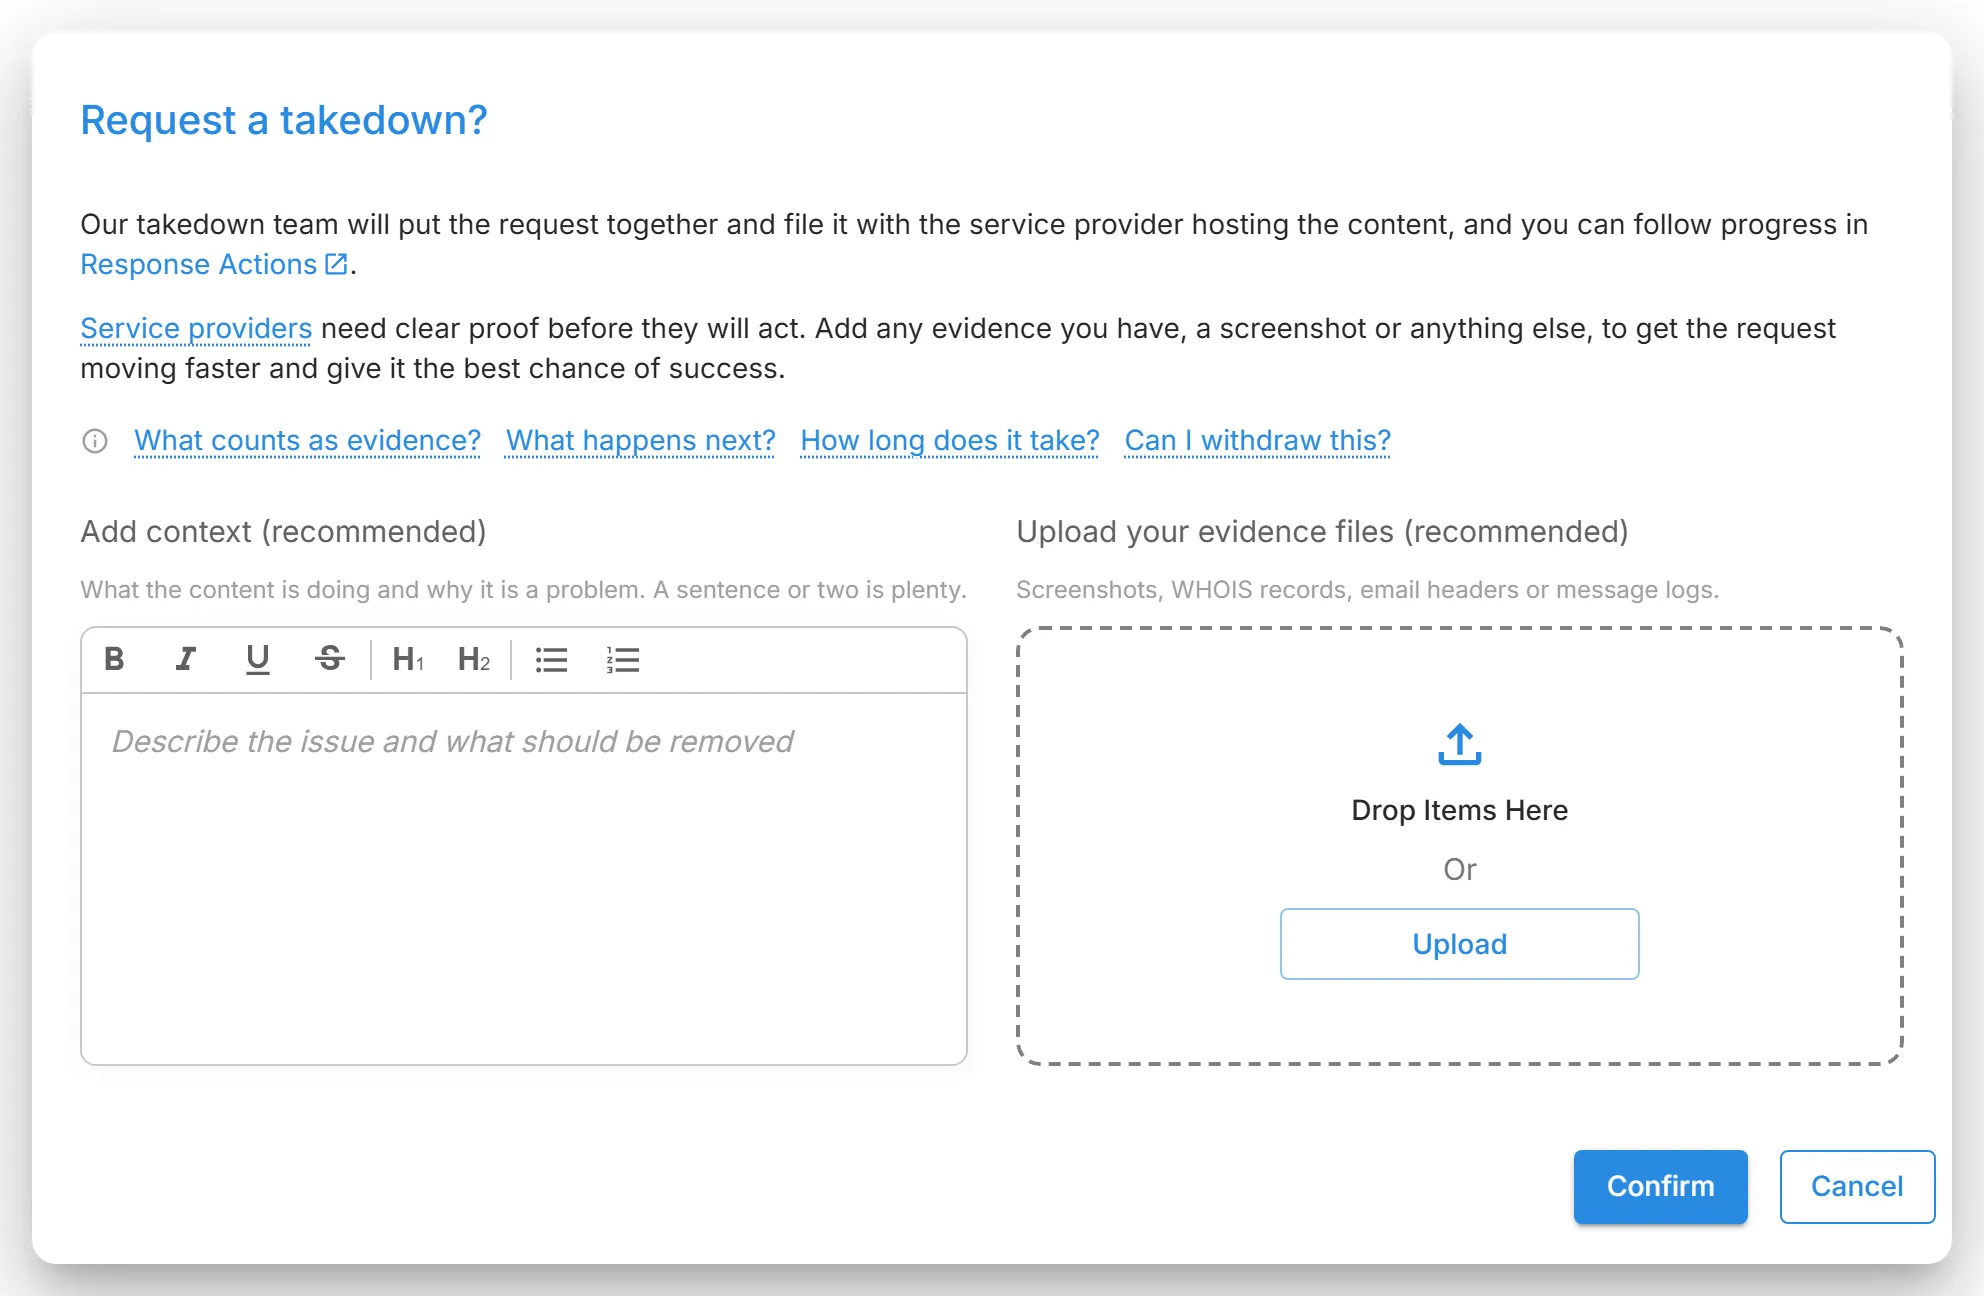
Select "Request Takedown".
-
Add context and evidence, and select "Confirm". The request goes to the Styx takedown team. See Response Actions / Takedowns.
Data Leakage & Dark Web Detection - Status Update Actions
Section titled “Data Leakage & Dark Web Detection - Status Update Actions”Some Data Leakage & Dark Web Detection records, such as exposed credentials and stealer logs, have their own review status.
1. Access the Findings
- In the left menu, go to "Company Protection" → "Data Leakage & Dark Web Detection", and open a module such as "Exposed Credentials" or "Stealer Logs".
2. Select the Findings
-
Several records: select them with their checkboxes, then select "Actions" → "Update Status".
-
One record: on a record's detail page that has a "Status" list, choose the status there.
3. Update Status
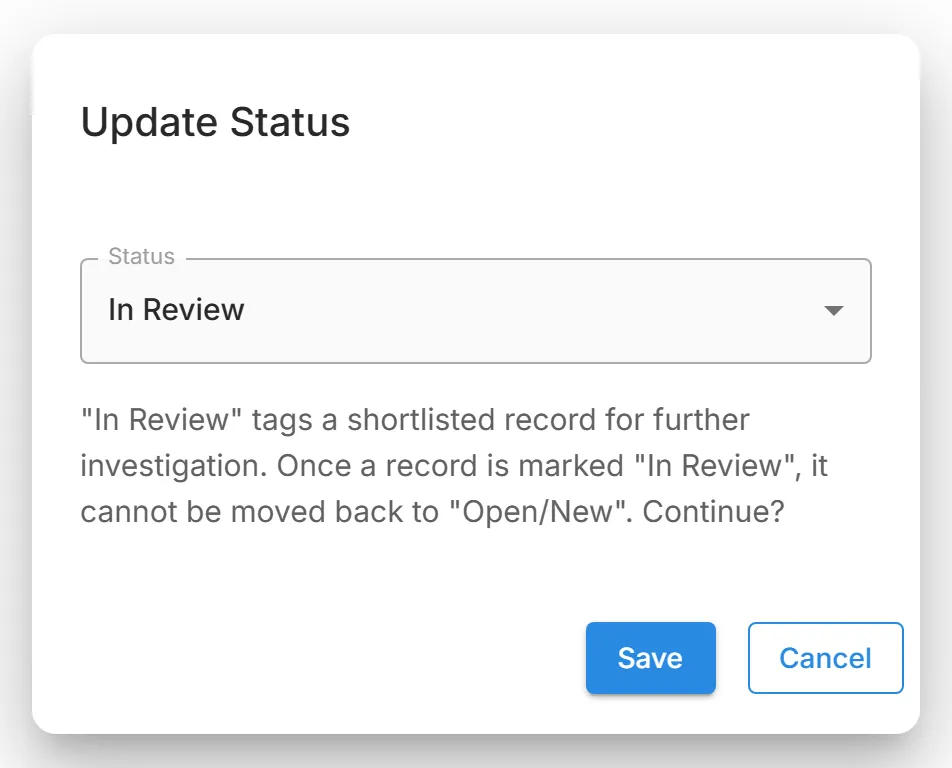
-
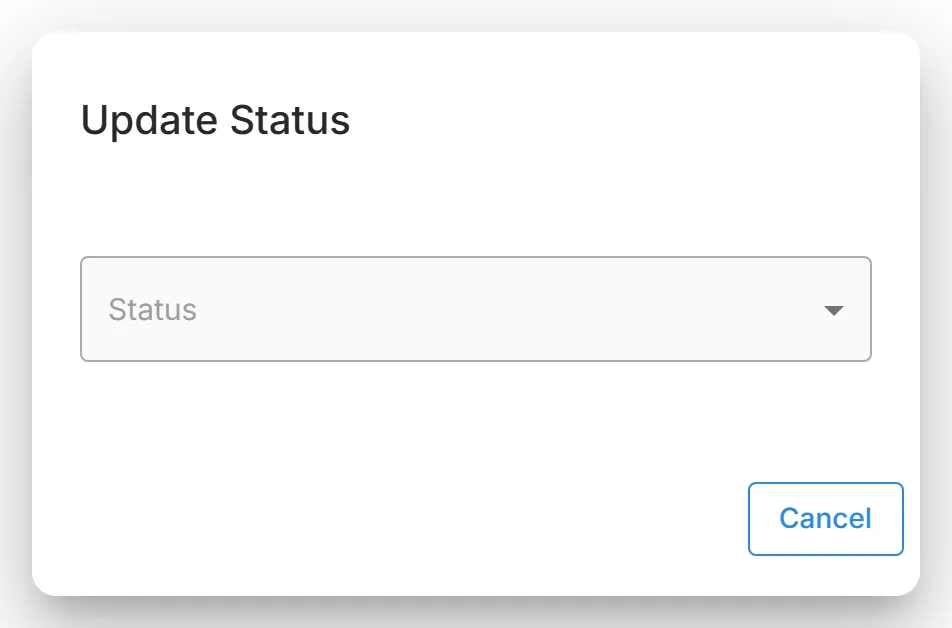
In the "Update Status" dialog, choose the new status in "Status".
| Status | Meaning |
|---|---|
| New/Open | The default for a new record: identified, not yet analysed. |
| In Review | The record is under investigation. A record in review cannot go back to New/Open. |
| Monitor | The exposure is real but is not being acted on yet. The record stays visible without sitting in the open queue. |
| Closed | The record is resolved or no longer relevant. Closing cannot be undone. |
A record moves forward through these statuses and cannot return to an earlier one.
4. Save Changes
-
Select "Save" to apply the status, or "Cancel" to make no change.
Data Leakage & Dark Web Detection - User Account Actions
Section titled “Data Leakage & Dark Web Detection - User Account Actions”1. Navigate to User Accounts
- In the left menu, go to "Company Protection" → "Data Leakage & Dark Web Detection" → "User Accounts". The page has three tabs: "Compromised Accounts", "Accounts Monitored", and "Breach Source Summary".
2. Select a User Account
- Select an account to open its "Data Breached" page.
- The account's type is shown next to its email address: Active, Inactive, or System/Service.
3. Review Breach Information
The "Details" card shows:
- Breaches: the risk ratings of the breaches the account appears in.
- Total Breaches Suffered: how many breaches the account appears in.
- Attributes Exposed: the kinds of data exposed, for example names, email addresses, passwords, phone numbers, physical addresses, IP addresses, job titles, and employers.
Below it, StyxView lists the account's "Breach Source" records, and its pastes, breached files, and Advanced Stealer Logs where there are any.
4. Perform Actions on the Account
-
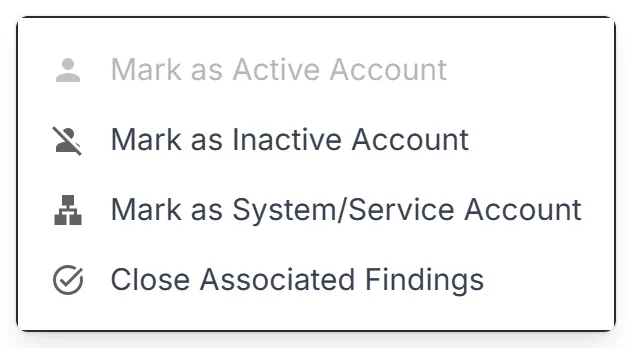
Select "Actions" at the top right.
-
Choose an option:
- Mark as Active Account: the account is in use. Unavailable when the account is already Active.
- Mark as Inactive Account: the account is no longer in use.
- Mark as System/Service Account: the account belongs to a system or service, not a person.
- Close Associated Findings: closes all the related breach, data leak, and Advanced Stealer Logs records for this email address, and any findings linked to them. This cannot be undone. Select "Yes" to confirm.