
Policies
A policy tells StyxView what to monitor: a company or an executive, and the assets that belong to them, such as domains, hosts, IP addresses, and social media accounts. Every policy belongs to an account and to one solution:
- Company Protection monitors your organisation. An account has at most one.
- Executive Protection monitors one executive. Add one policy for each executive.
- Third Party Risk monitors one third party. You add these with "Add Third Party". See Add Third Party.
Before scanning starts, the StyxView Support Team reviews every asset you submit, so a typo or an over-broad entry does not turn into findings you have to clear later. Approved assets appear in scans within 24 hours.
Policies is in the "Configuration" menu, which only Admins see. Only Admins can add and delete policies.
Navigation Path
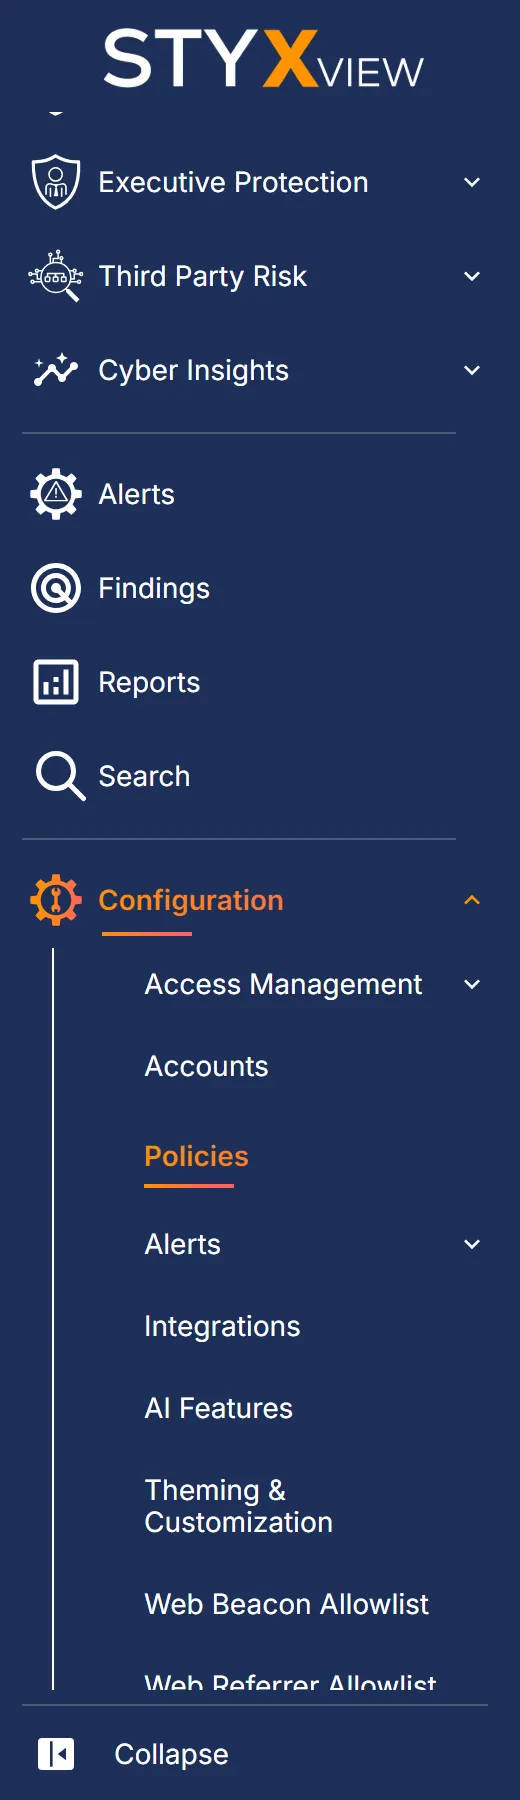
Section titled “Navigation Path”In the sidebar, select "Configuration" > "Policies".
The Policies Page
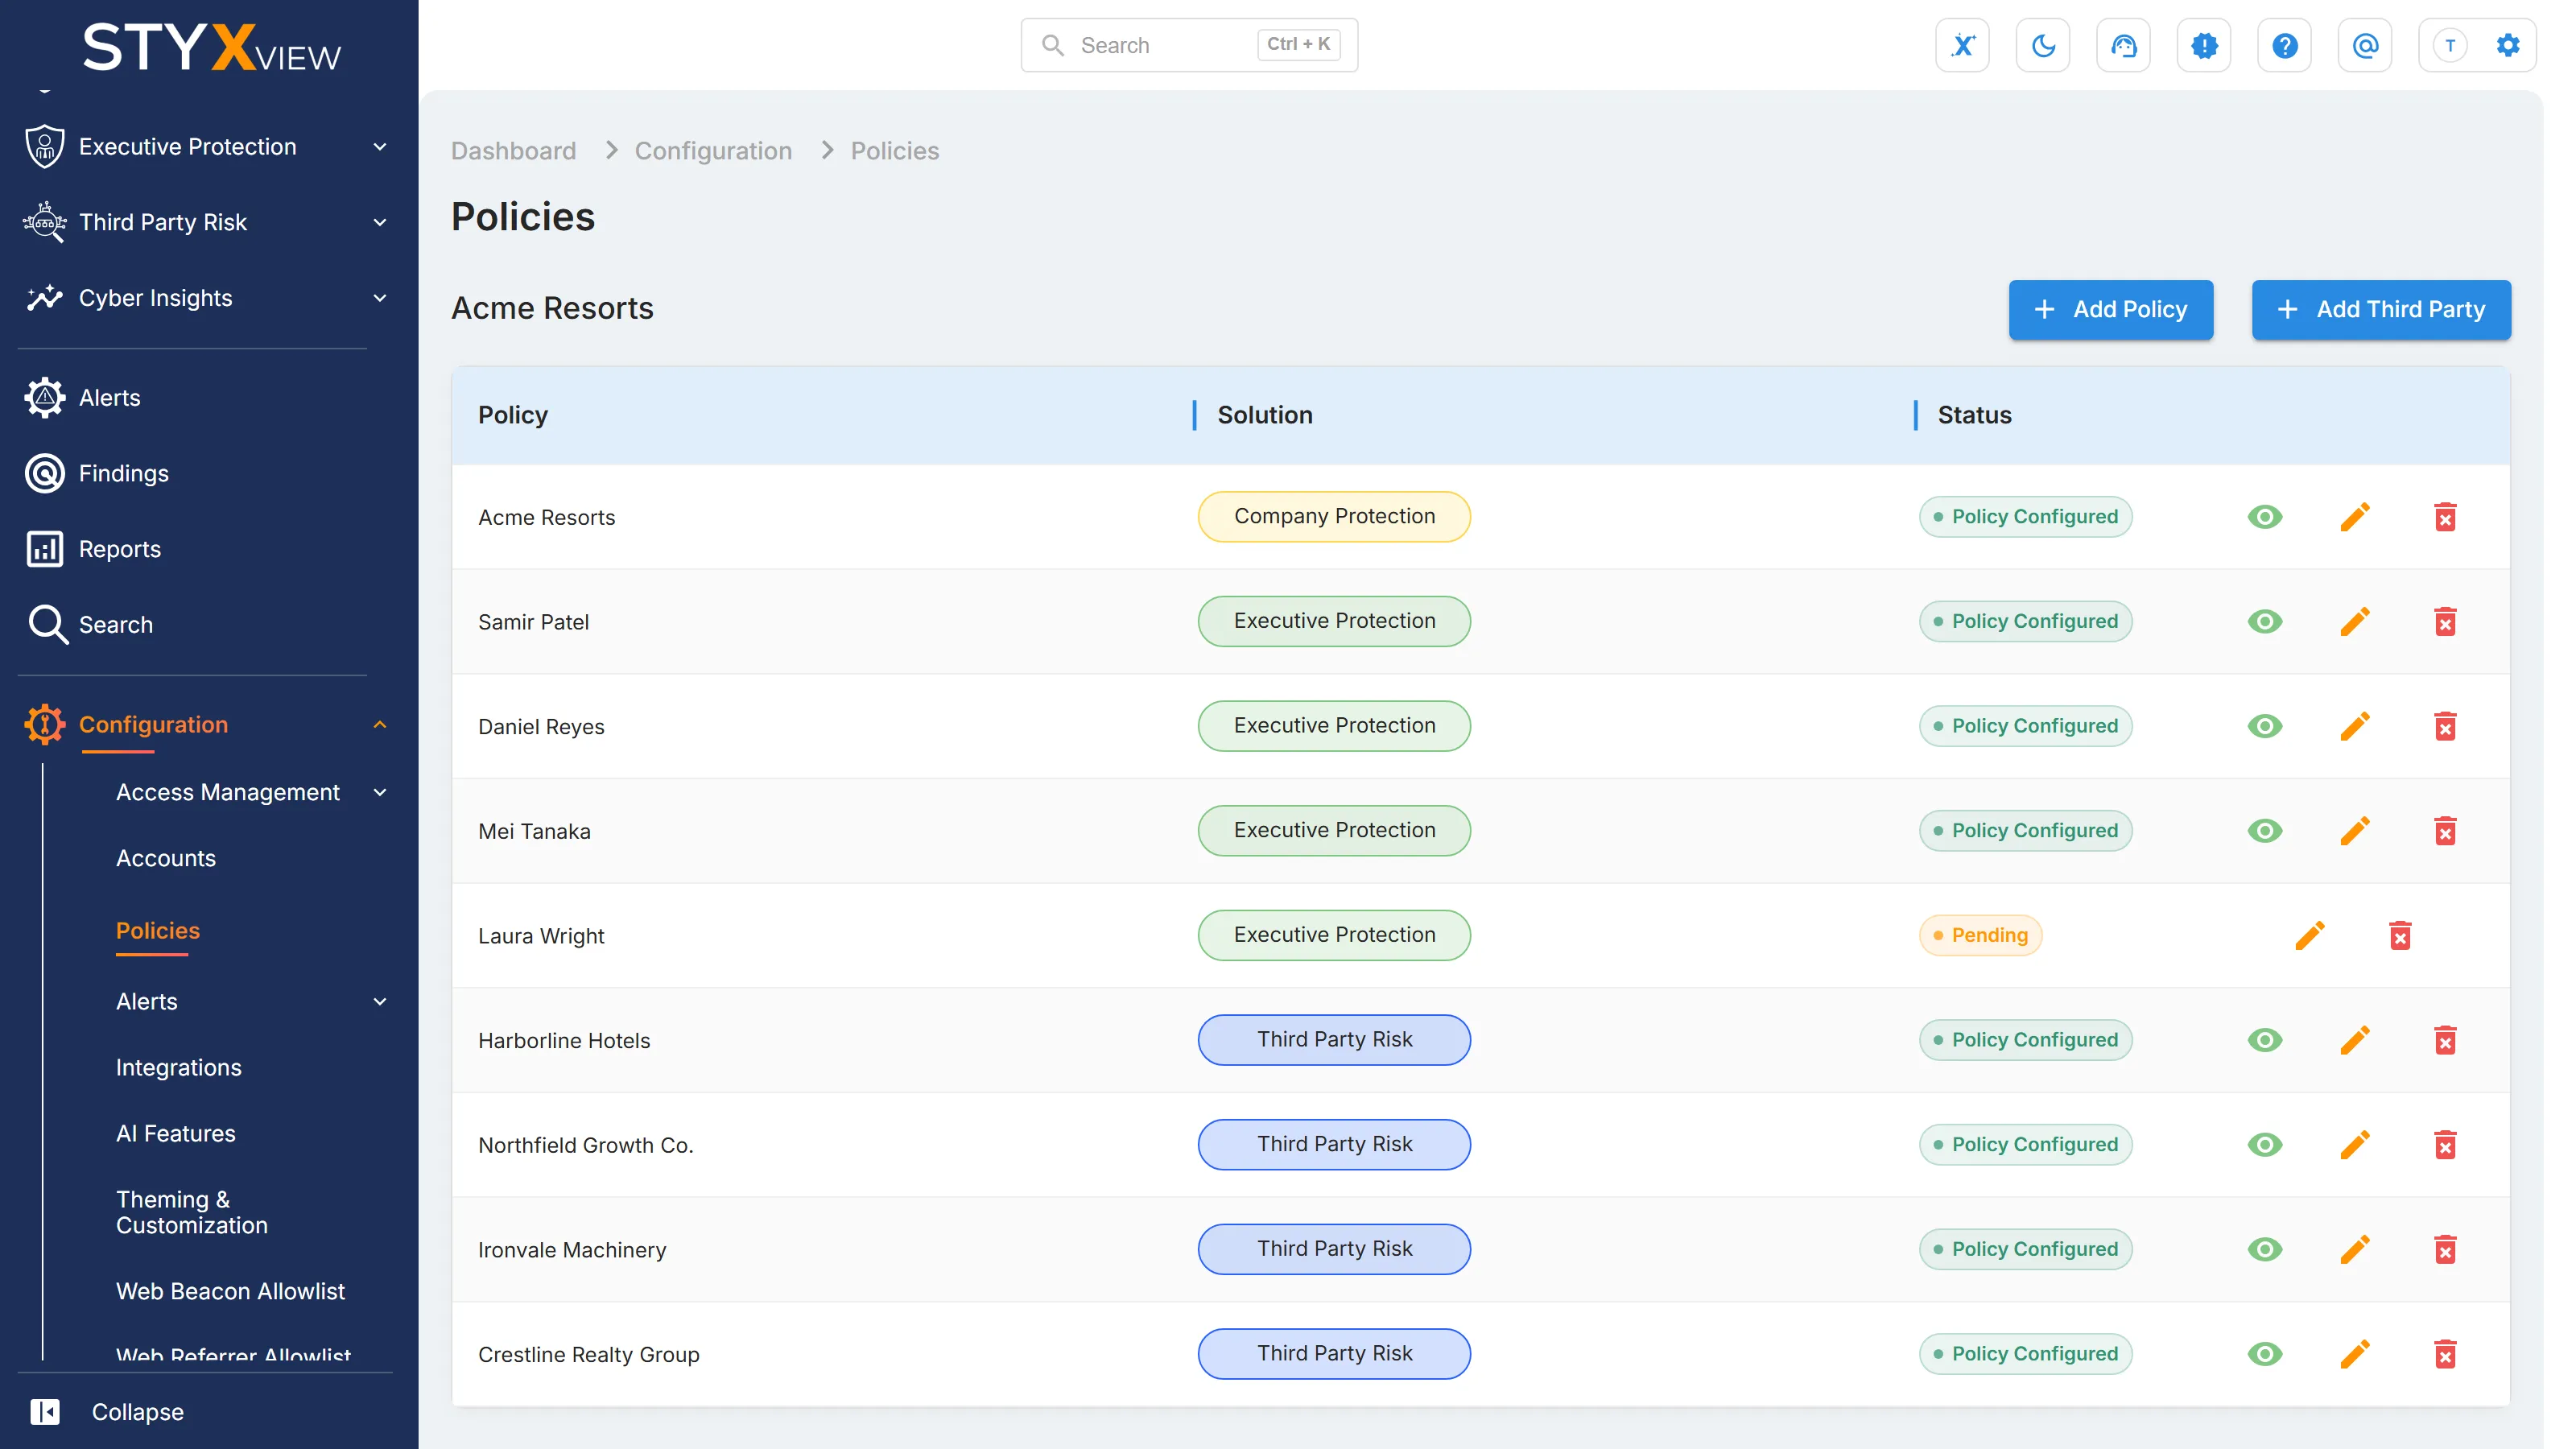
Section titled “The Policies Page”The page lists each account with its "Add Policy" and "Add Third Party" buttons and a table of its policies.
| Column | What it shows |
|---|---|
| "Policy" | The policy name. |
| "Solution" | Company Protection, Executive Protection, or Third Party Risk. |
| "Status" | "Pending" until the policy is submitted for review, then "Policy Configured". |
The icons at the end of each row:
- On a "Pending" policy, the pencil icon opens the policy so you can fill it in.
- On a "Policy Configured" policy, the eye icon opens it read-only, and the pencil icon opens it in edit mode so you can add or remove assets.
- The delete icon deletes the policy.



Adding a Policy
Section titled “Adding a Policy”-
Find the account and select "Add Policy".
-
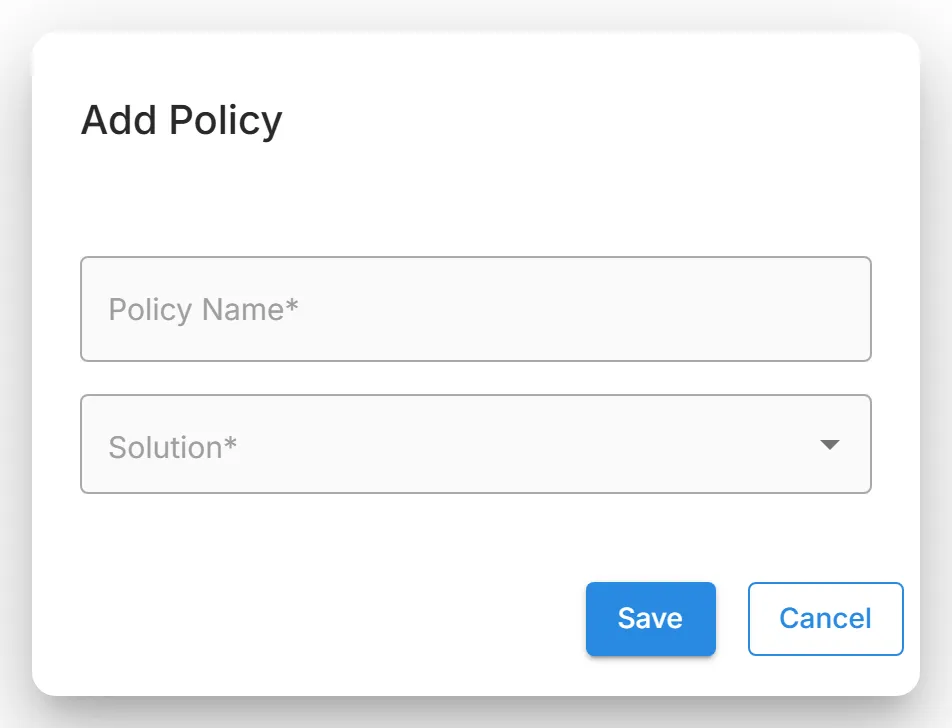
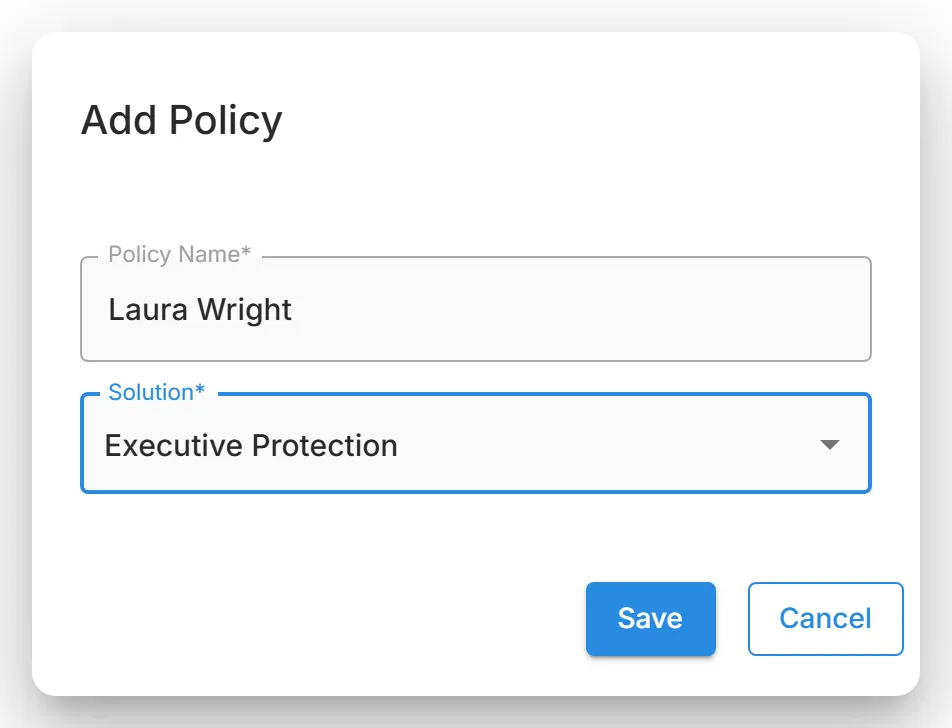
In the "Add Policy" dialog, enter a "Policy Name" of at least 3 characters. Use letters, numbers, spaces, apostrophes, and hyphens. The name appears in the policy list and at the top of the policy, so use the company or executive name.
-
Choose the "Solution": "Company Protection" or "Executive Protection". "Company Protection" is offered only while the account has no Company Protection policy.
-
Select "Save". To close the dialog without adding the policy, select "Cancel".
The policy appears in the list as "Pending". Select its pencil icon to fill it in.
Filling In a Policy
Section titled “Filling In a Policy”A policy page is titled "Policy - " followed by the policy name. Its sections run down the left side. Select a section to open it.
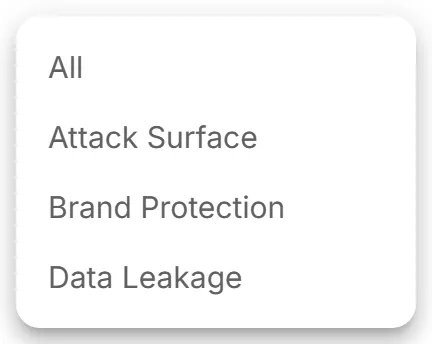
For Company Protection and Third Party Risk, the menu at the top right (set to "All") narrows the sections to those one module uses. Company Protection offers "Attack Surface", "Brand Protection", and "Data Leakage". Third Party Risk offers "Third Party Risk", "Attack Surface", and "Brand Protection".
Sections by Solution
Section titled “Sections by Solution”| Section | Company Protection | Executive Protection | Third Party Risk |
|---|---|---|---|
| "Basic Information" | Required | Required | Required |
| "Domains" | Required | Optional | Required |
| "Hosts" | Optional | Not available | Optional |
| "IP Addresses" | Optional | Not available | Optional |
| "Social Media" | Optional | Optional | Optional |
| "Job Posting Channels" | Optional | Not available | Not available |
| "Mobile Apps" | Optional | Not available | Not available |
| "Credit Cards" | Optional | Optional | Not available |
| "User Accounts" | Optional | Required | Not available |
| "Brand Colors" | Optional | Not available | Not available |
| "Geo" | Optional | Not available | Not available |
| "Keywords" | Generated by StyxView | Generated by StyxView | Generated by StyxView |
Every policy also has "Review" (renamed "Summary" once the policy is submitted) and "Change History". You can submit the policy only when every required section has an entry.
Basic Information
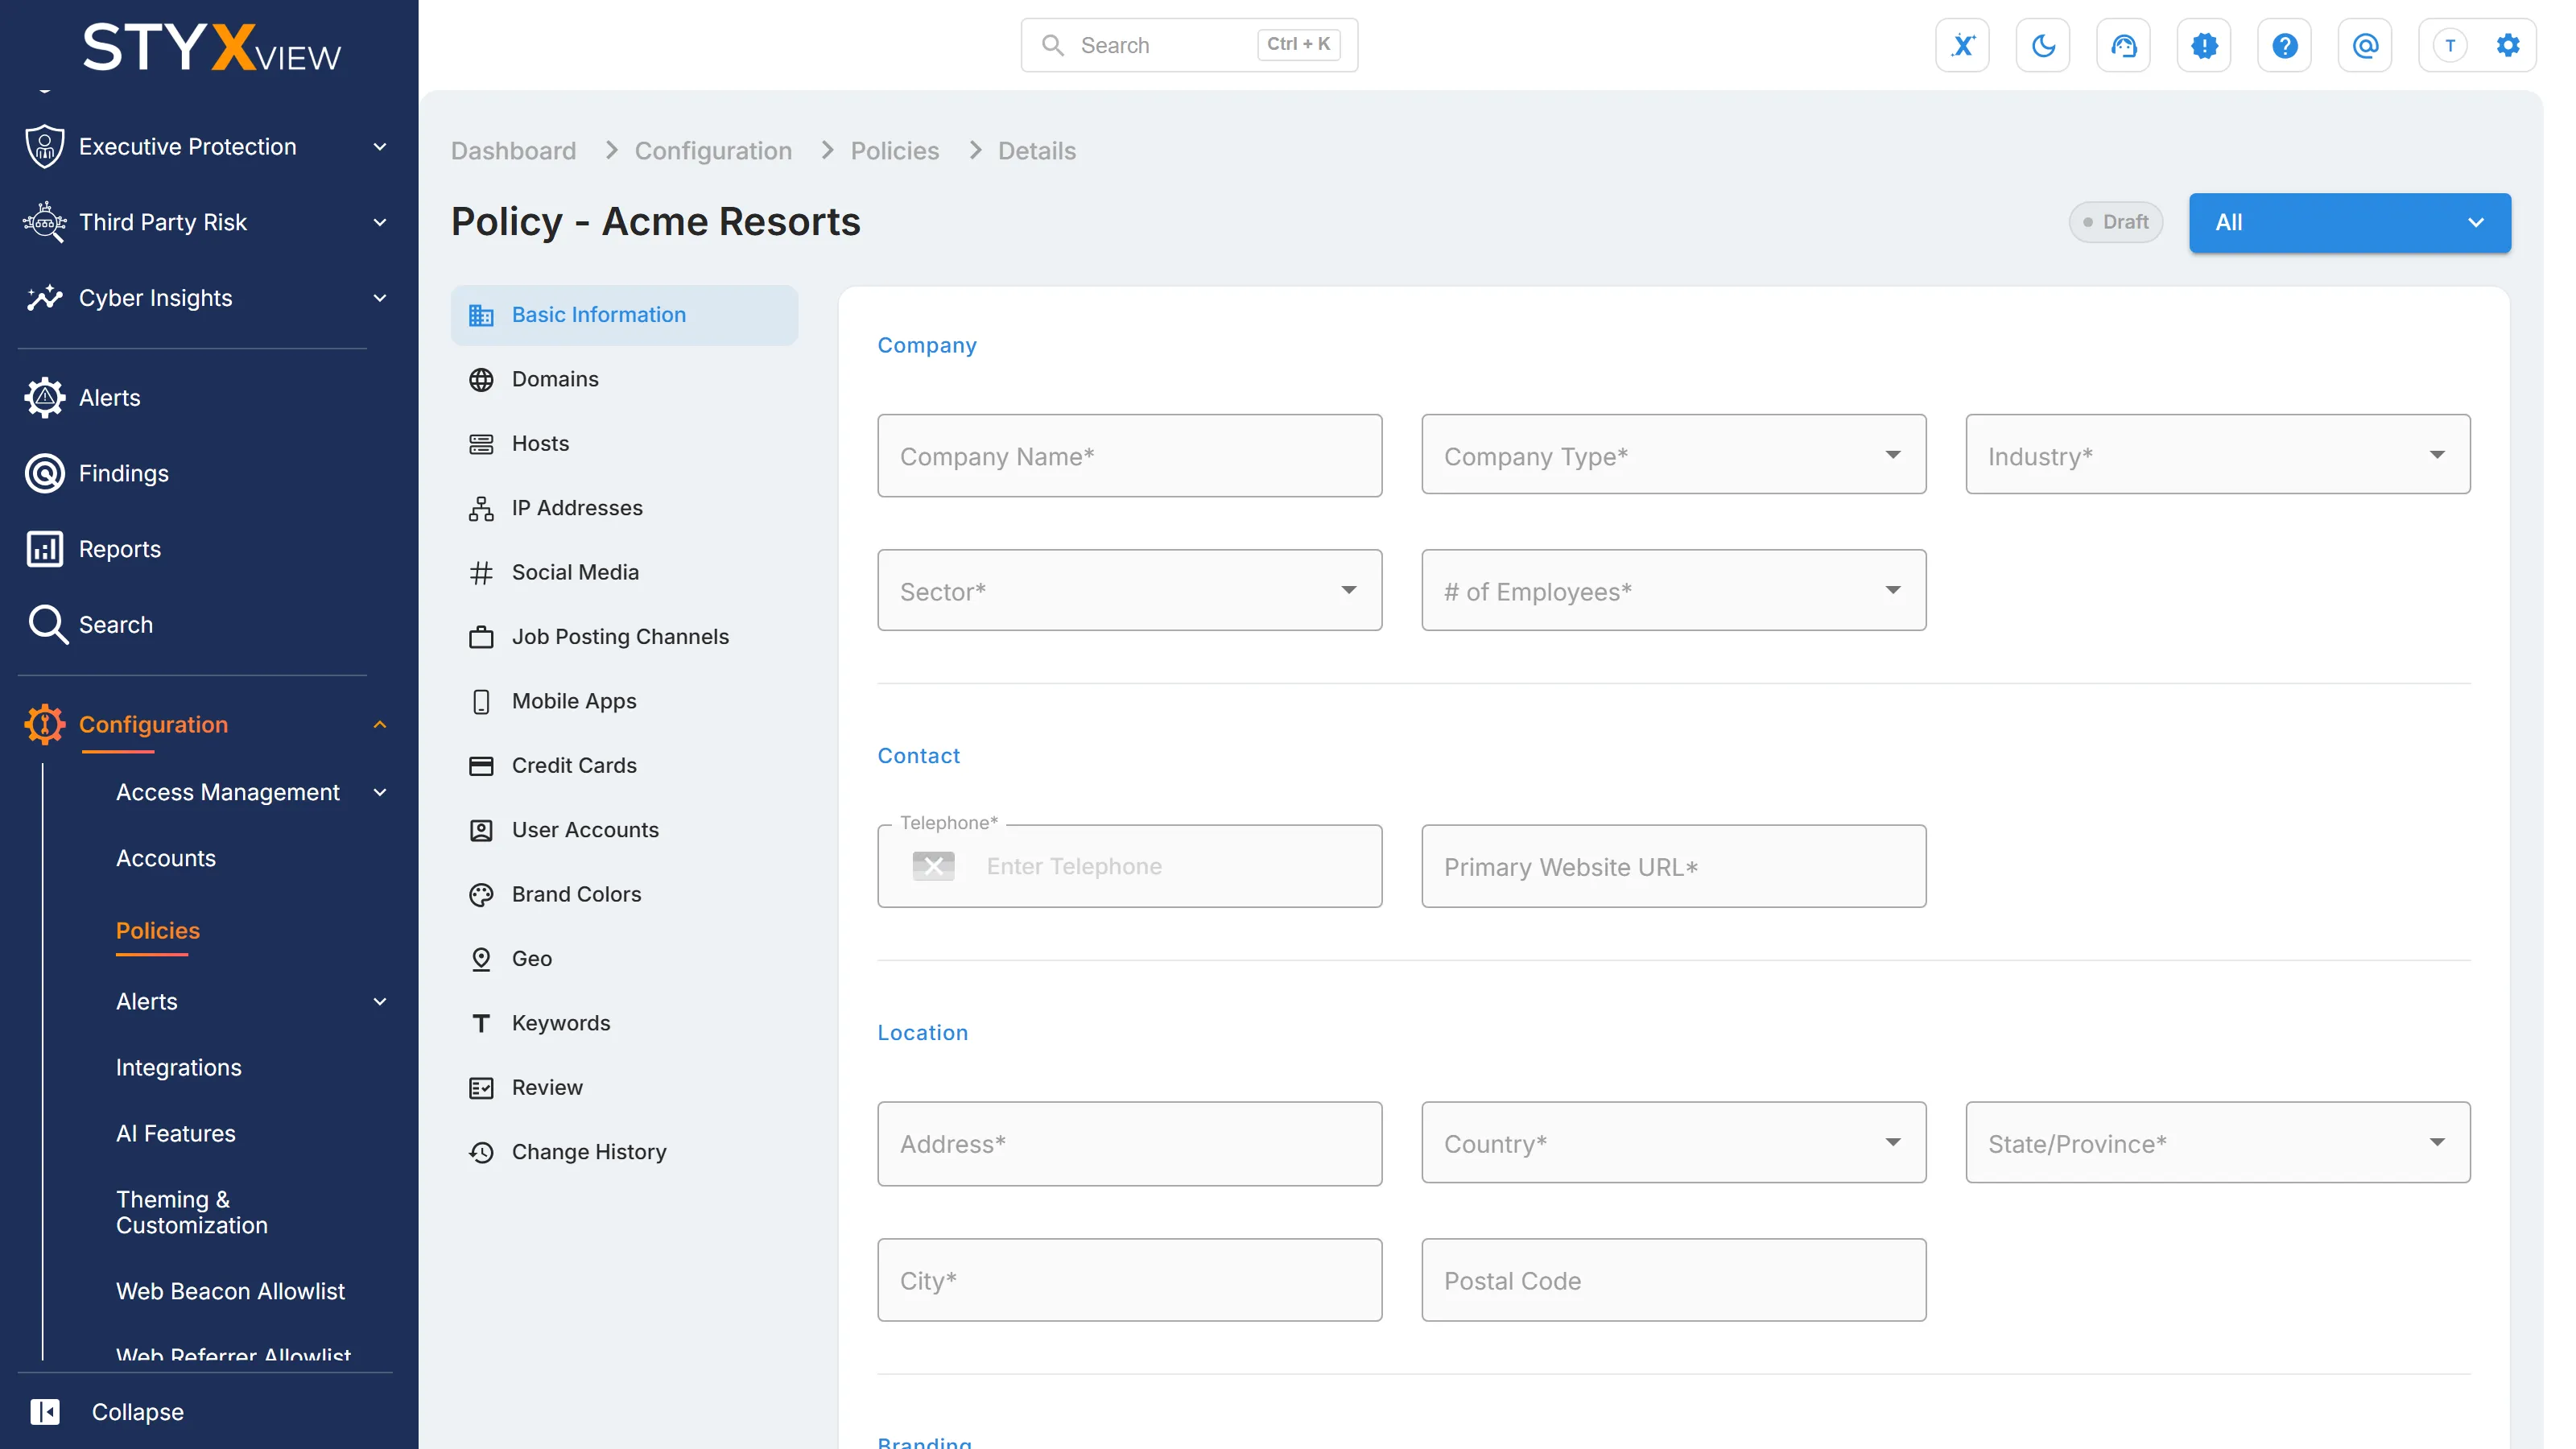
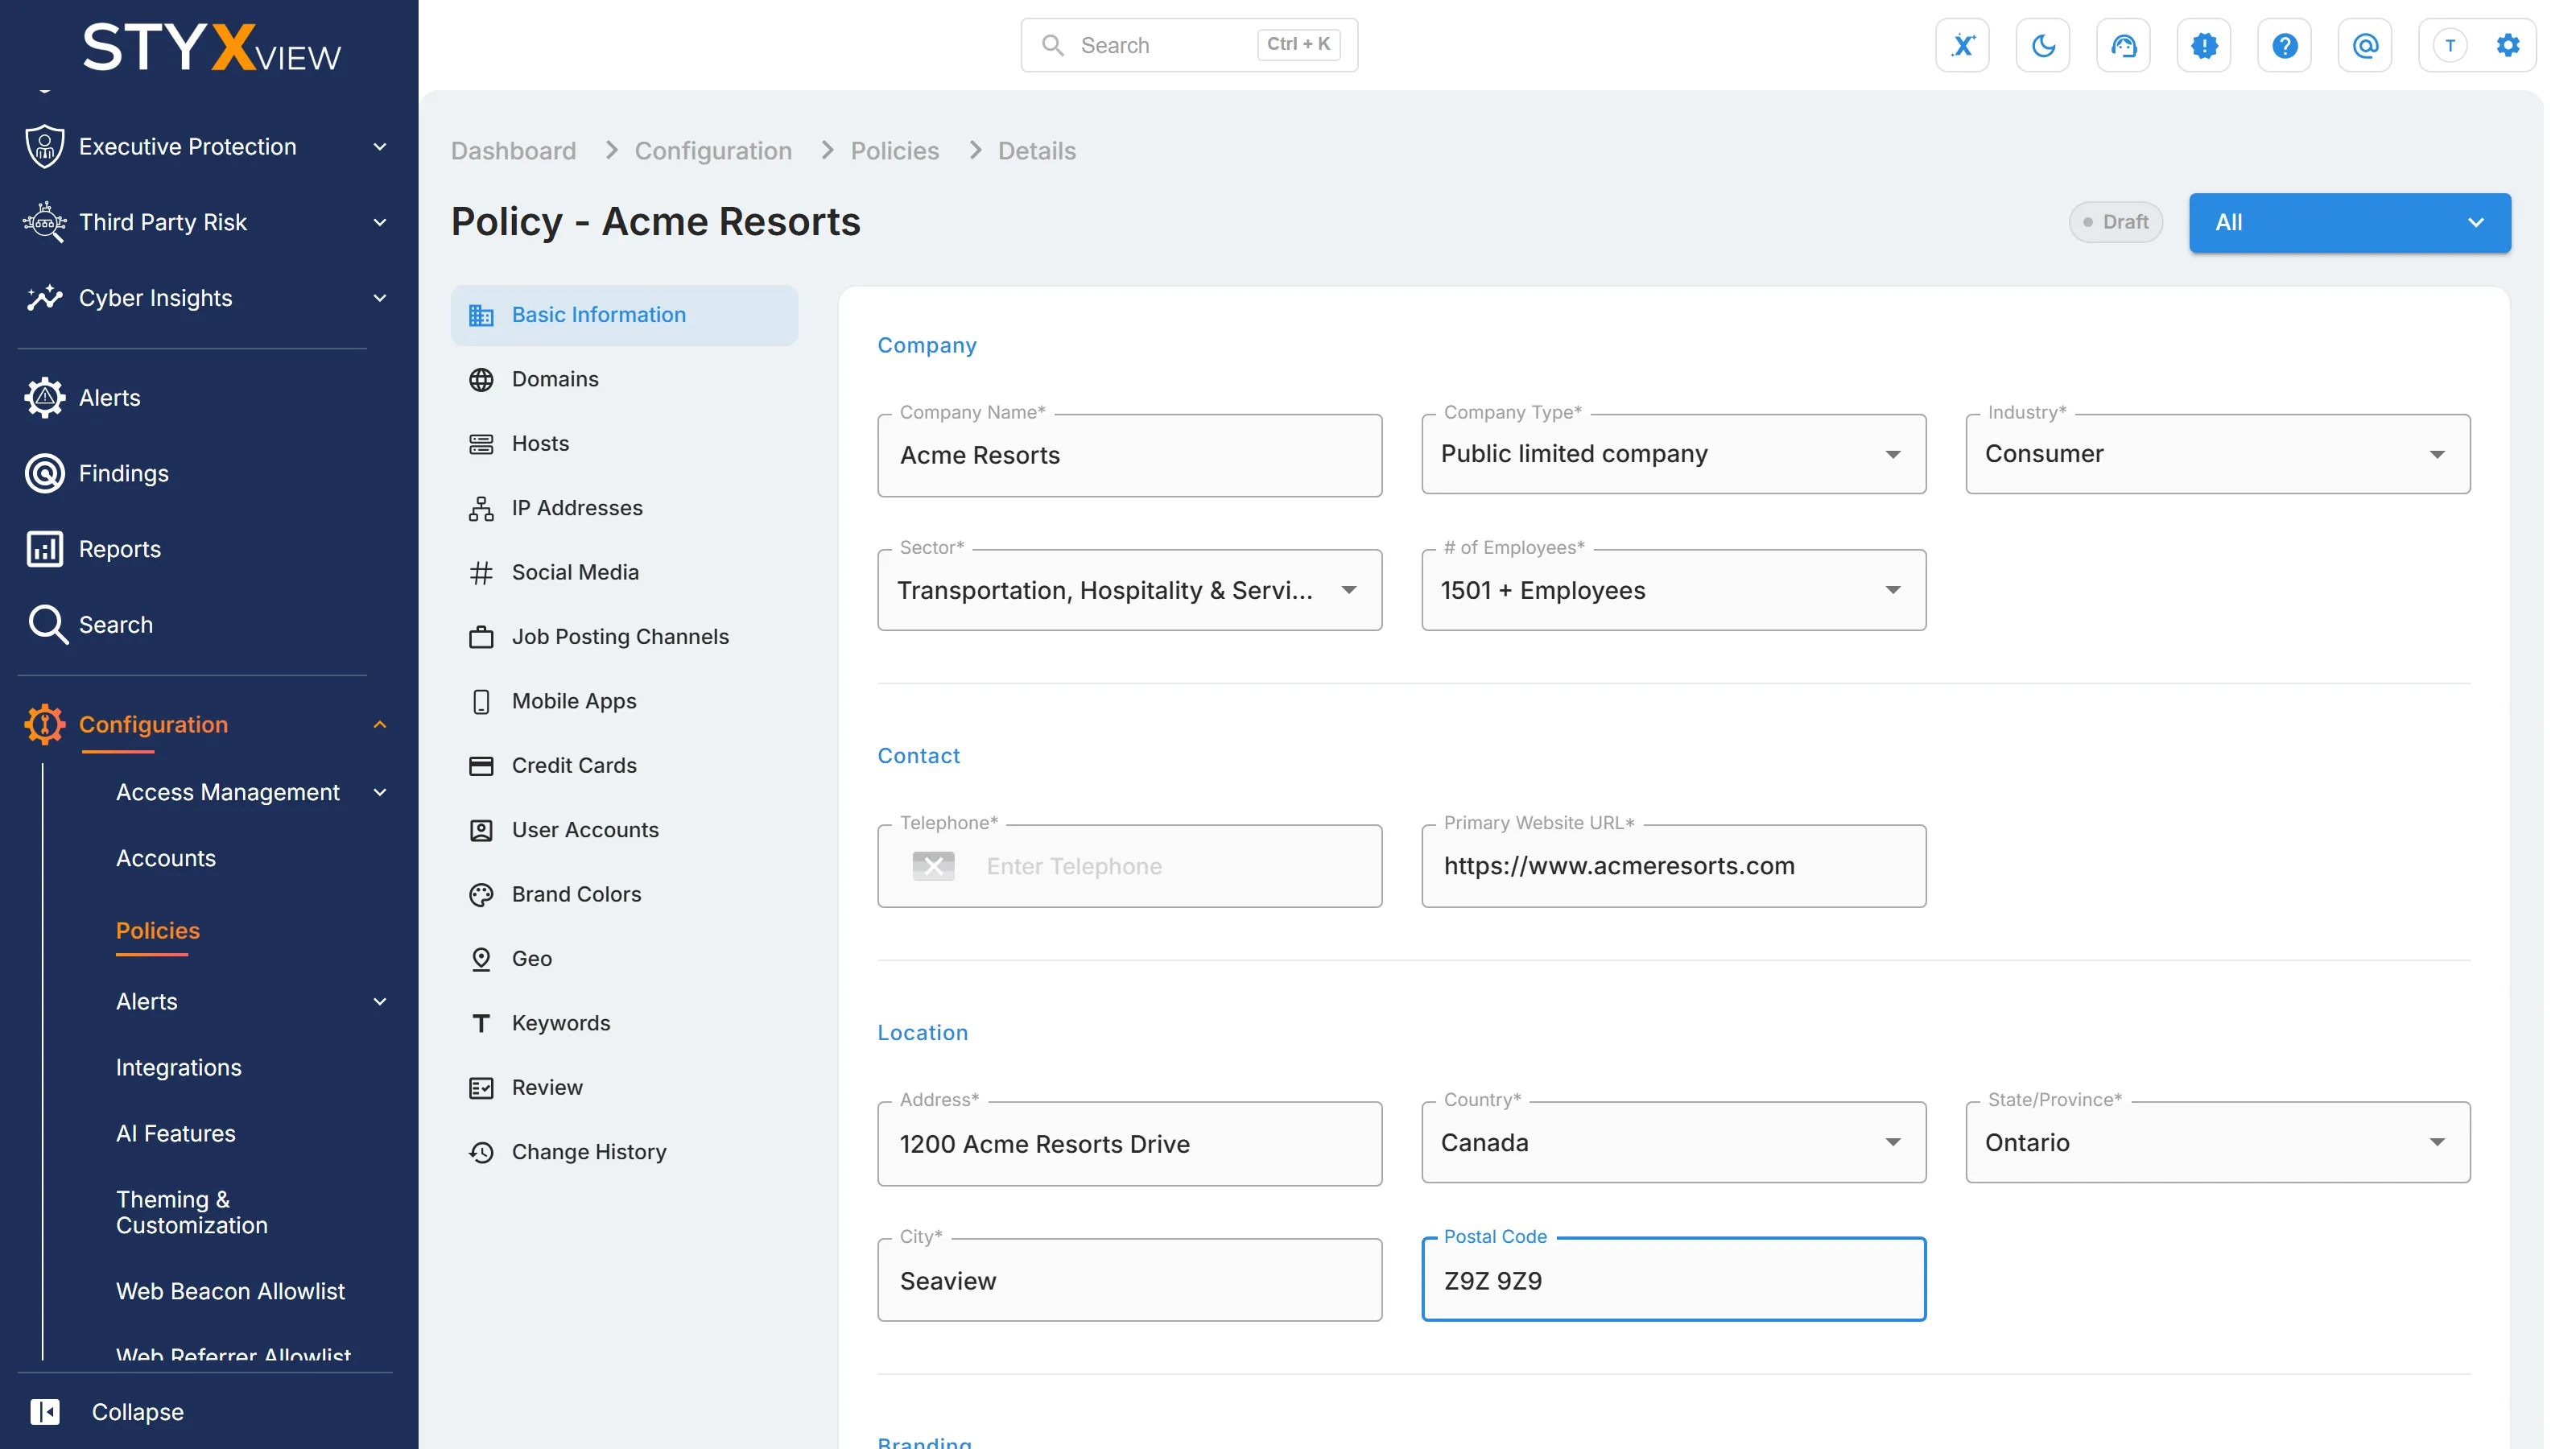
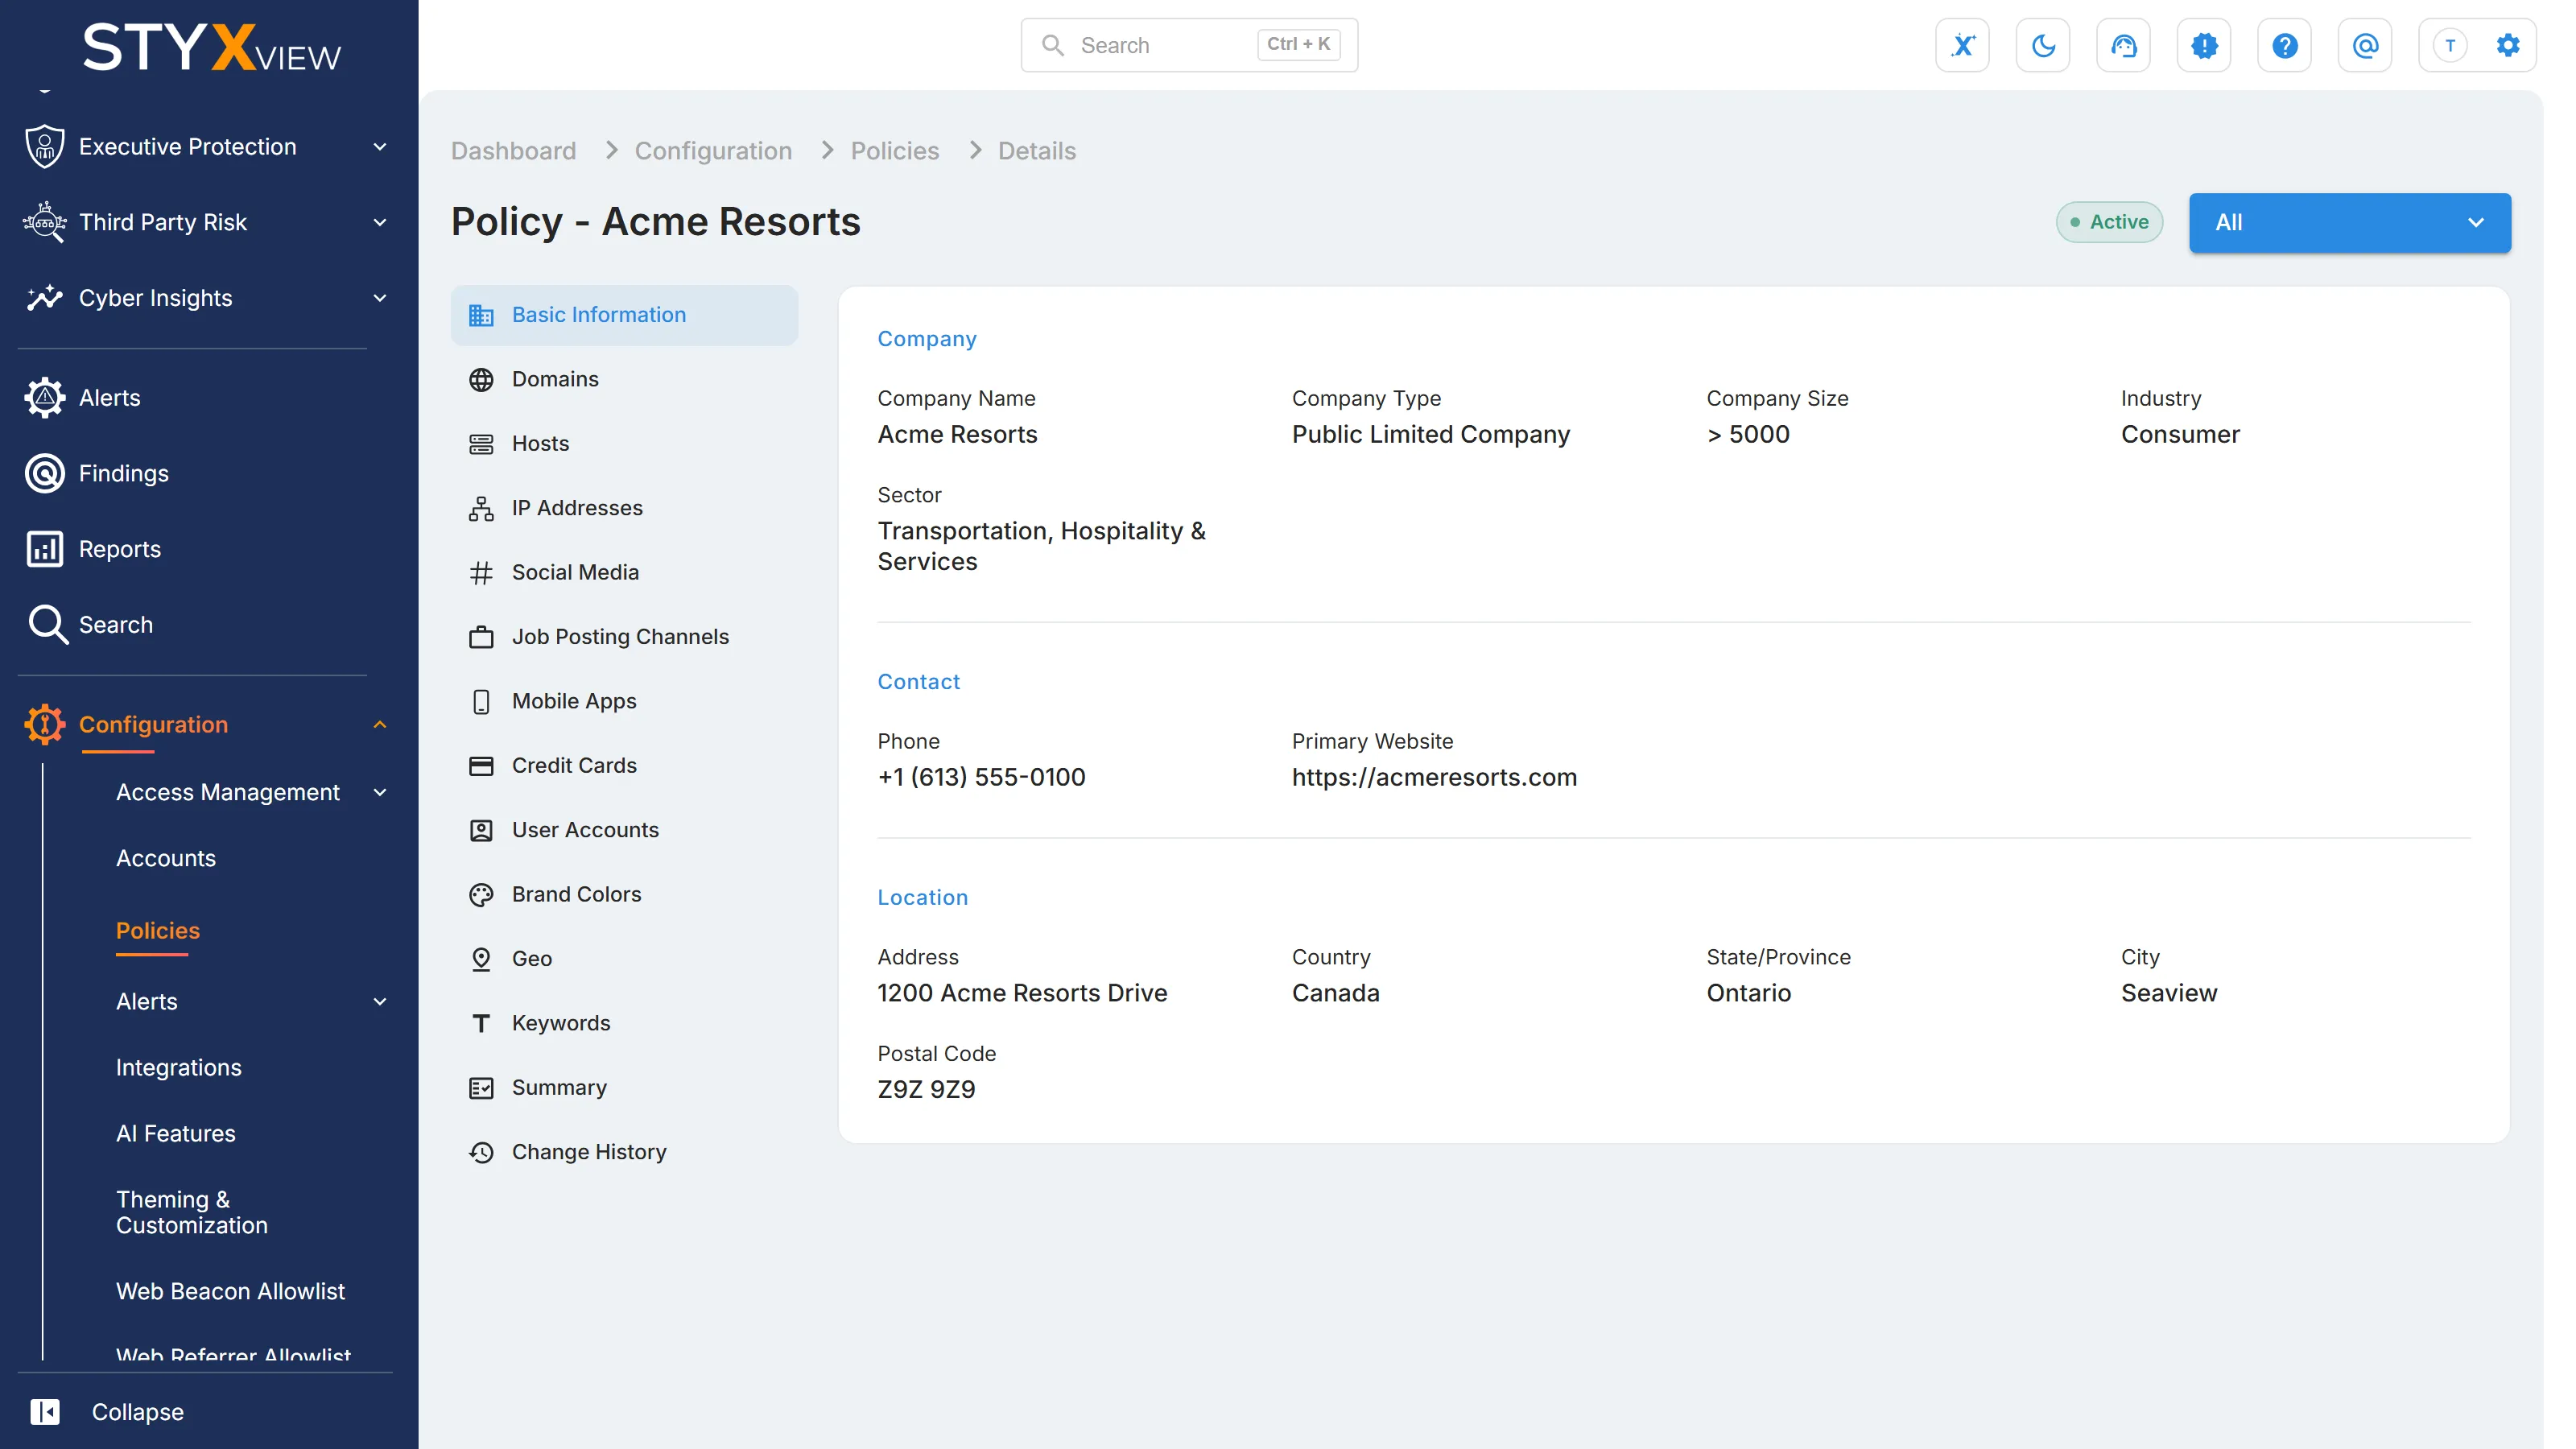
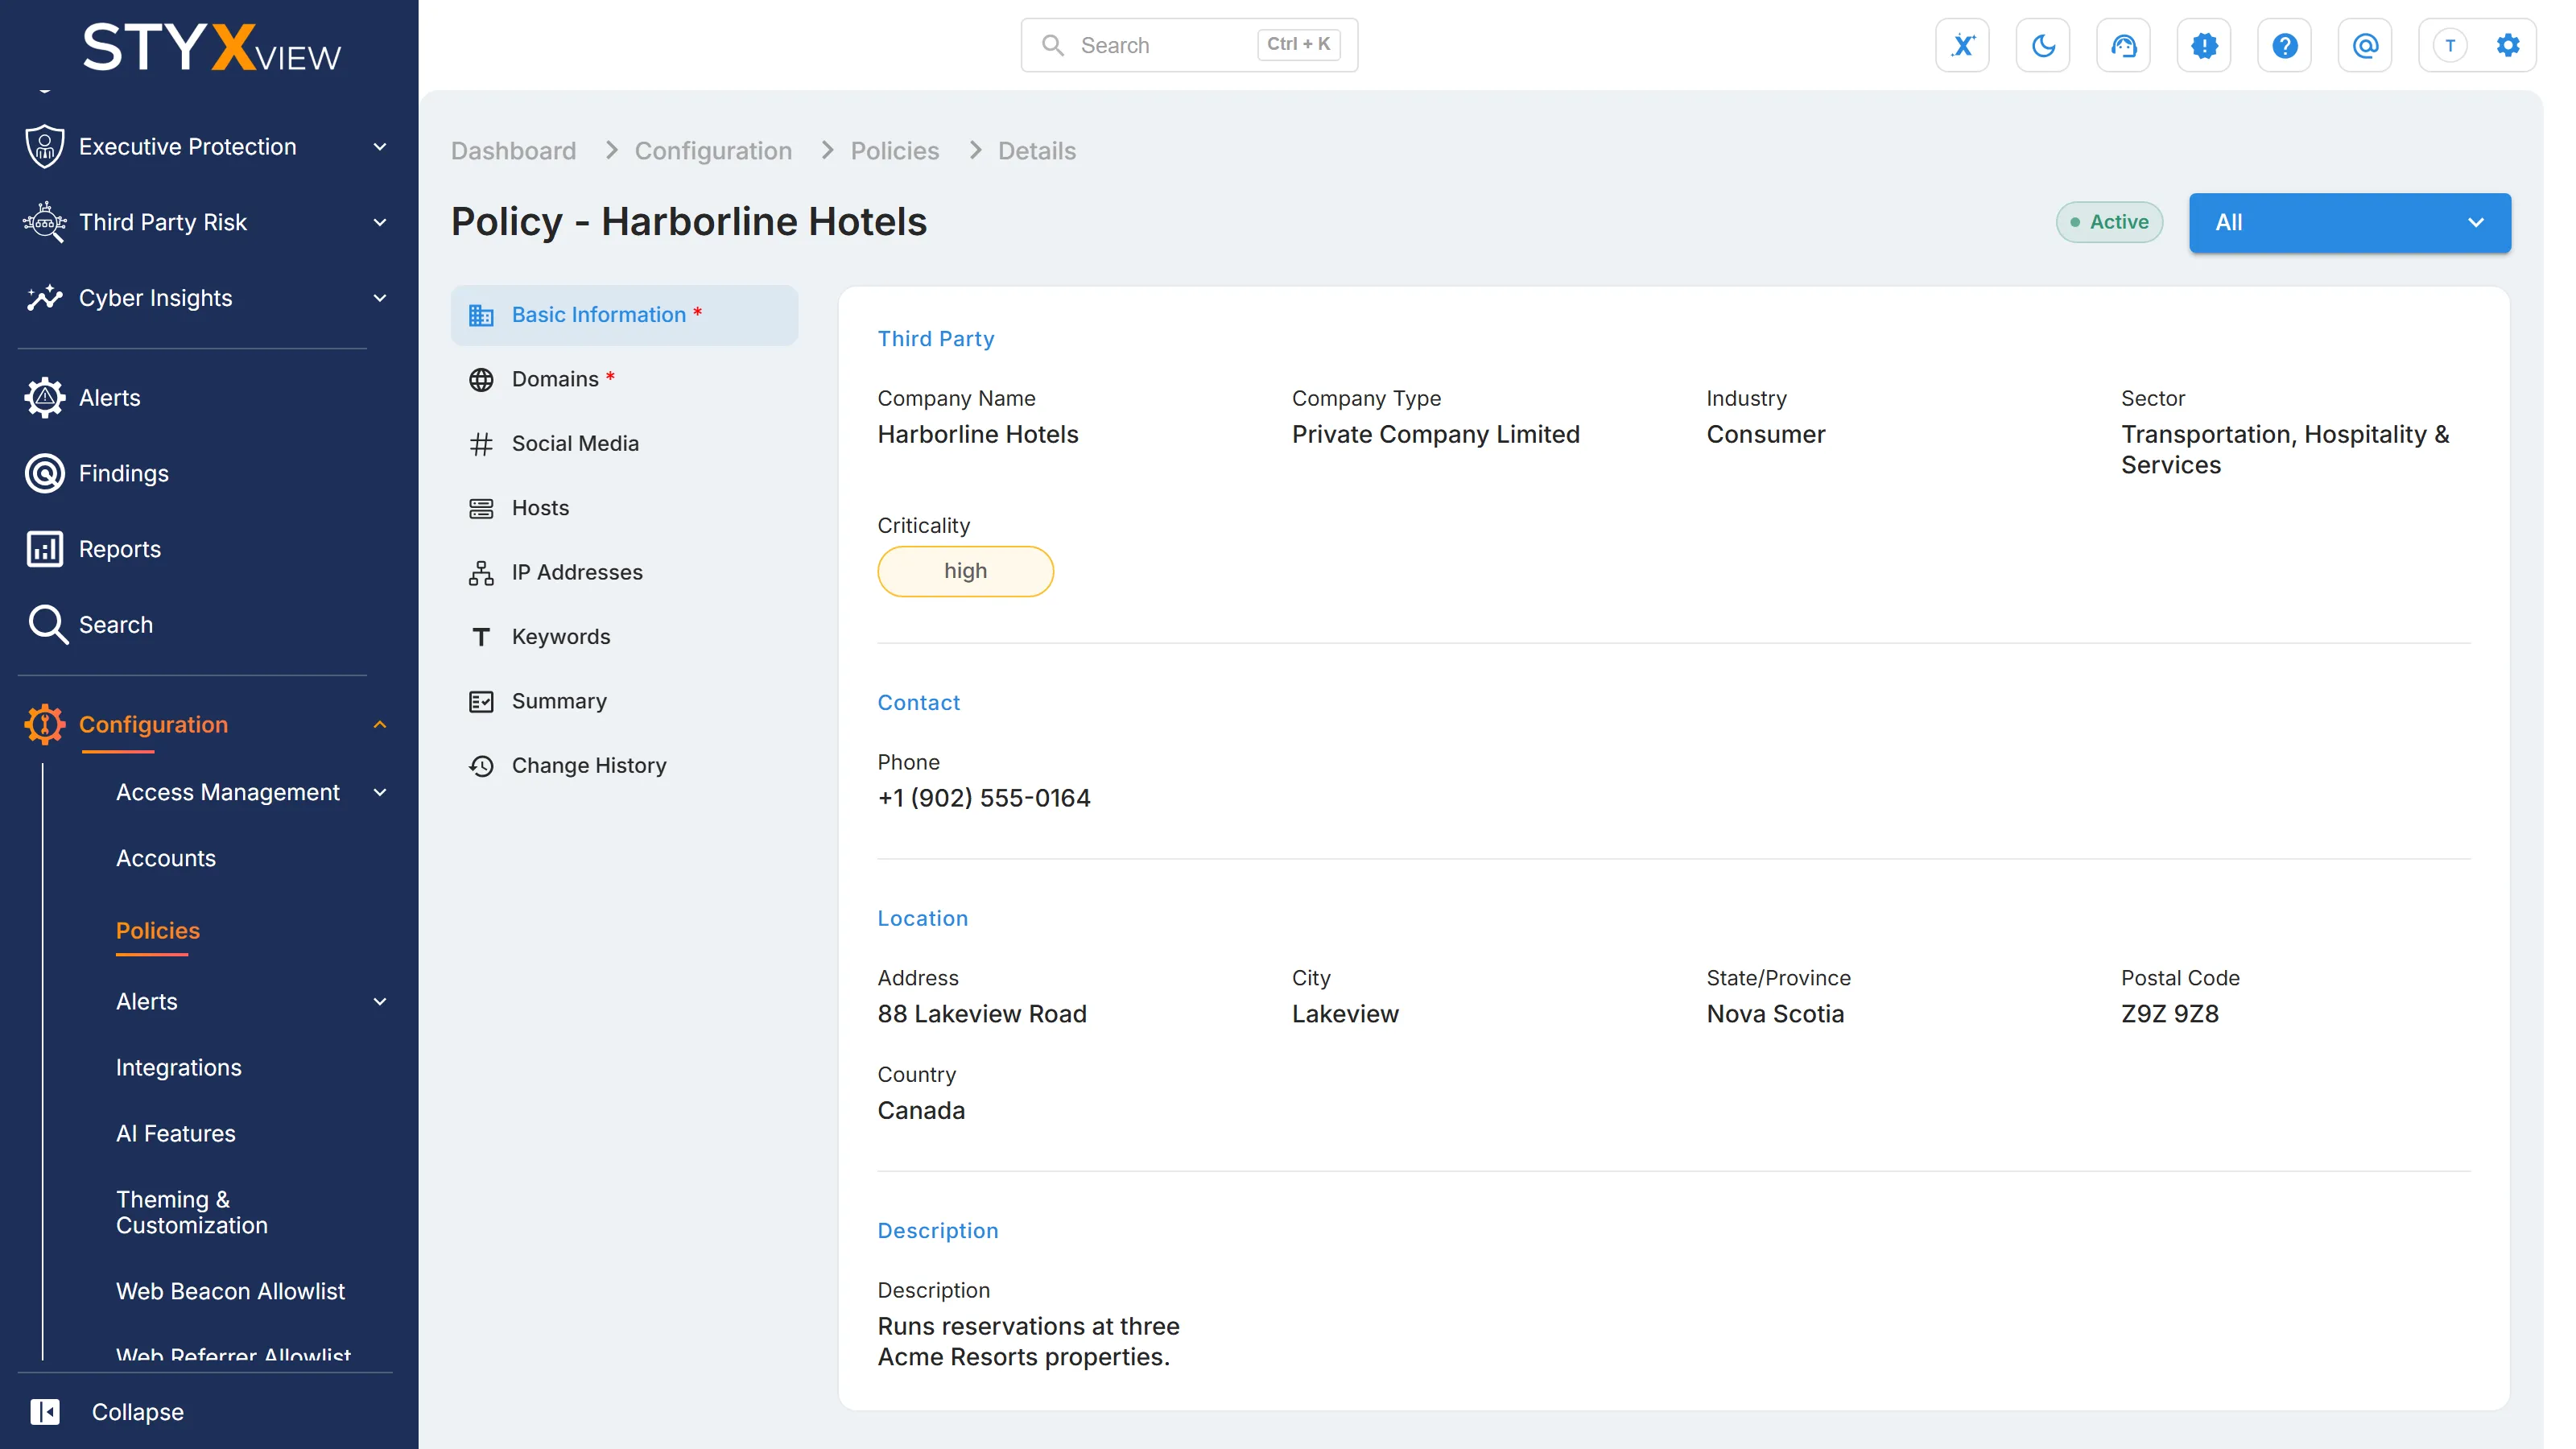
Section titled “Basic Information”Basic Information describes the company, executive, or third party that the policy monitors. Fill in the fields, select "Save", and confirm with "Yes". Fields marked with an asterisk (*) are required. For the address, enter the headquarters.
Once saved, Basic Information cannot be changed in StyxView. To update it, contact StyxGuard@styxintel.com (opens in a new tab).
Company Protection
Section titled “Company Protection”- "Company": "Company Name", "Company Type", "Industry", "Sector", and "# of Employees".
- "Contact": "Telephone" and "Primary Website URL".
- "Location": "Address", "Country", "State/Province", "City", and "Postal Code" (optional).
- "Branding": "Logo Path" (optional), the web address of your logo image, for example
https://contoso.com/logo.png.
Executive Protection
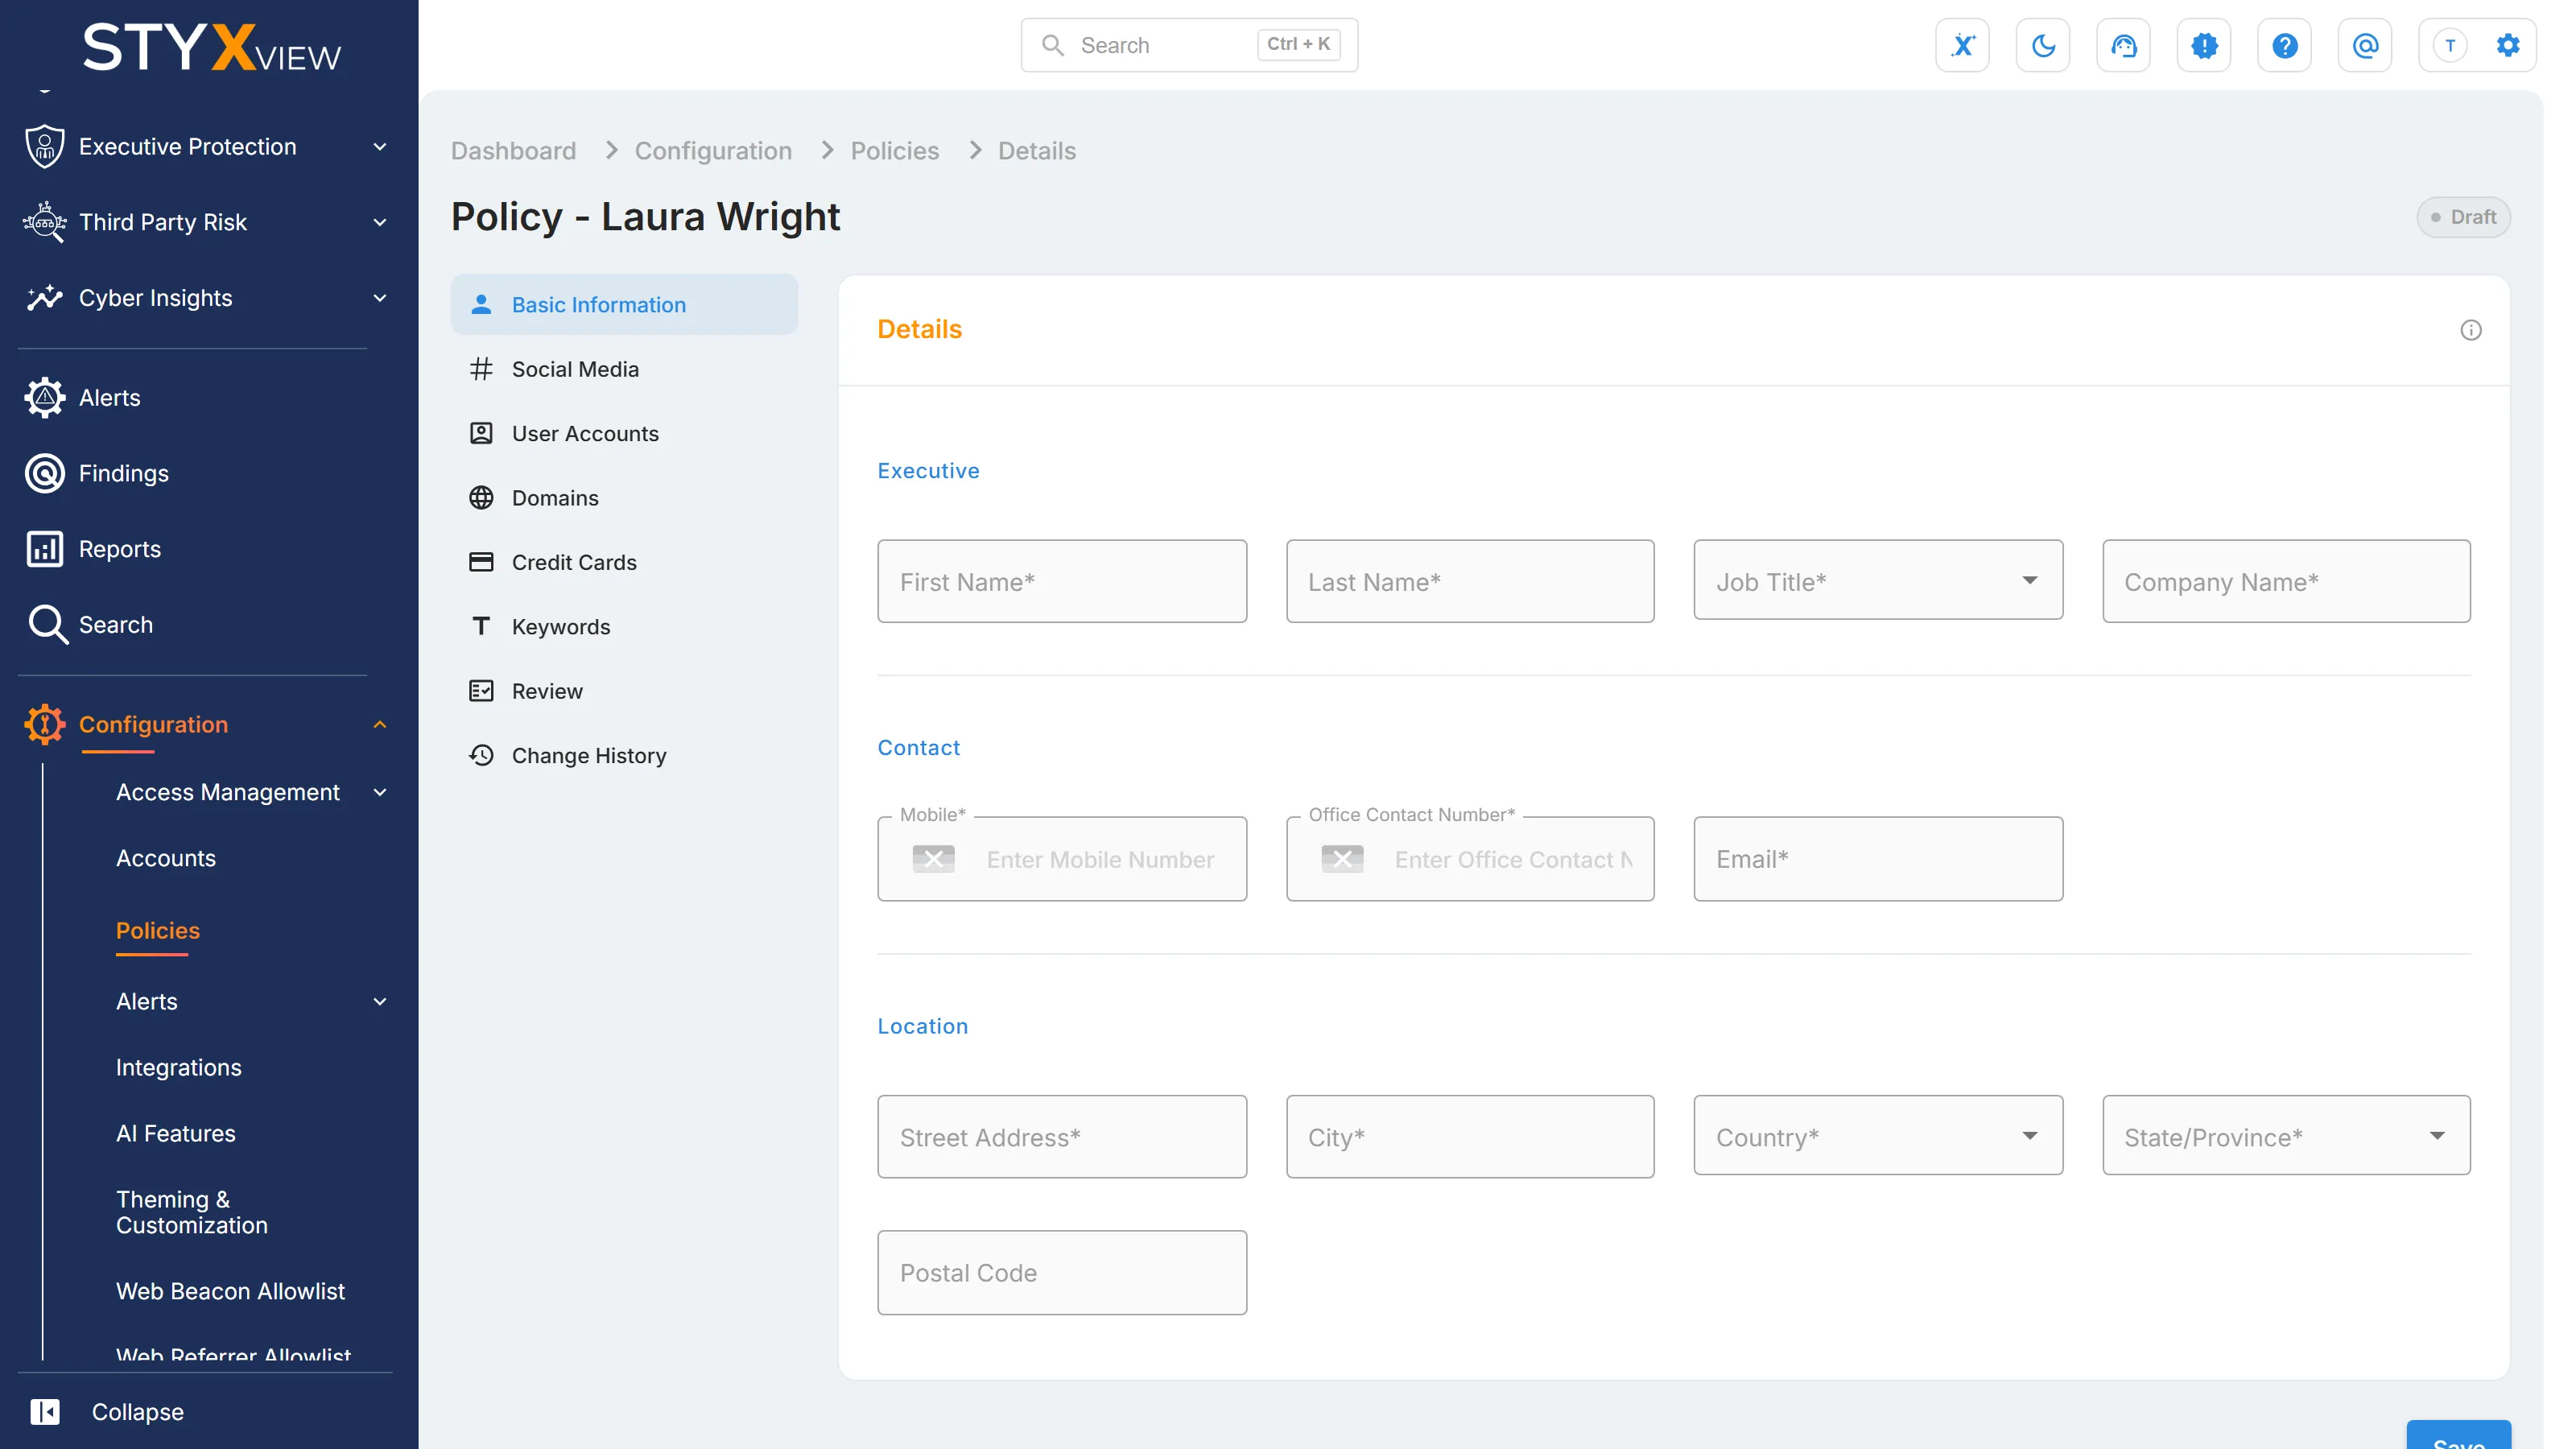
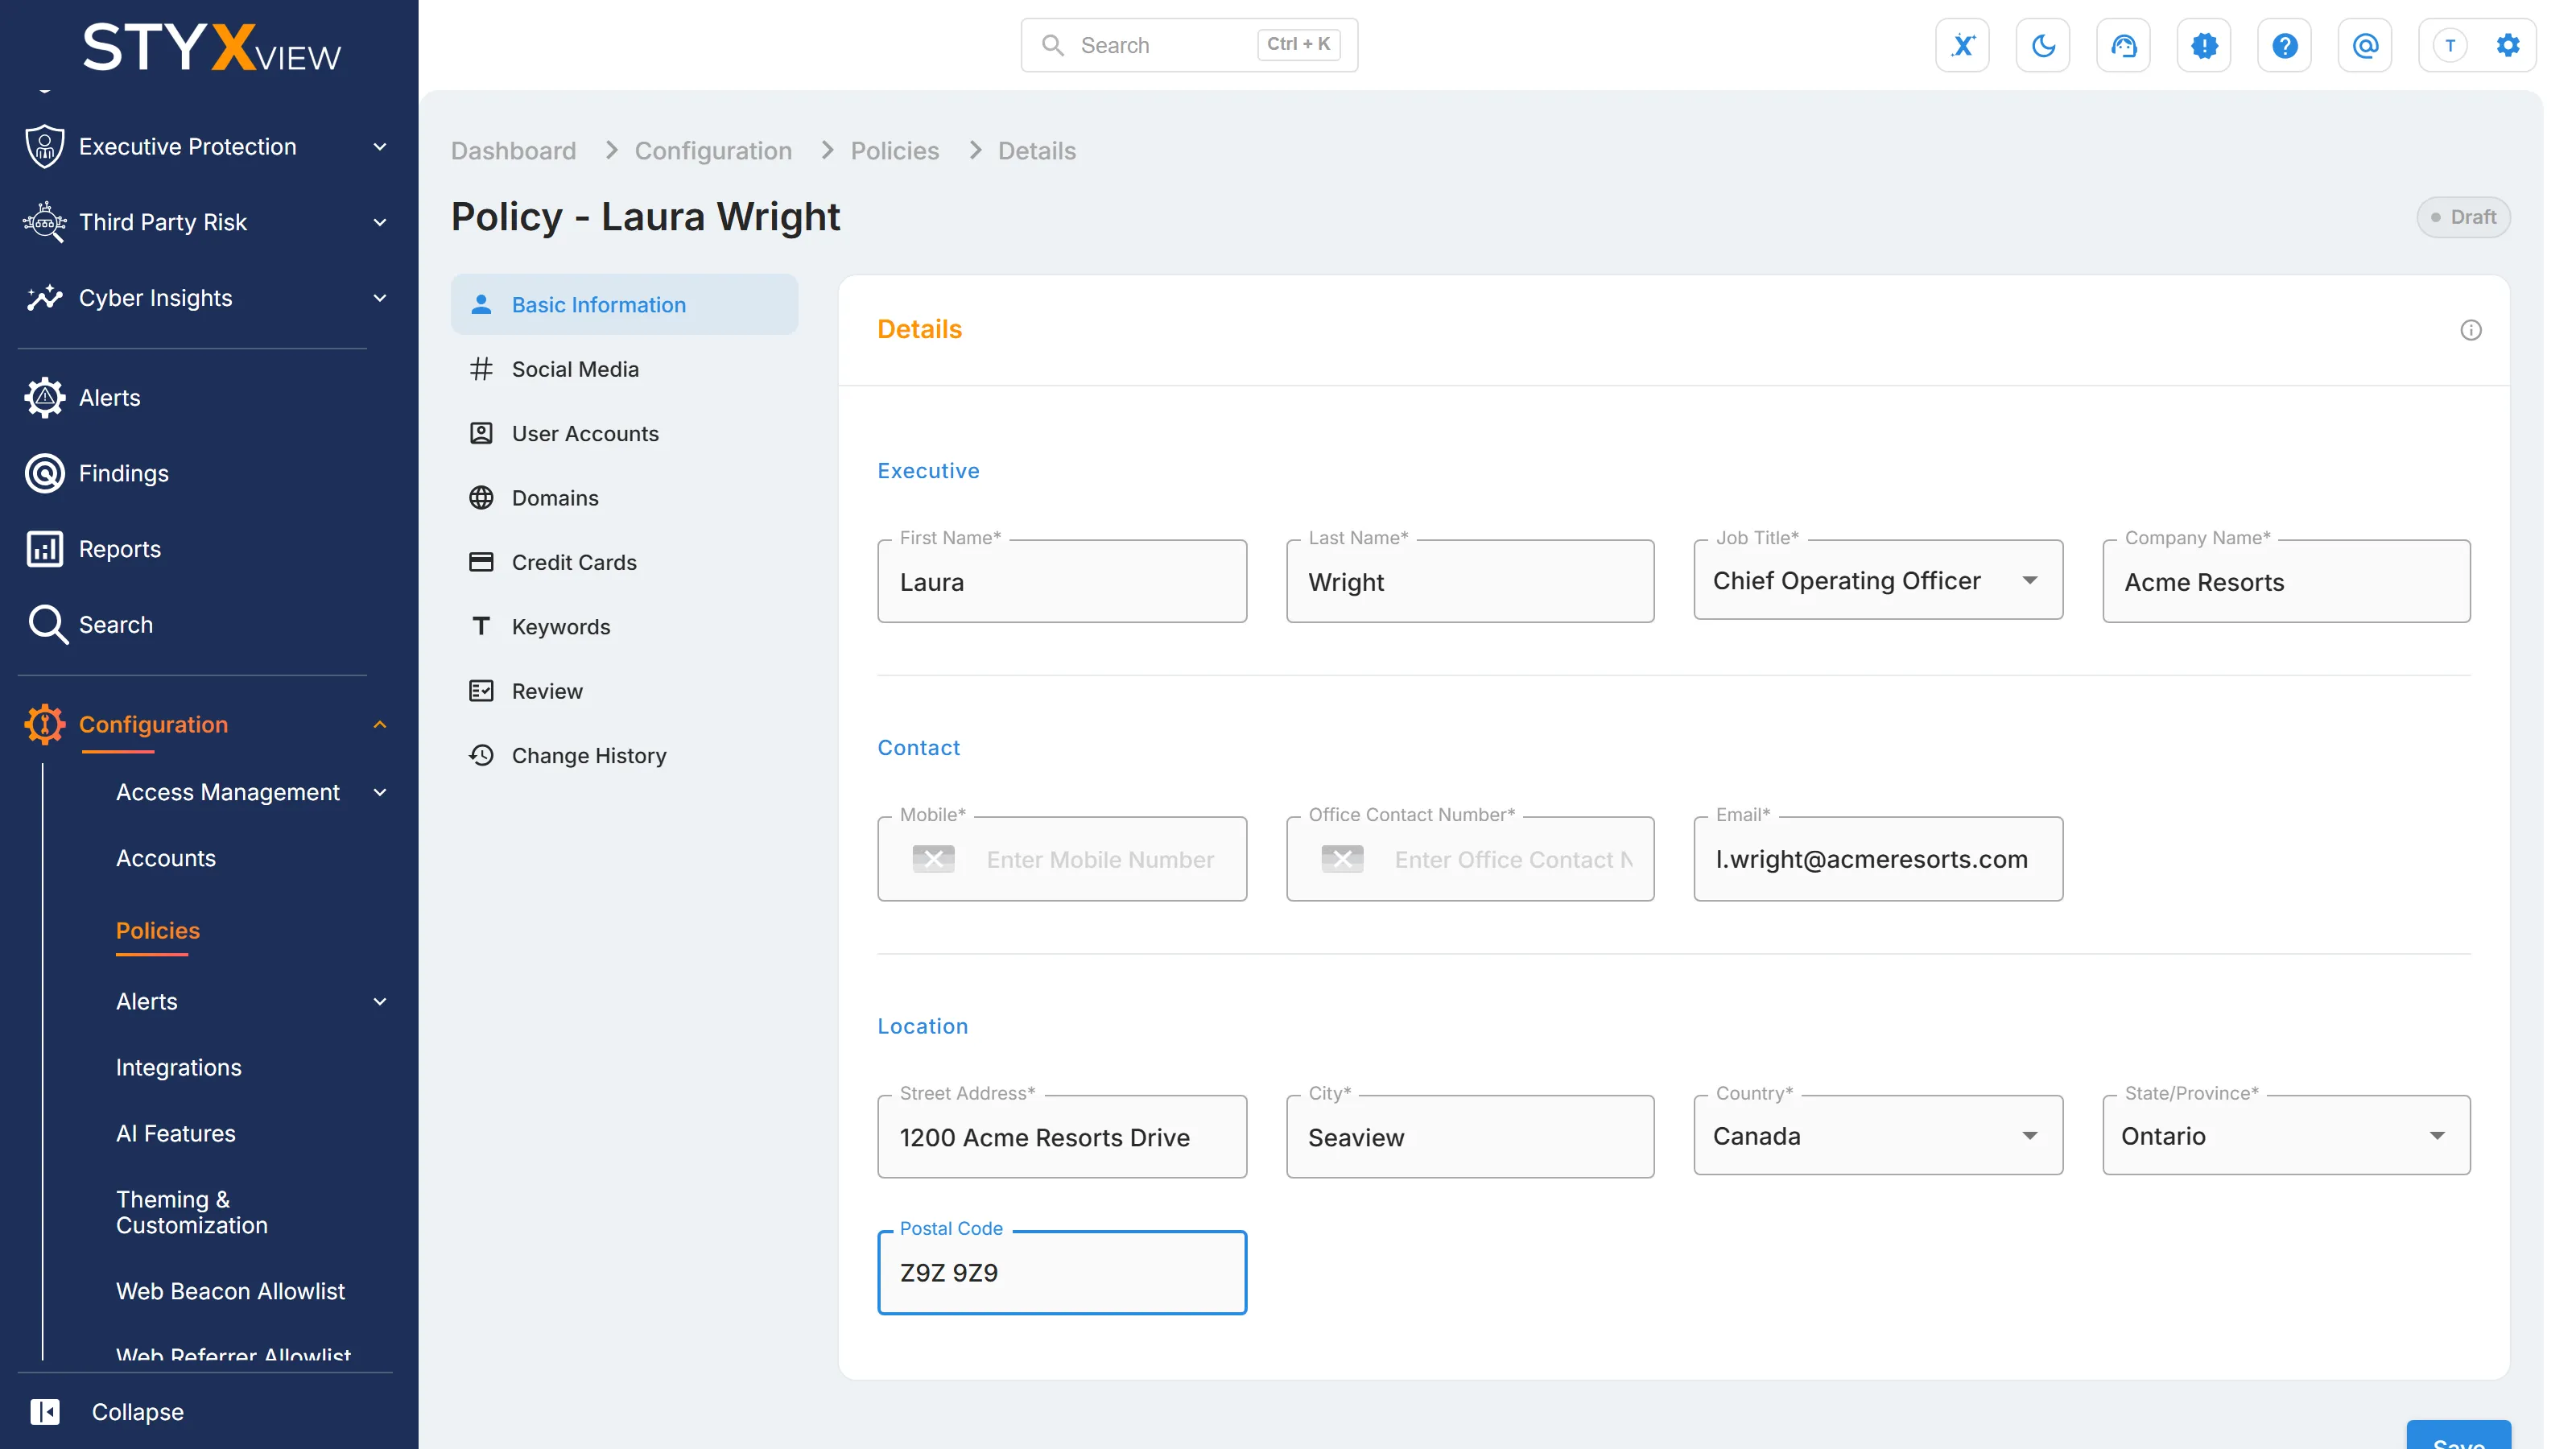
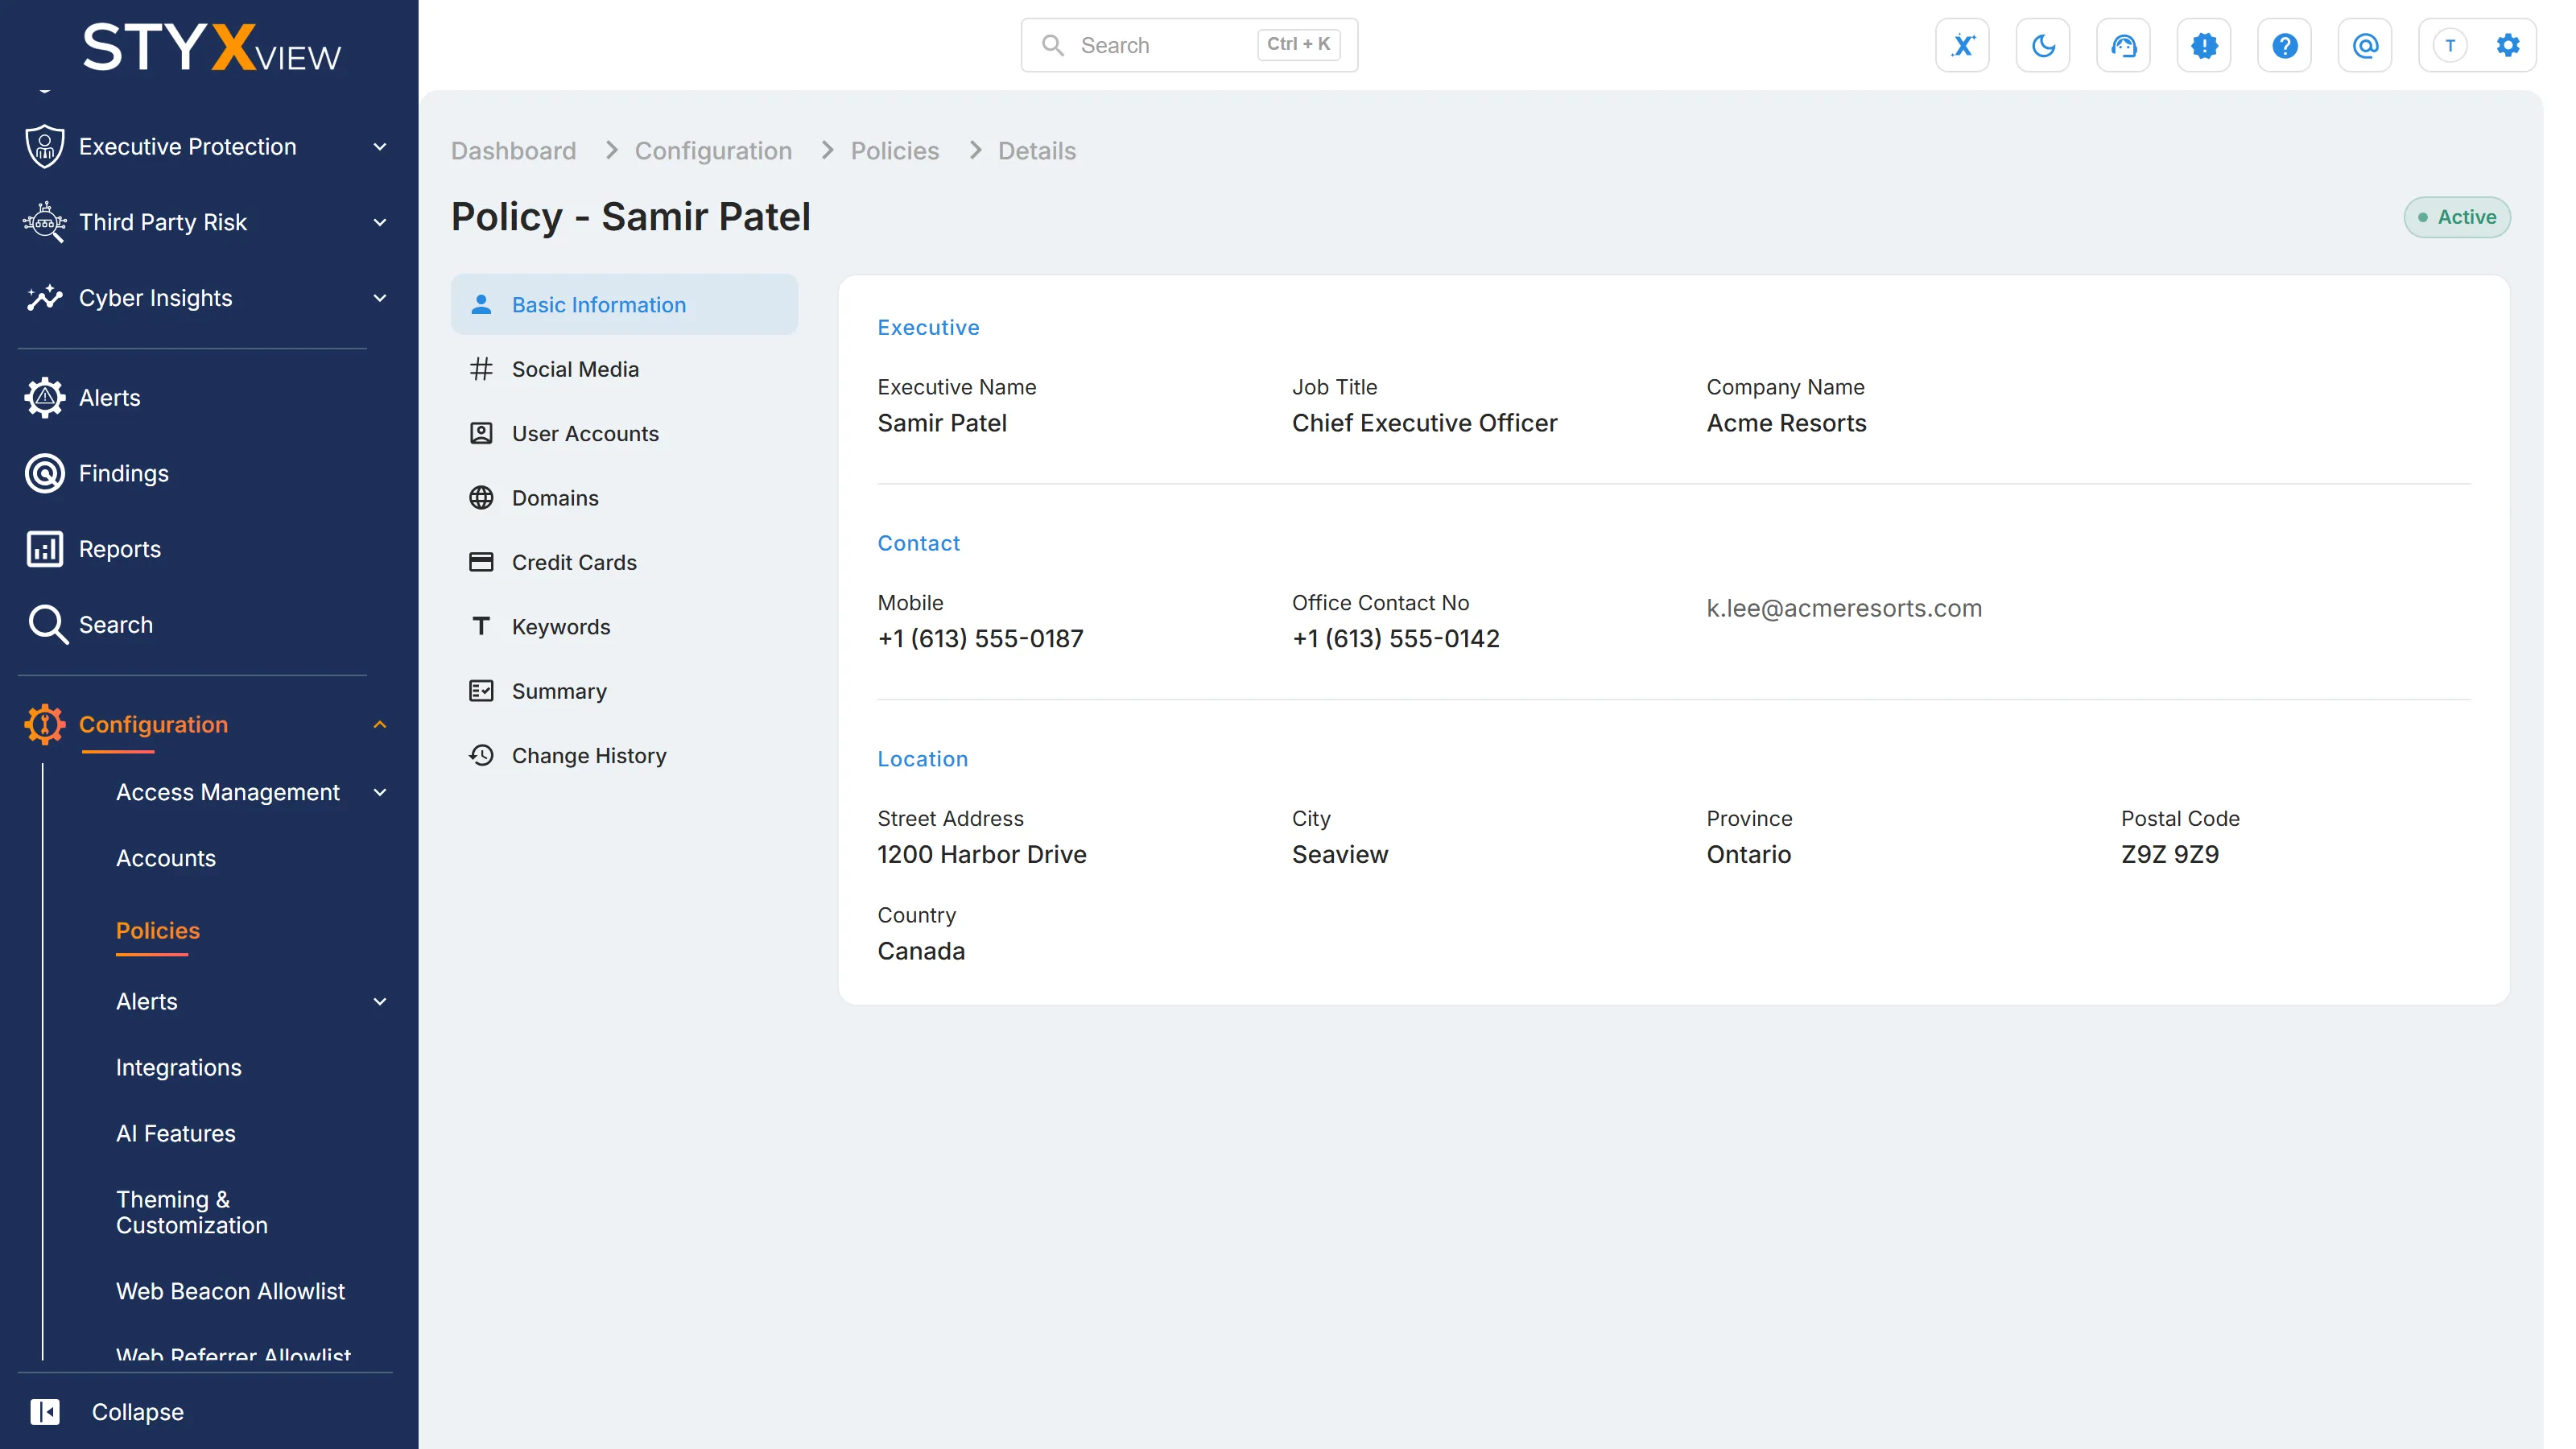
Section titled “Executive Protection”- "Executive": "First Name", "Last Name", "Job Title", and "Company Name".
- "Contact": "Mobile", "Office Contact Number", and "Email".
- "Location": "Street Address", "City", "Country", "State/Province", and "Postal Code" (optional).
Third Party Risk
Section titled “Third Party Risk”- Required: "Company Name", "Industry", "Sector", and "Criticality".
- Optional: "Company Type", "Telephone", "Address", "Country", "State/Province", "City", "Postal Code", "Description", and "Logo URL".
Adding Assets
Section titled “Adding Assets”Domains, Hosts, IP Addresses, Social Media, Job Posting Channels, Mobile Apps, Credit Cards, and User Accounts each hold a table of assets. You add assets one row at a time. On a policy that has already been submitted, open it in edit mode first. See Changing a Configured Policy.
-
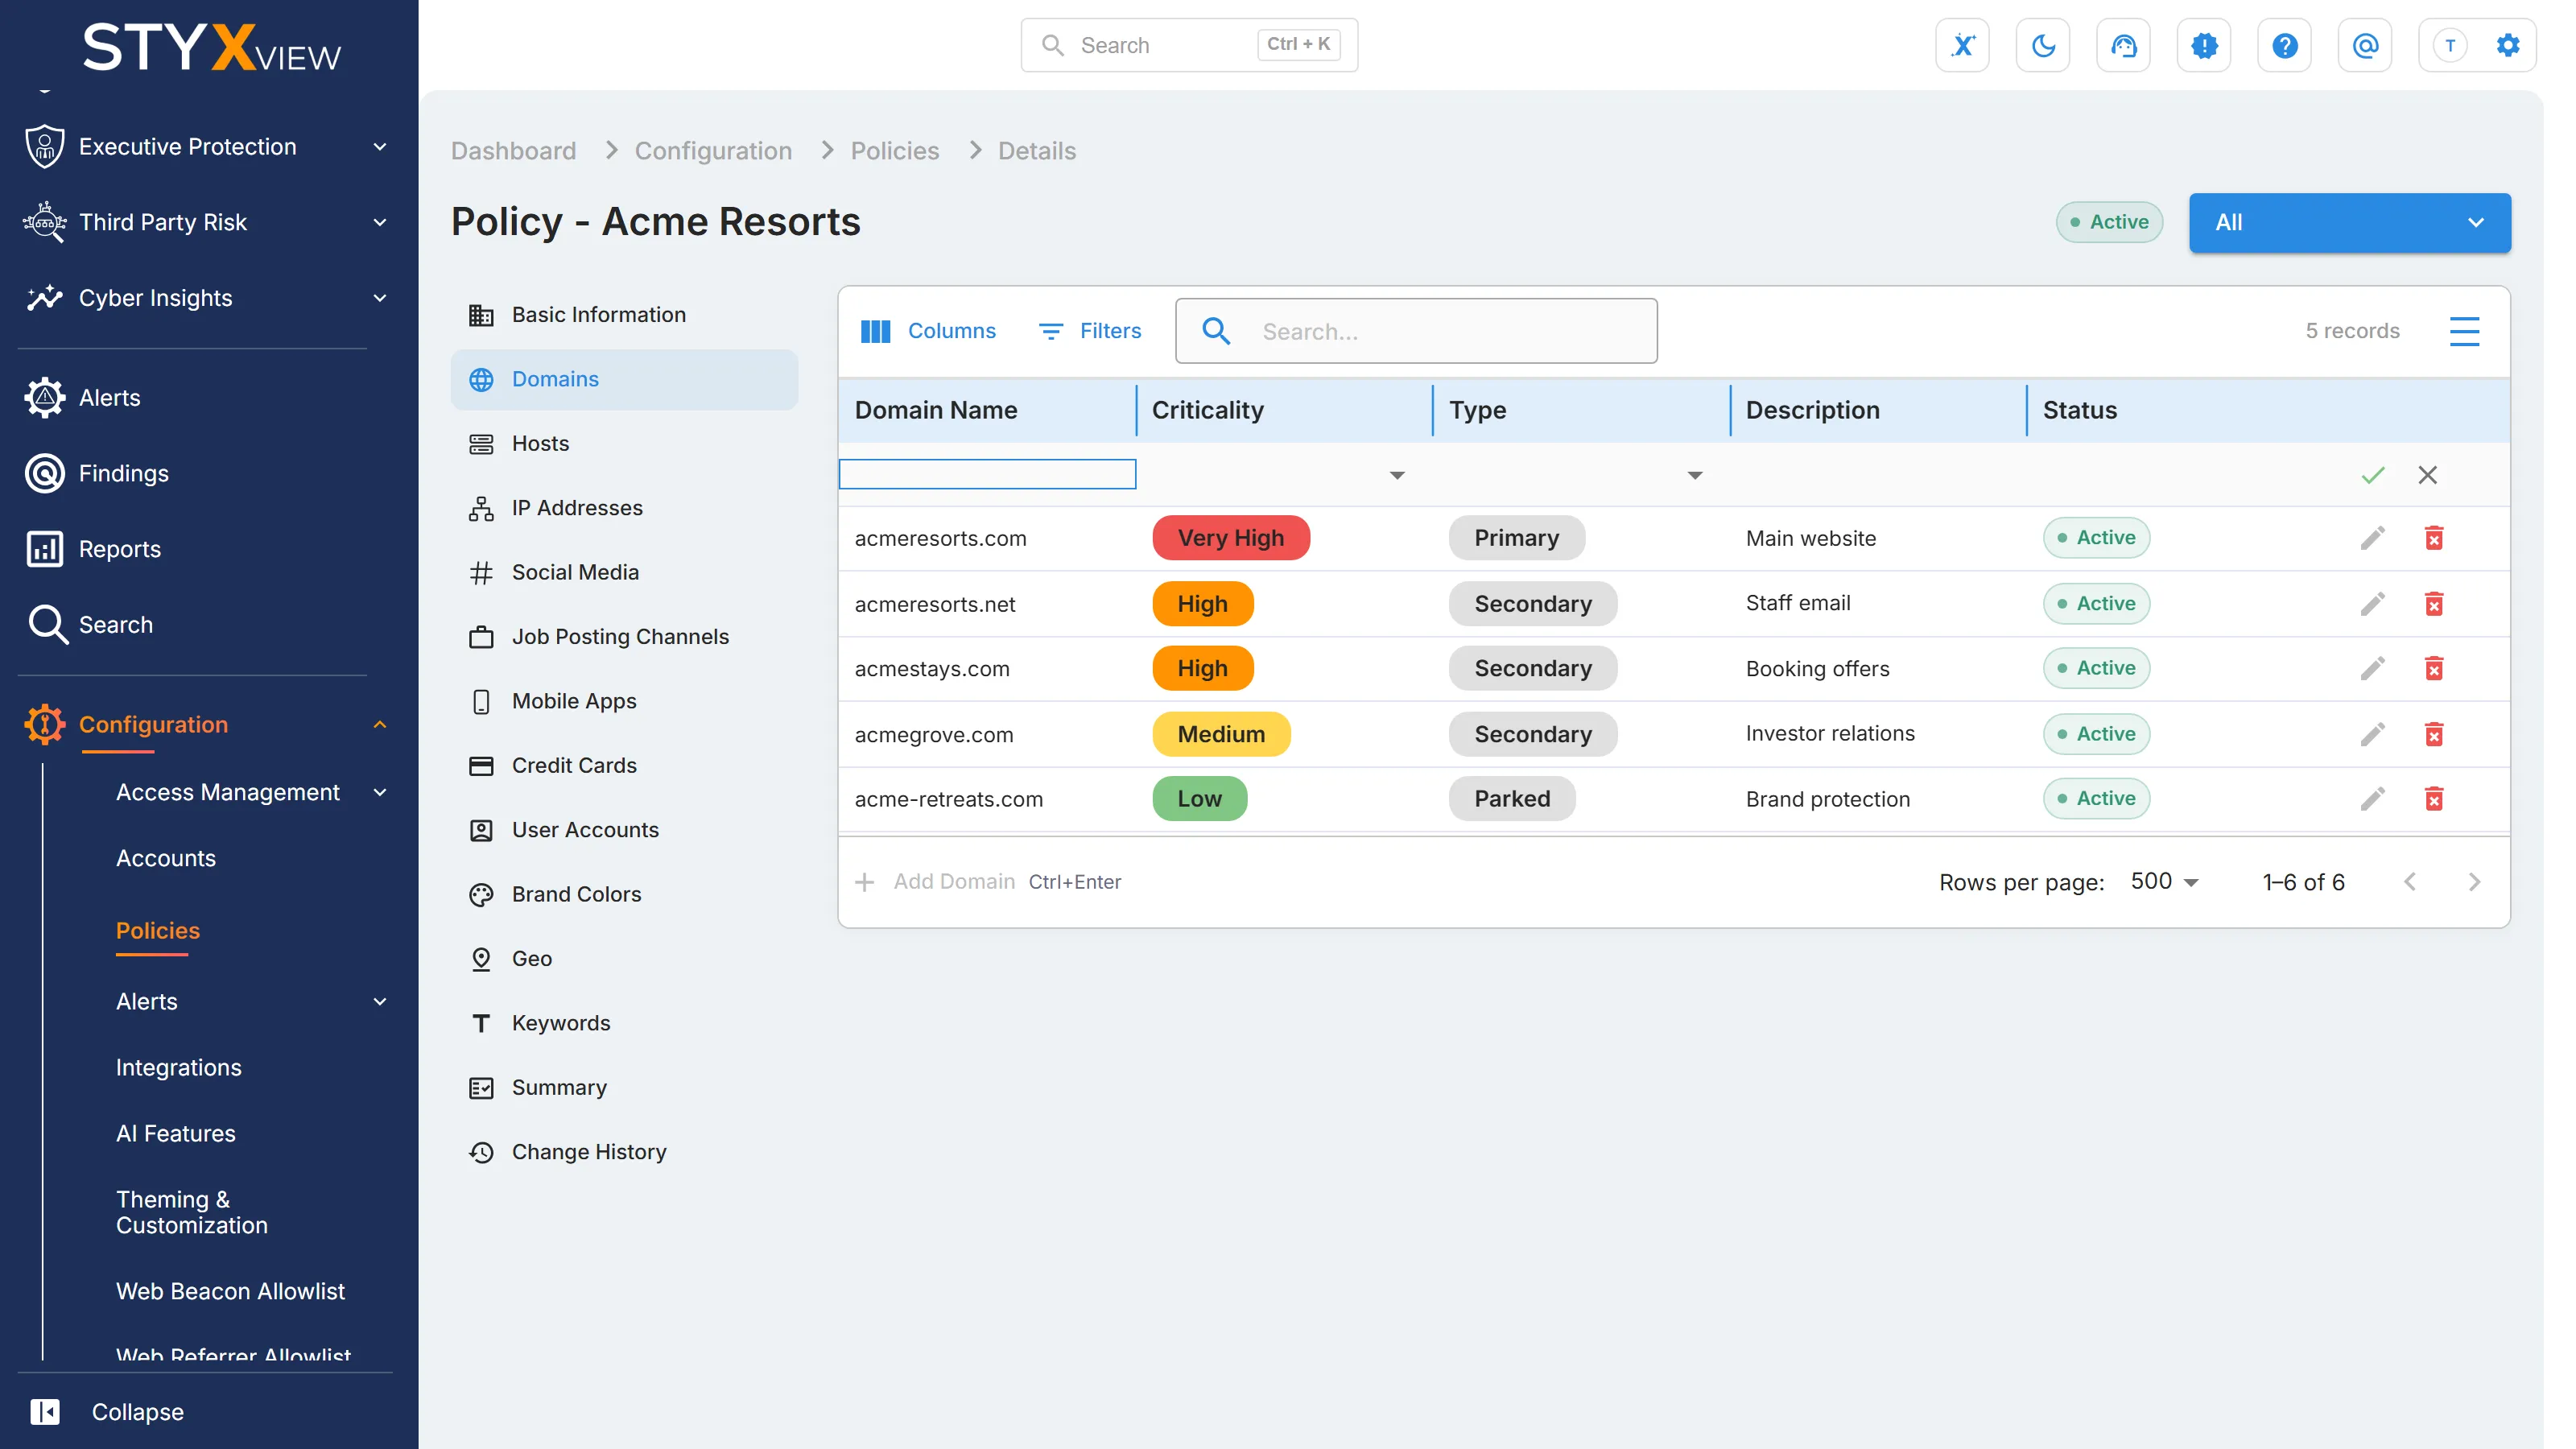
Open the section and select its add button below the table, for example "Add Domain". A blank row opens.
-
Fill in the row. If you leave a required cell empty, StyxView highlights it.
-
Select the save icon at the end of the row. Or press Ctrl + Enter (⌘ + Enter on a Mac) to save the row and open the next blank one. The discard icon drops the row without saving.
Each row saves on its own and shows its status in the "Status" column. See Policy and Asset Statuses. A saved asset cannot be edited: remove it and add it again.
"Criticality" says how important the asset is to your organisation: "Very Low", "Low", "Medium", "High", or "Very High". It is a property of the asset, not of any finding on it.
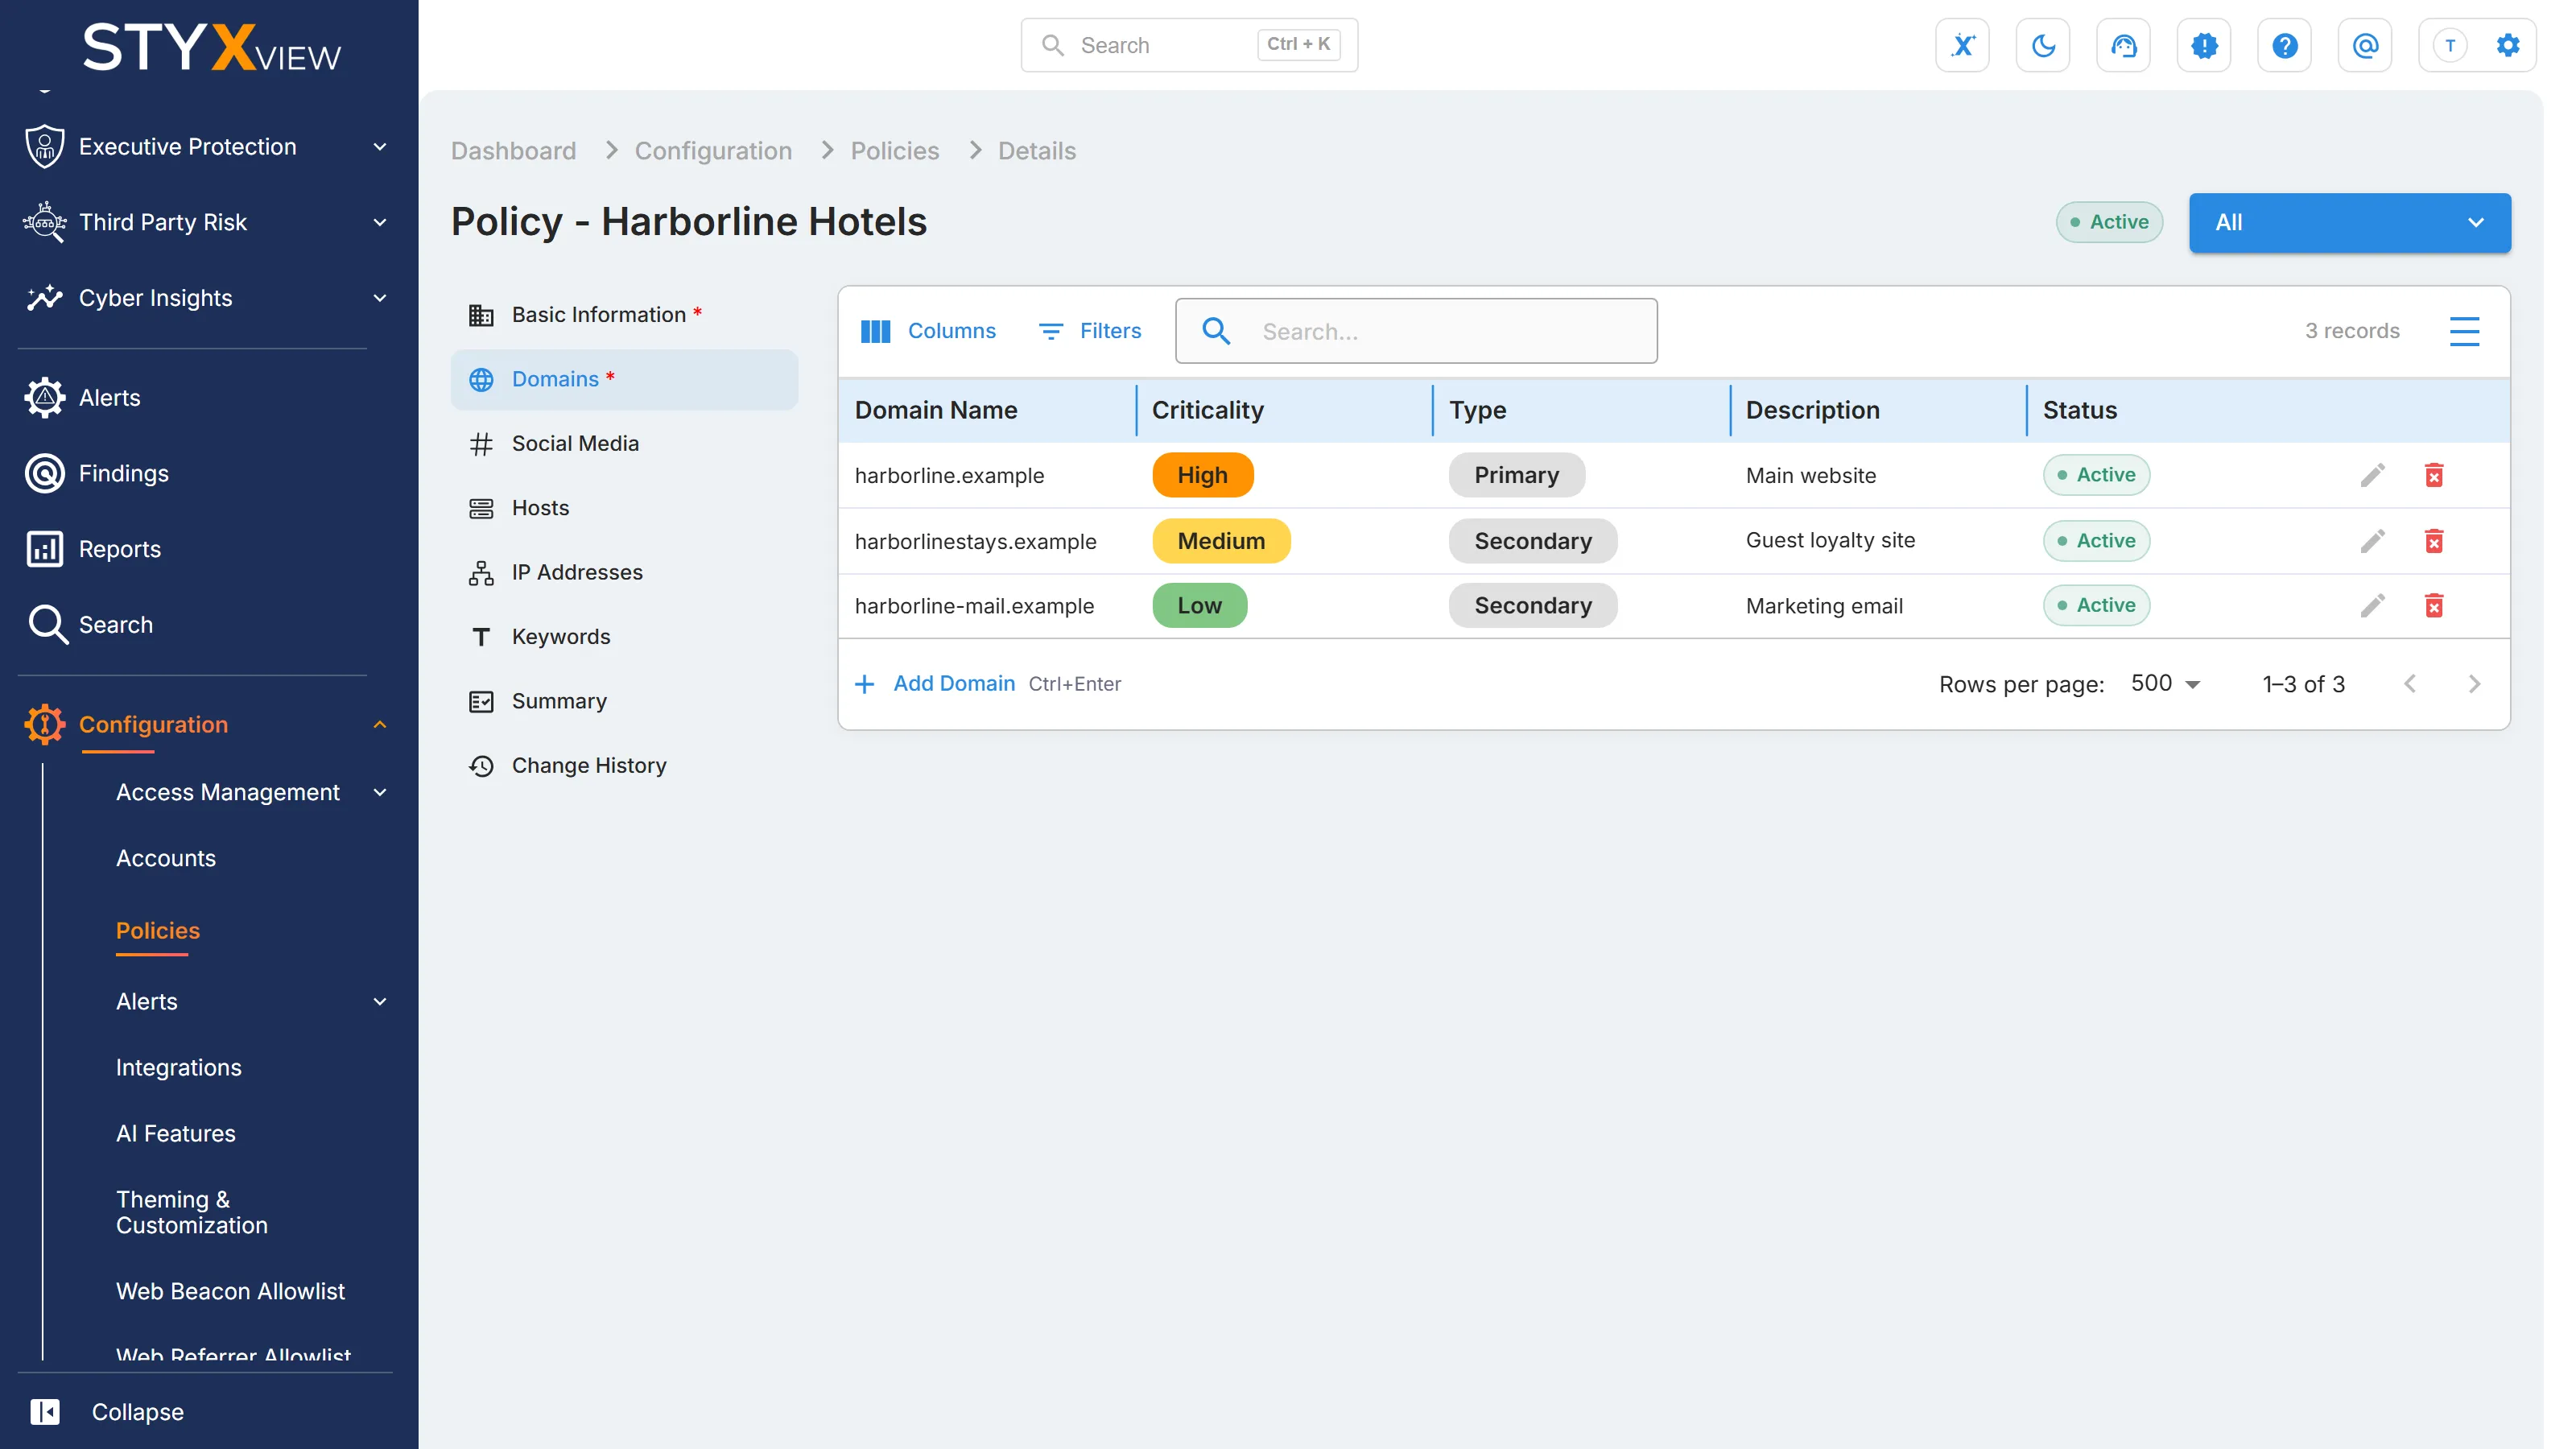
Domains
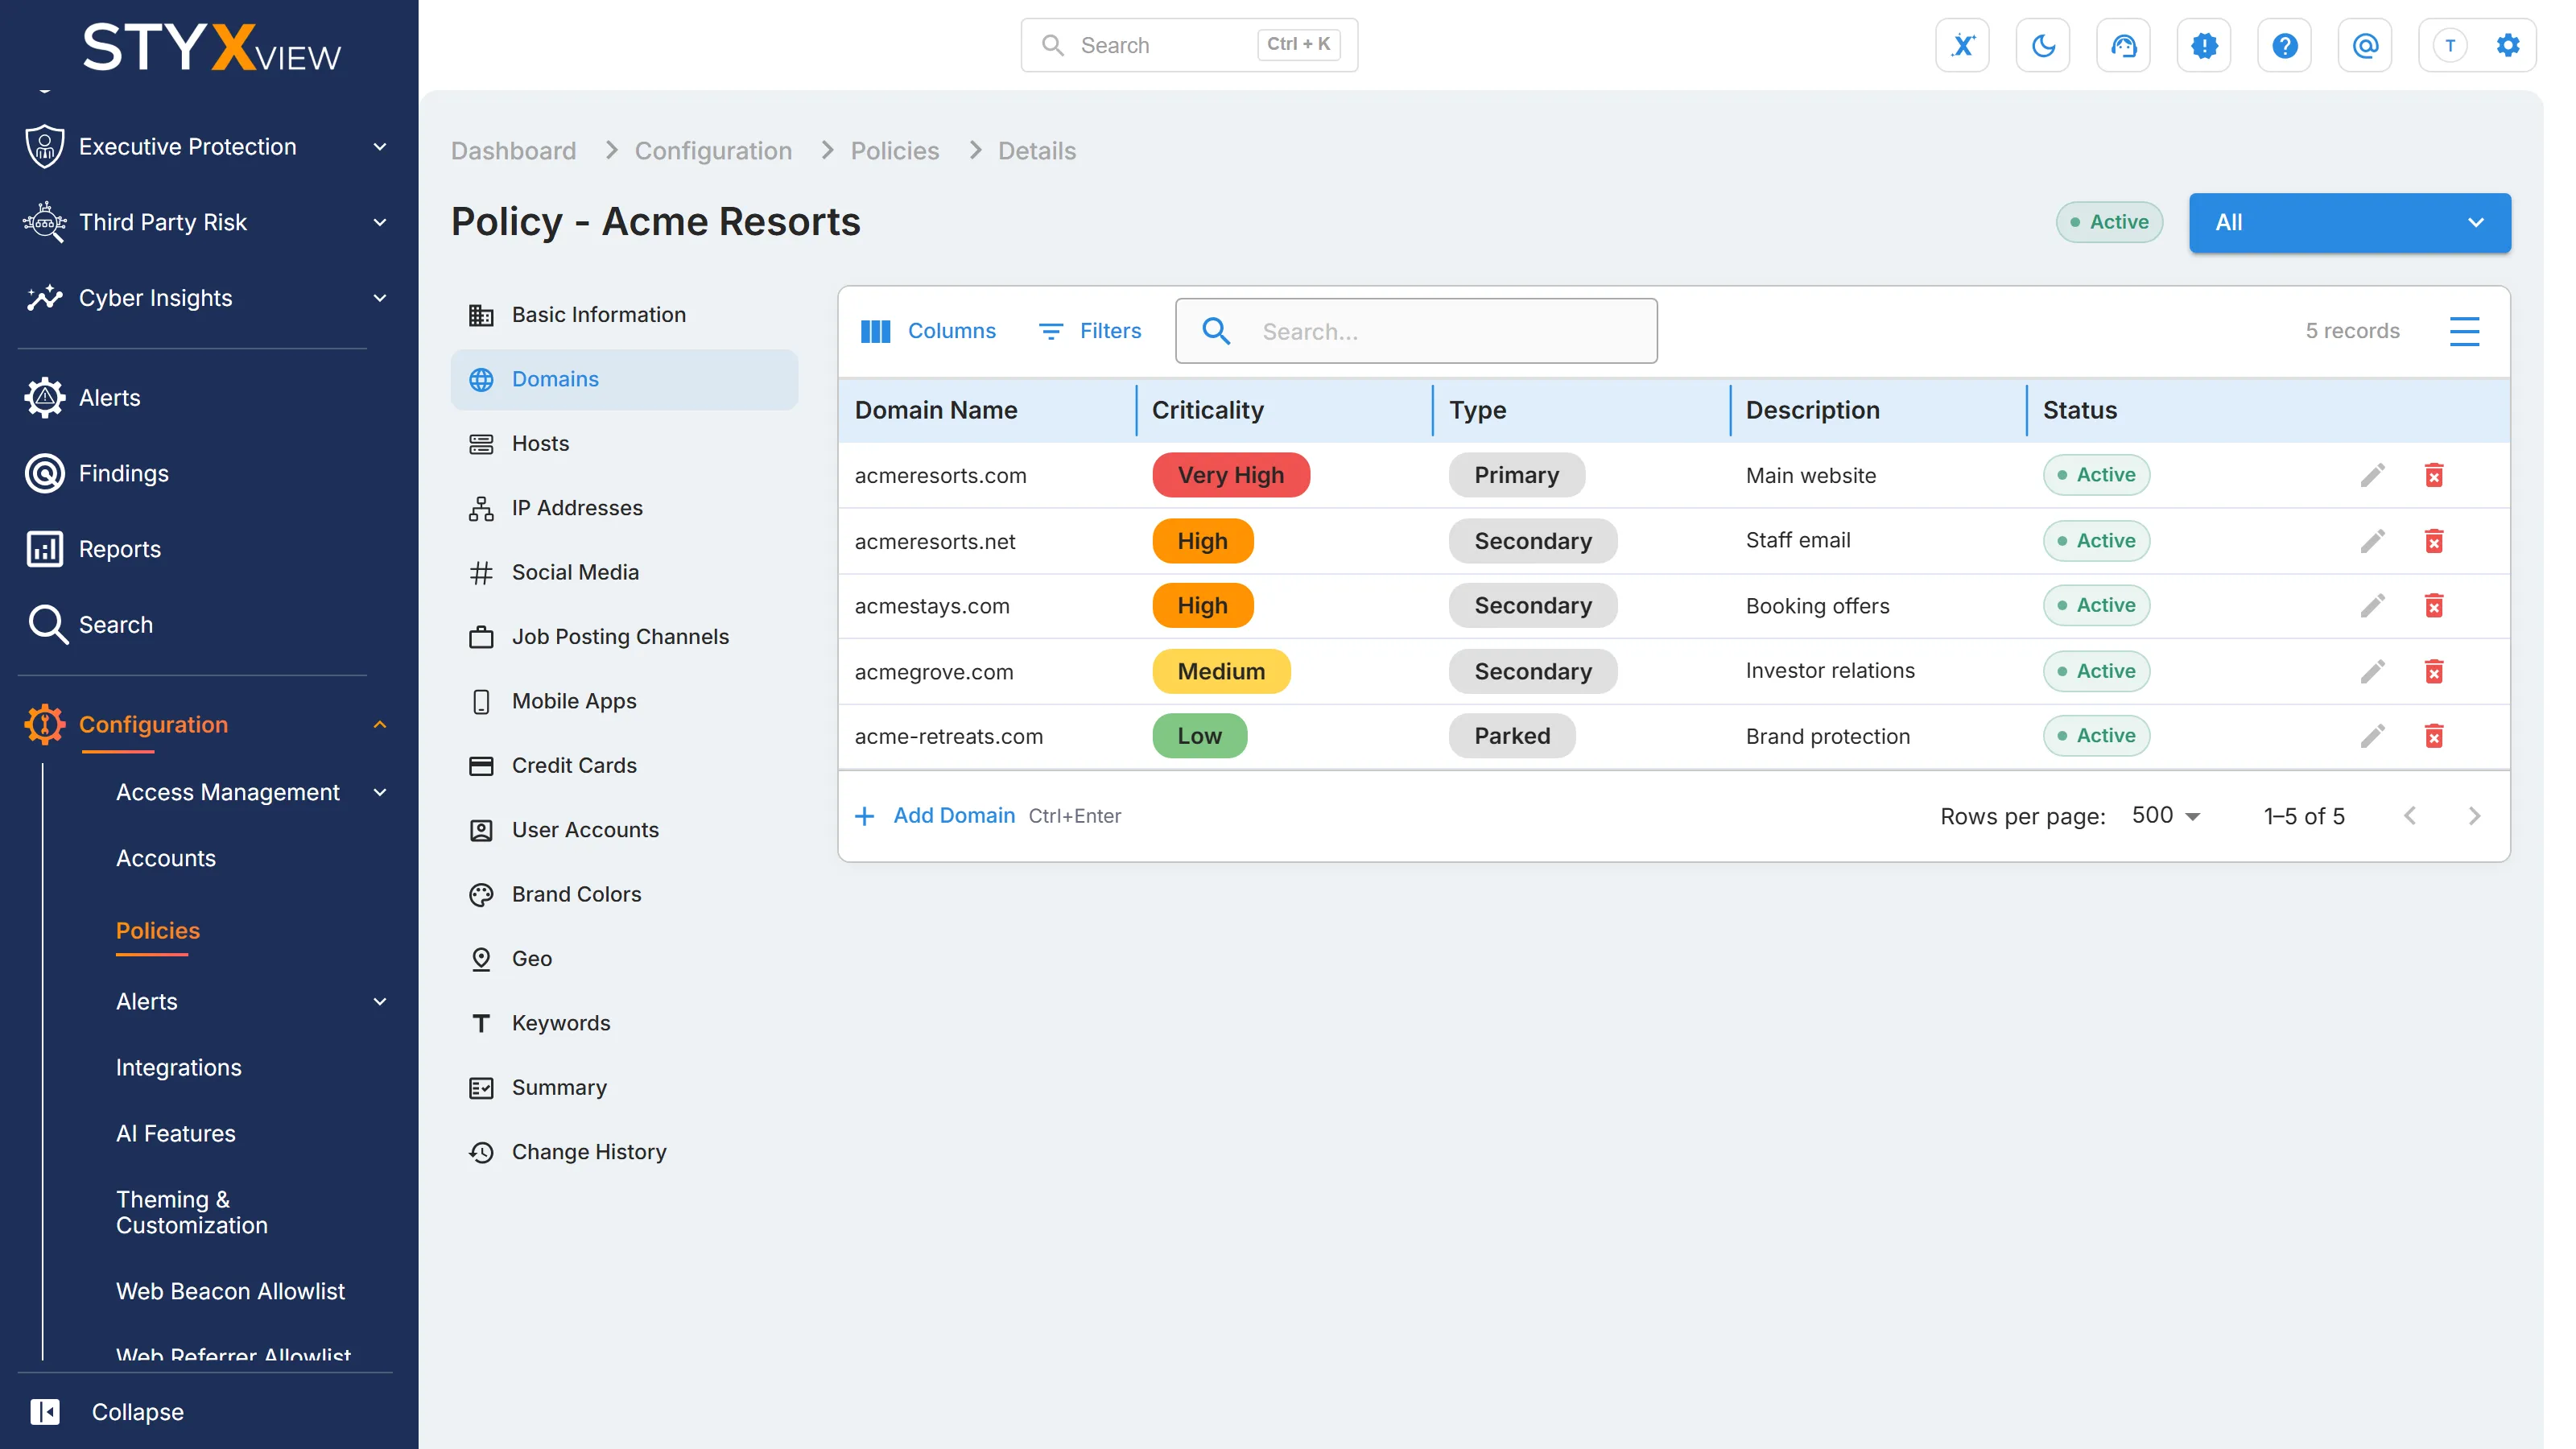
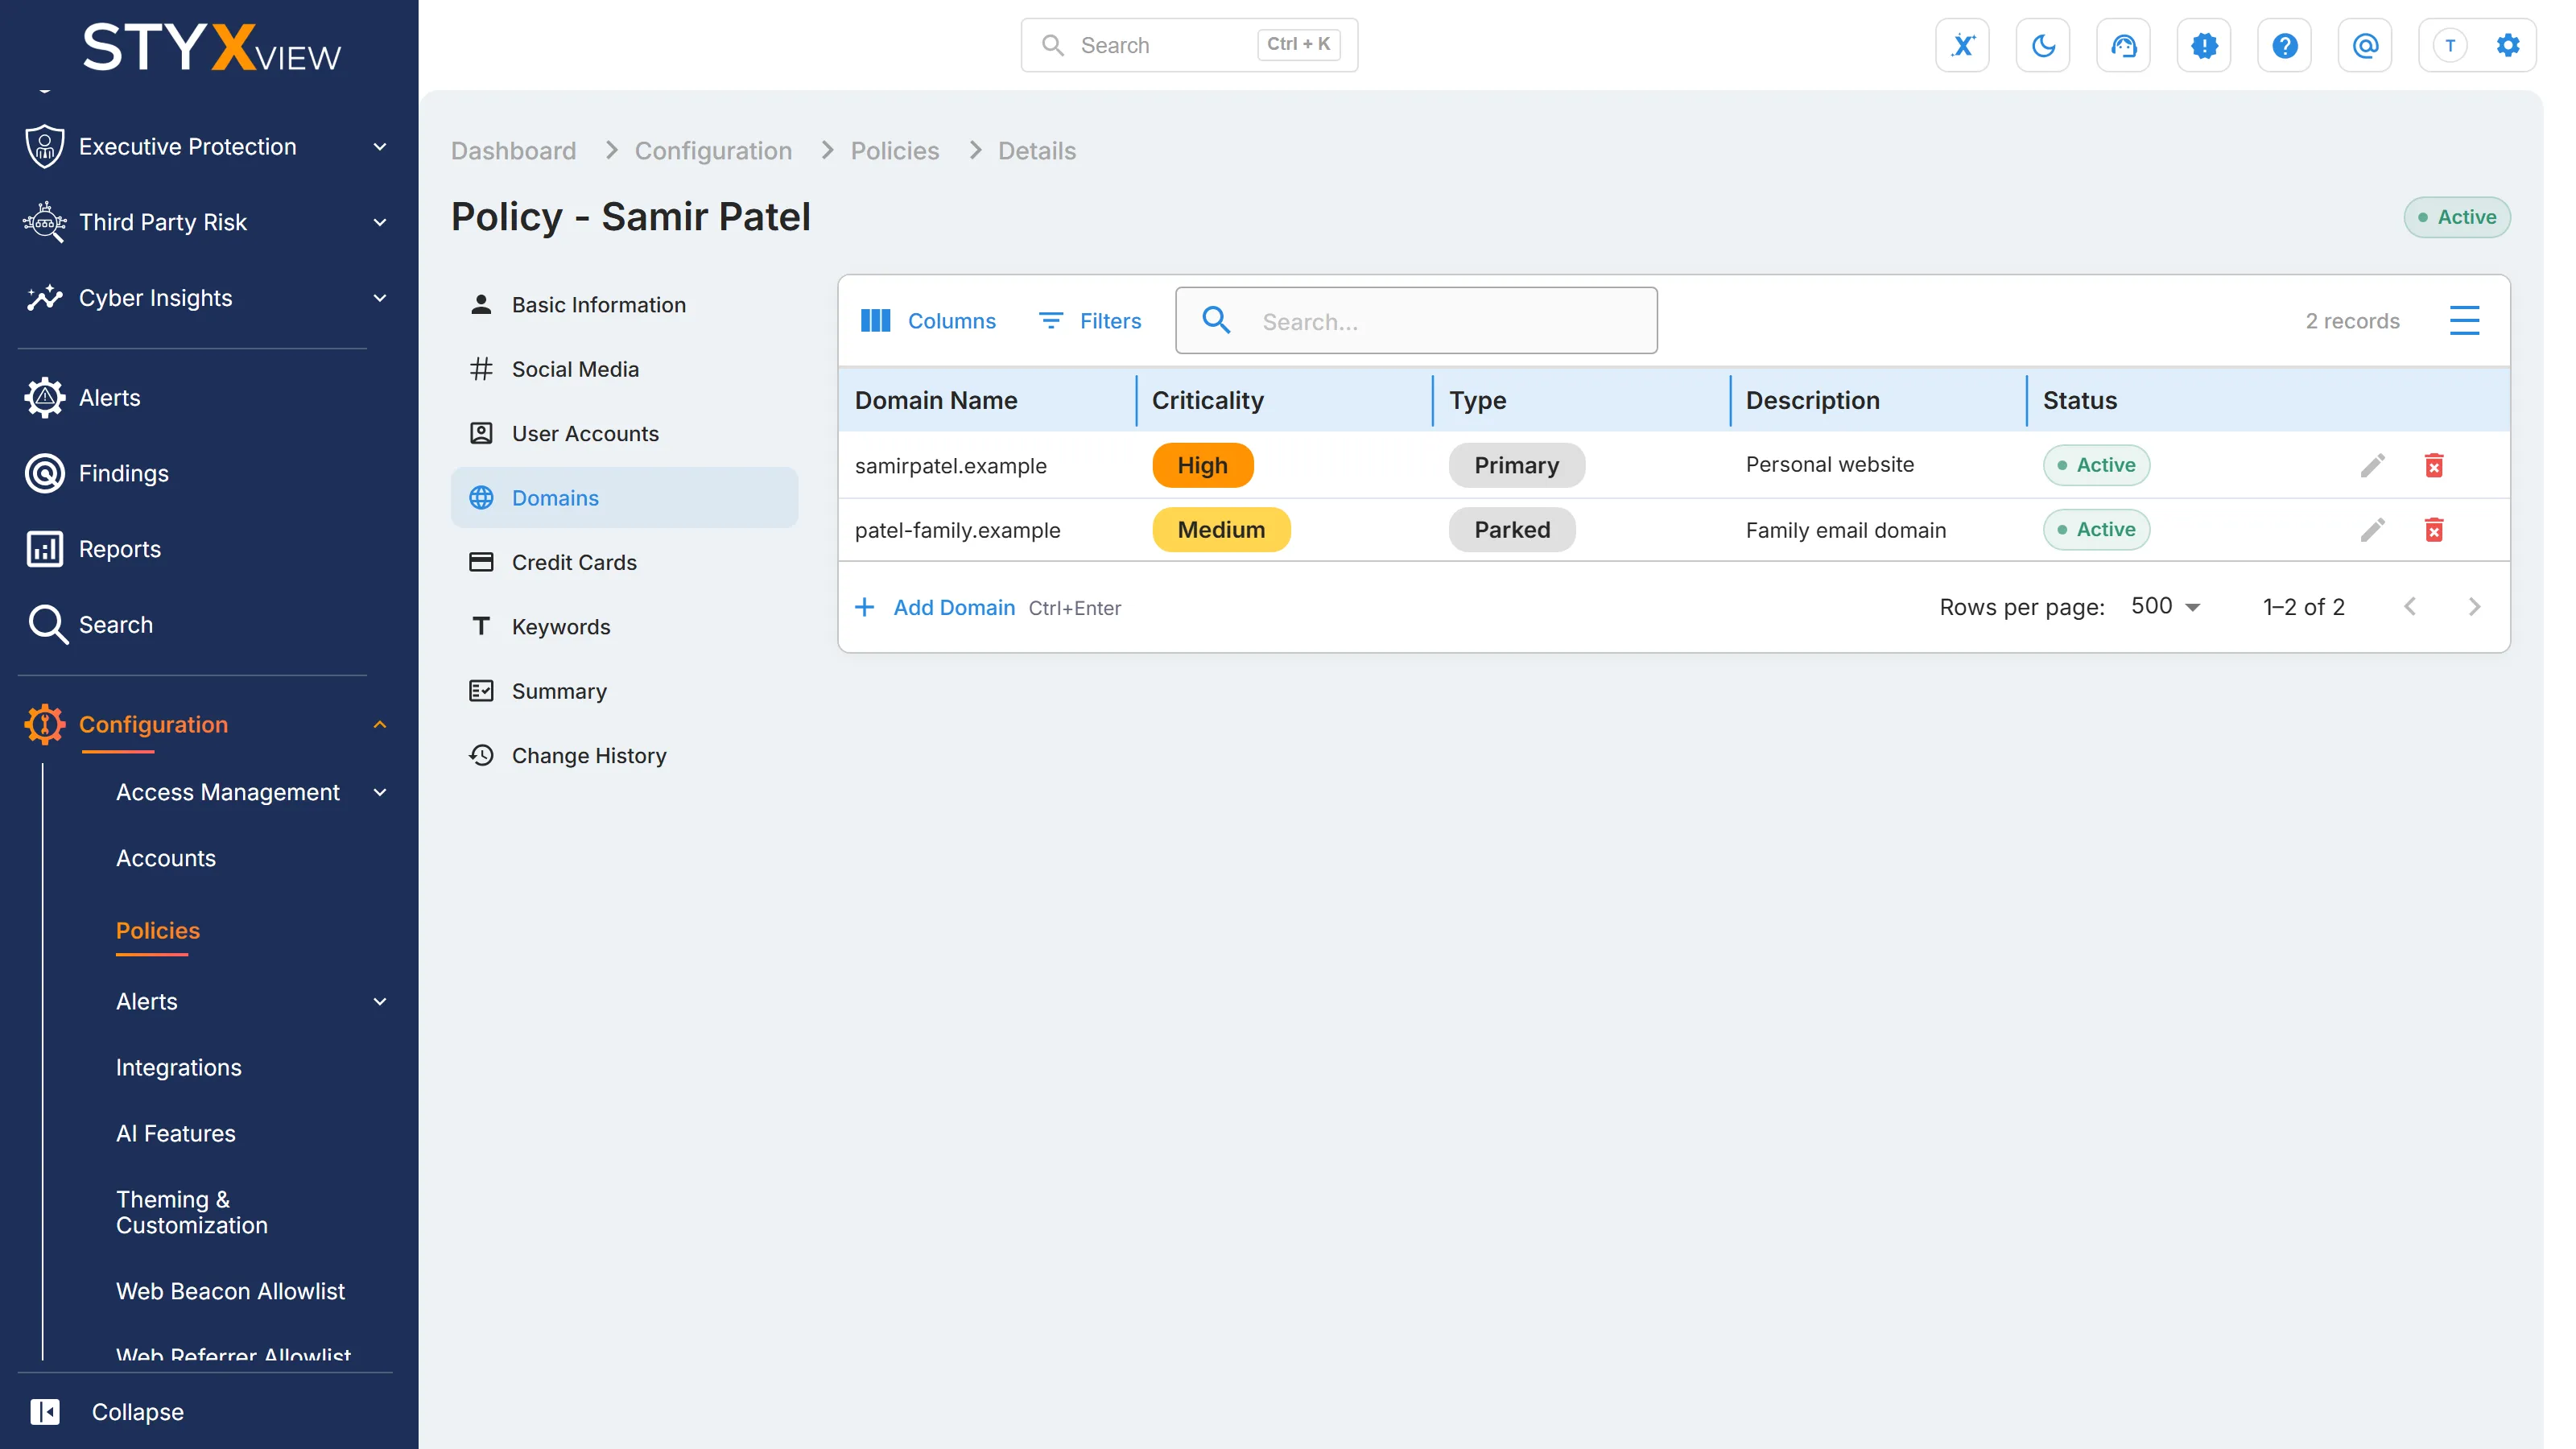
Section titled “Domains”Add with "Add Domain".
- "Domain Name" (required).
- "Criticality" (required).
- "Type" (required): "Primary", "Secondary", or "Parked".
- "Description".
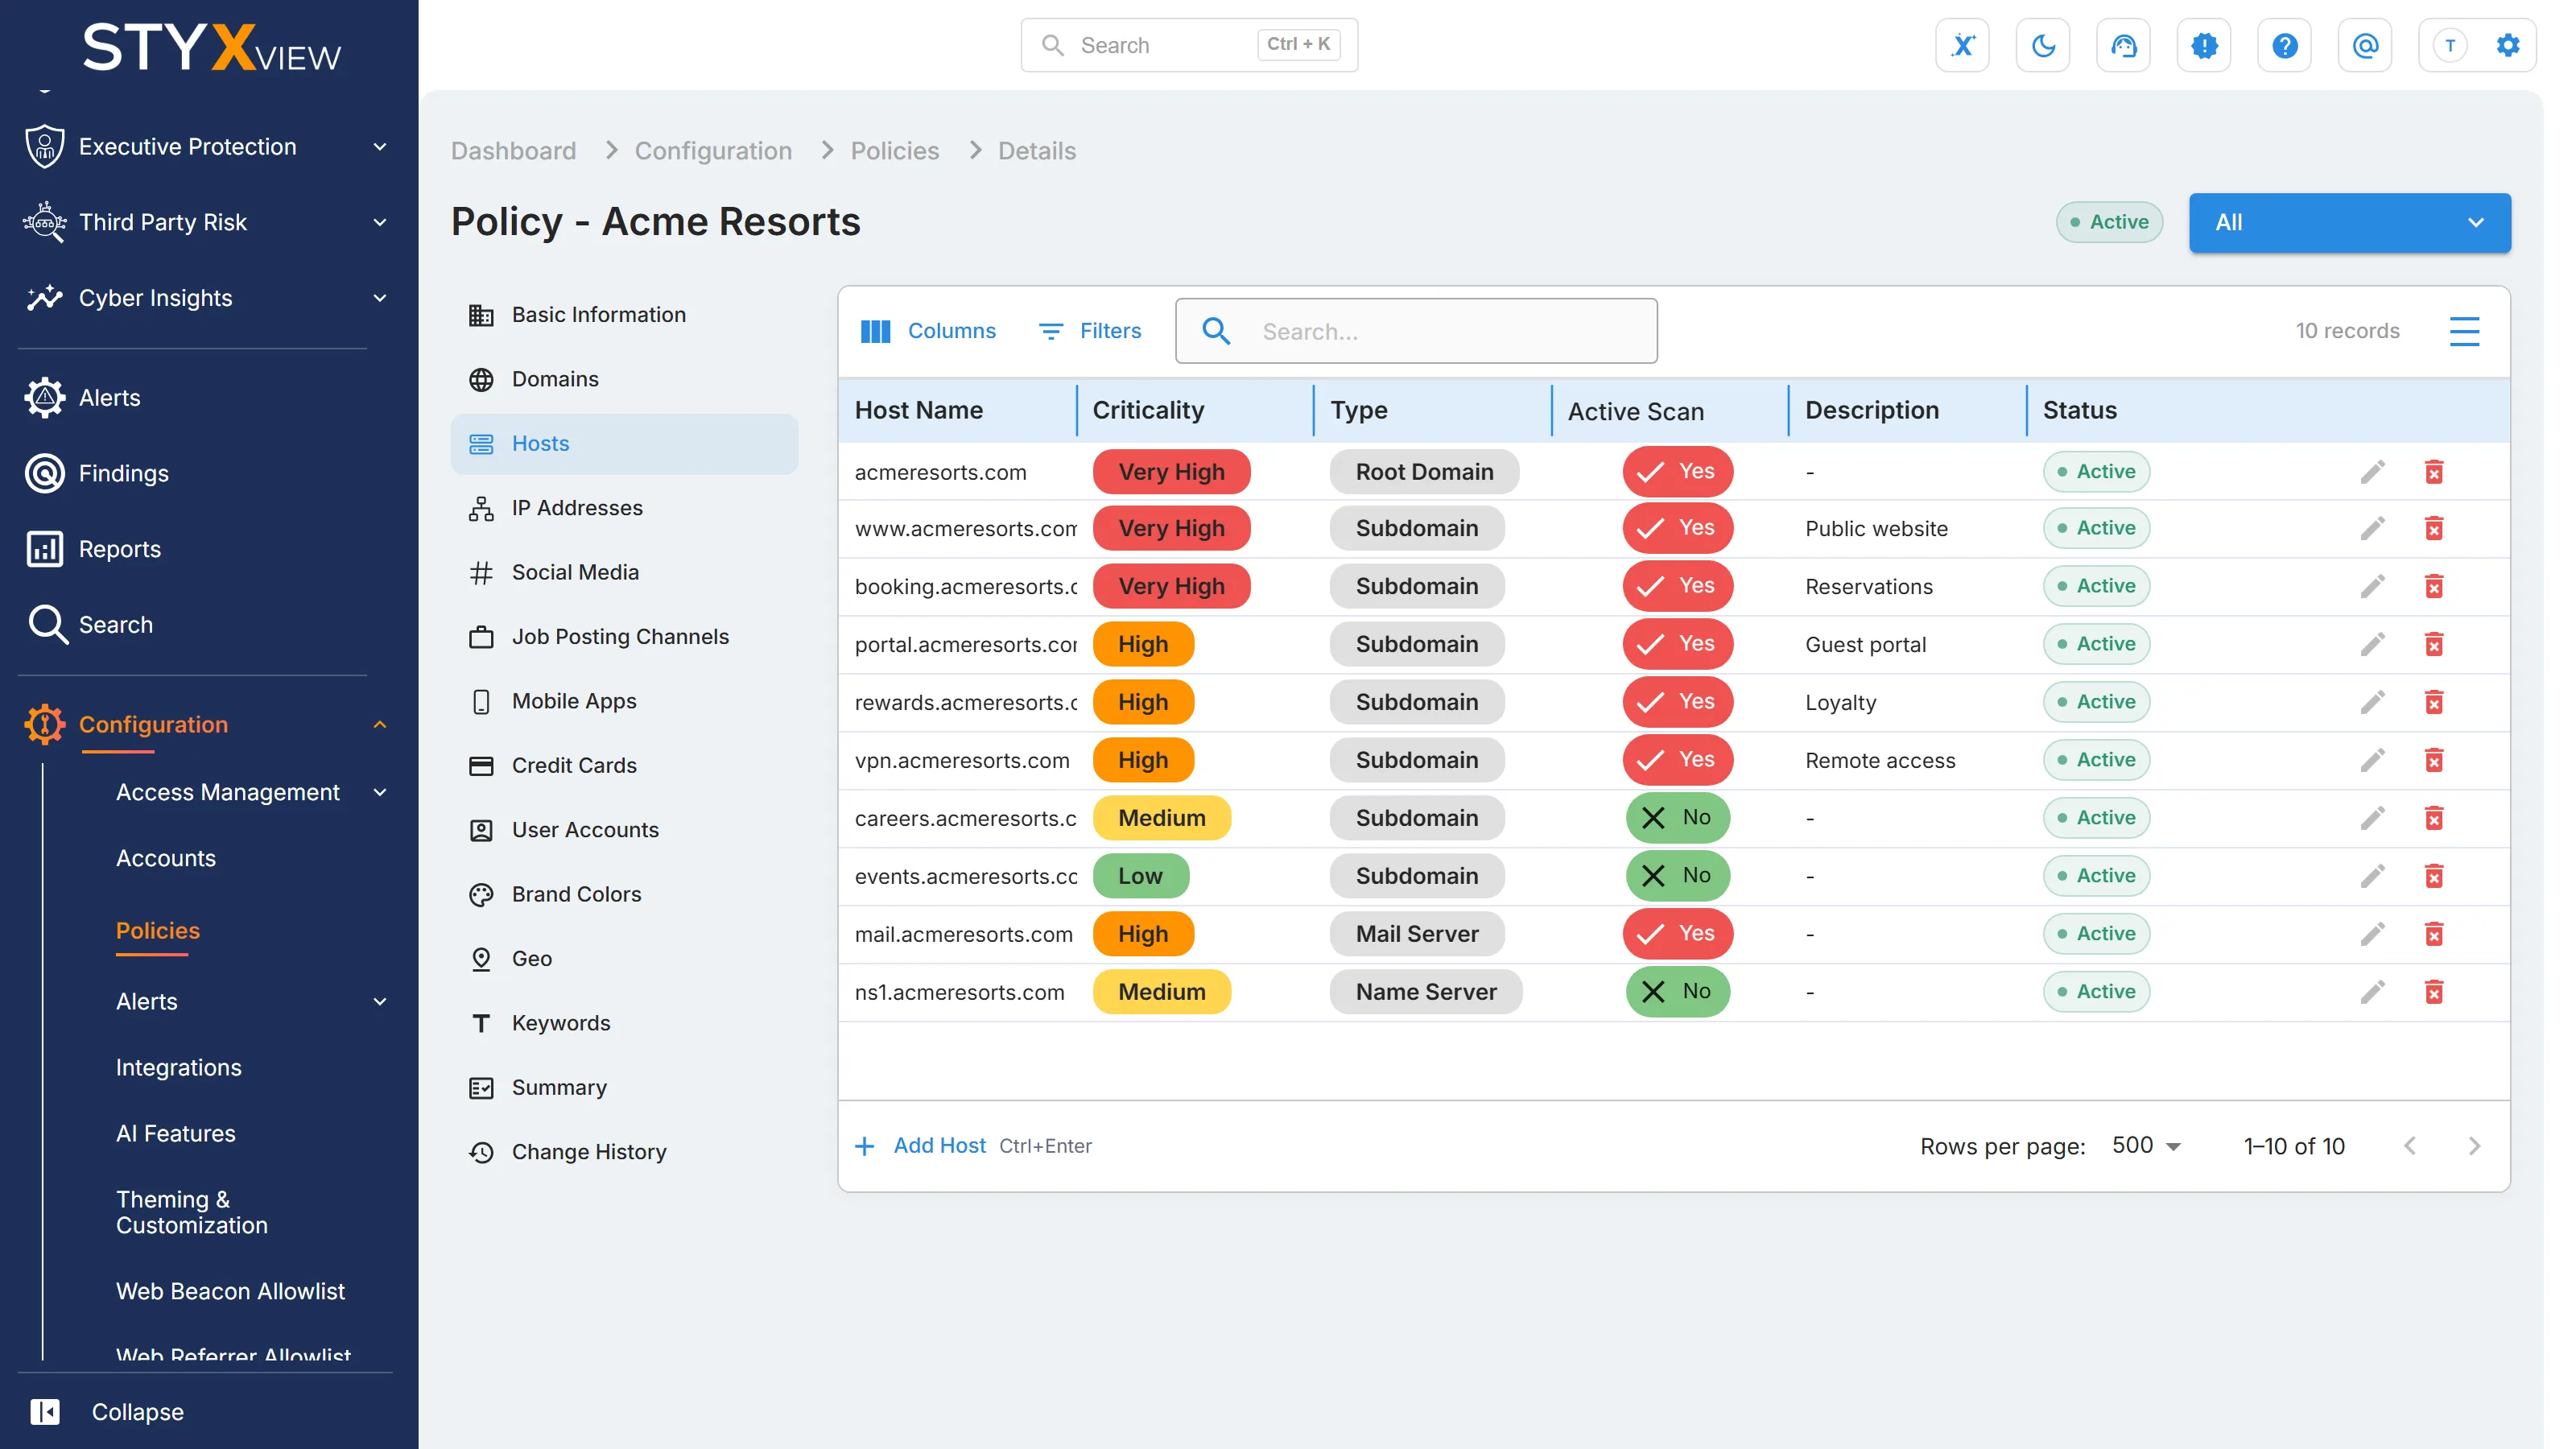
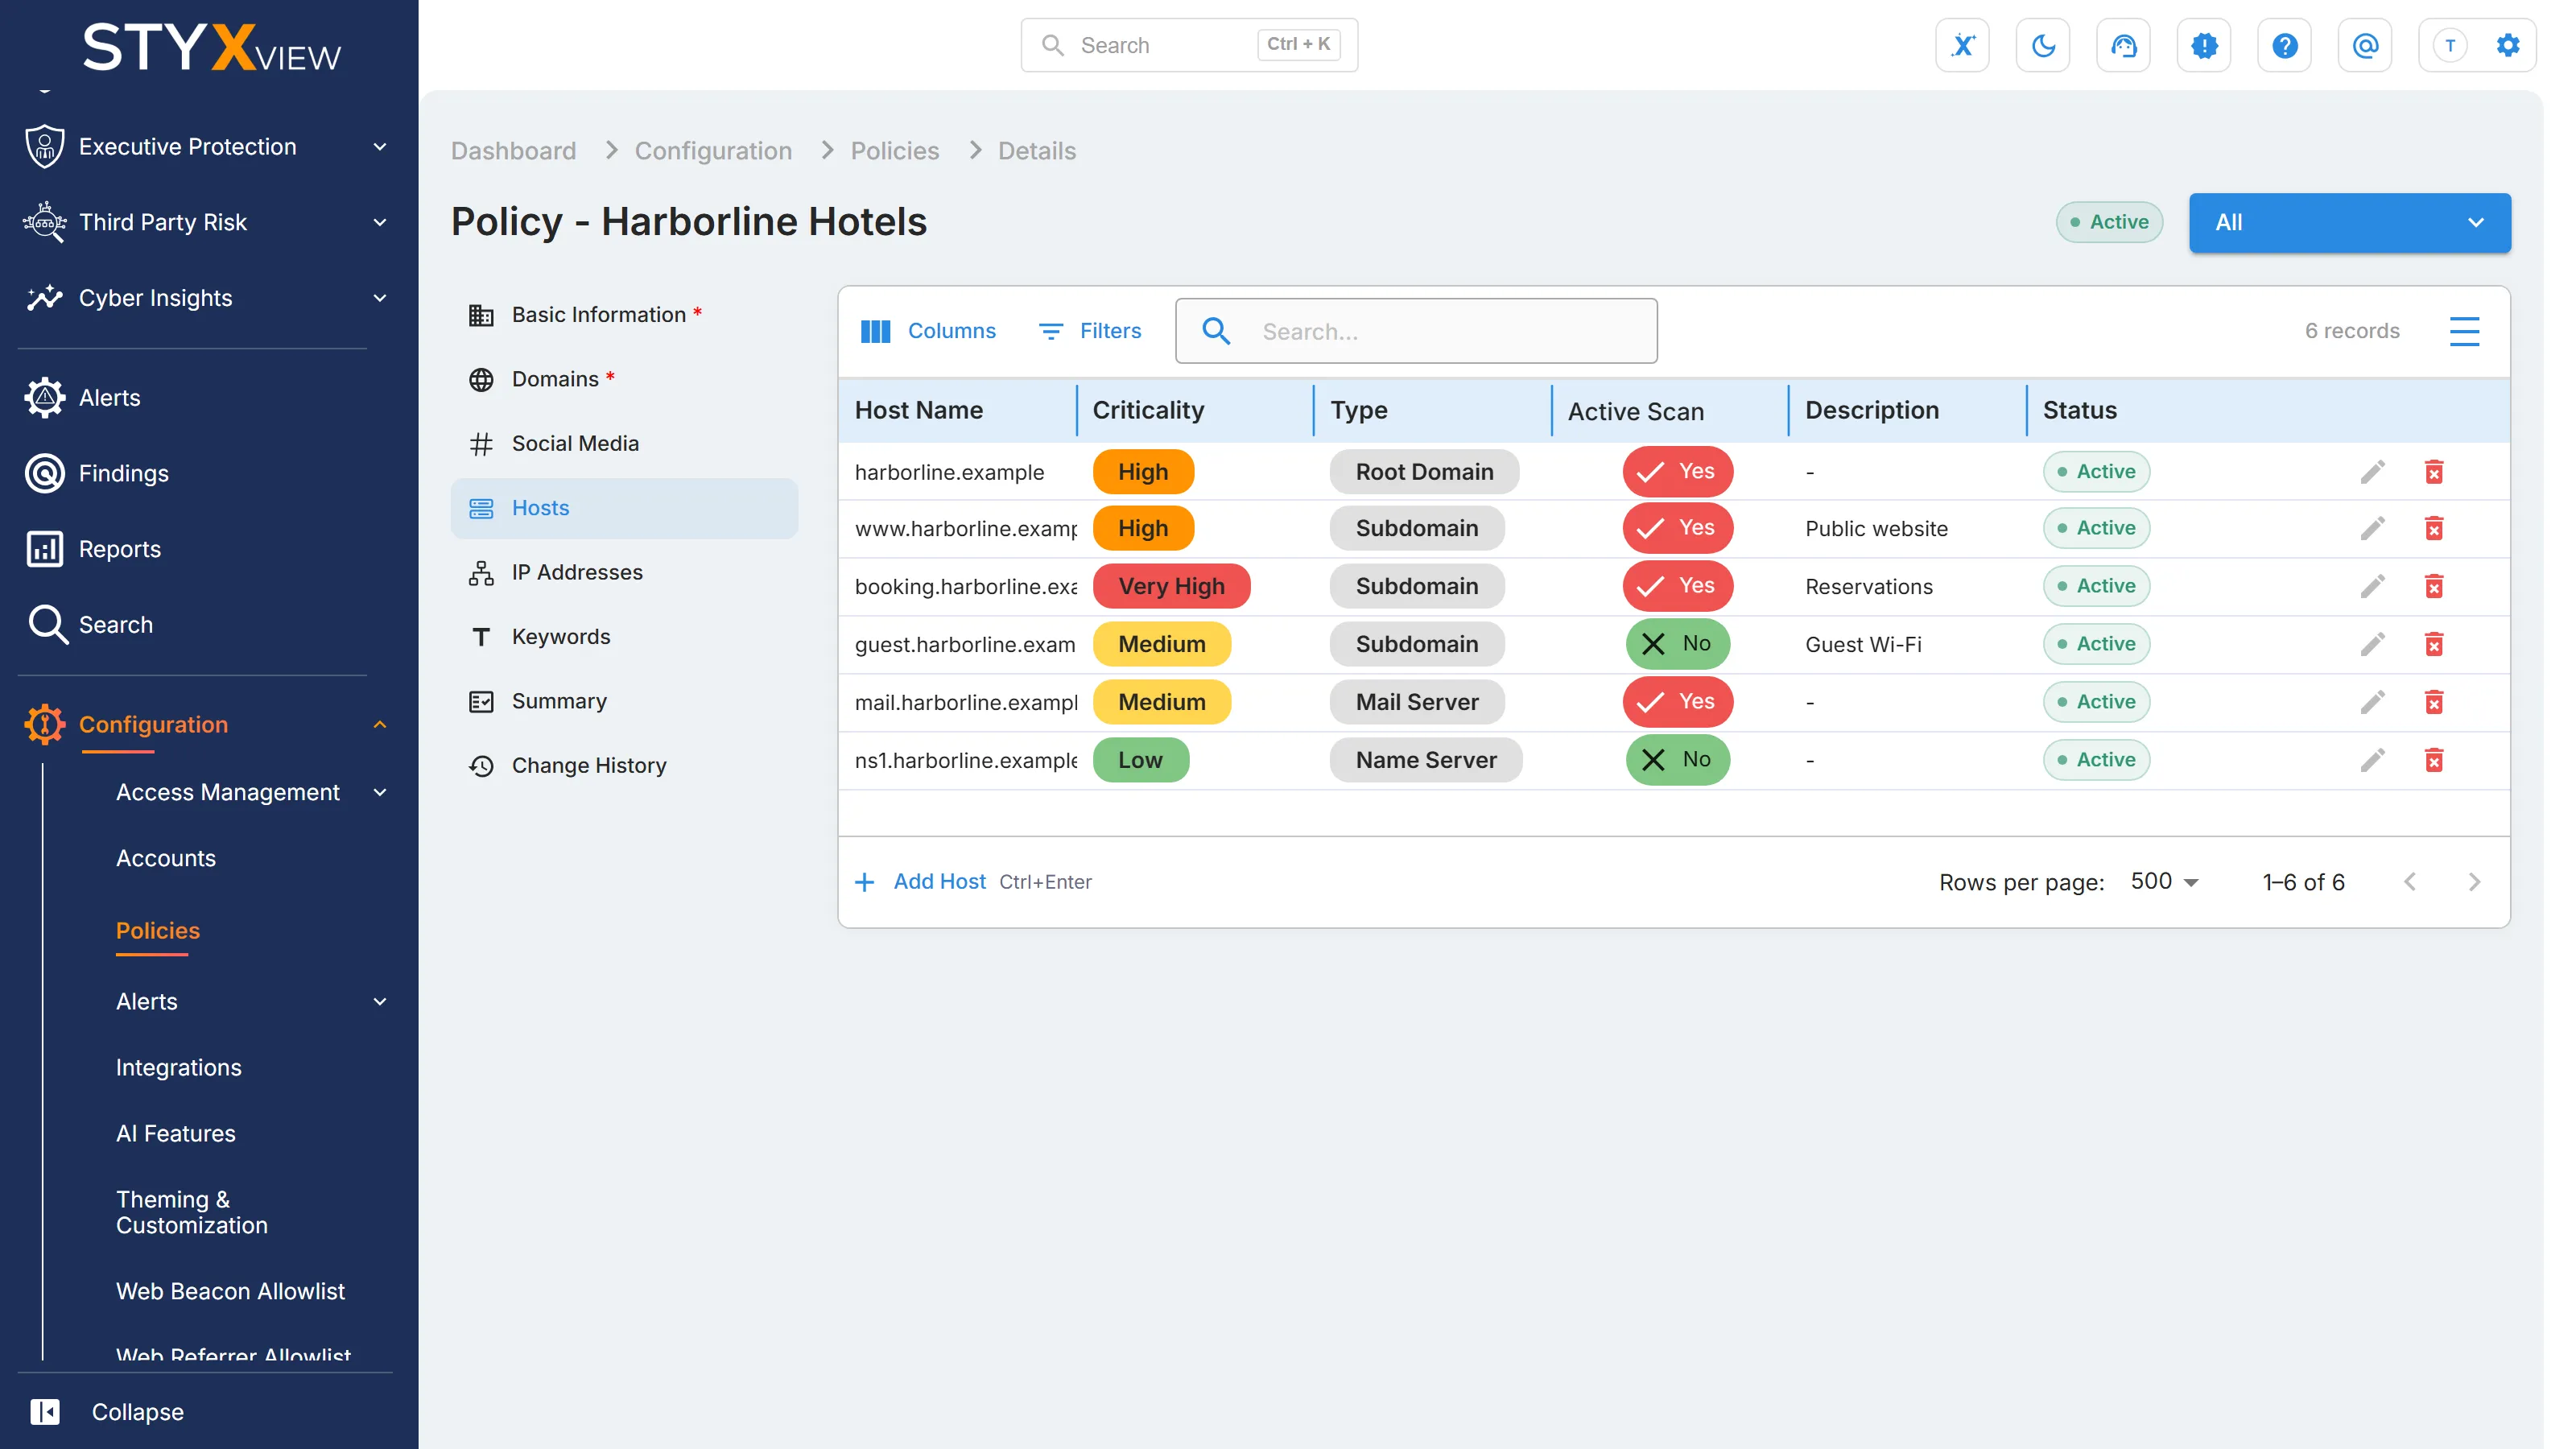
Add with "Add Host".
- "Host Name" (required).
- "Criticality" (required).
- "Type" (required): "Subdomain", "Root Domain", "Name Server", "Mail Server", or "SaaS Application".
- "Active Scan": select it to include the host in StyxView's periodic active scans.
- "Description".
IP Addresses
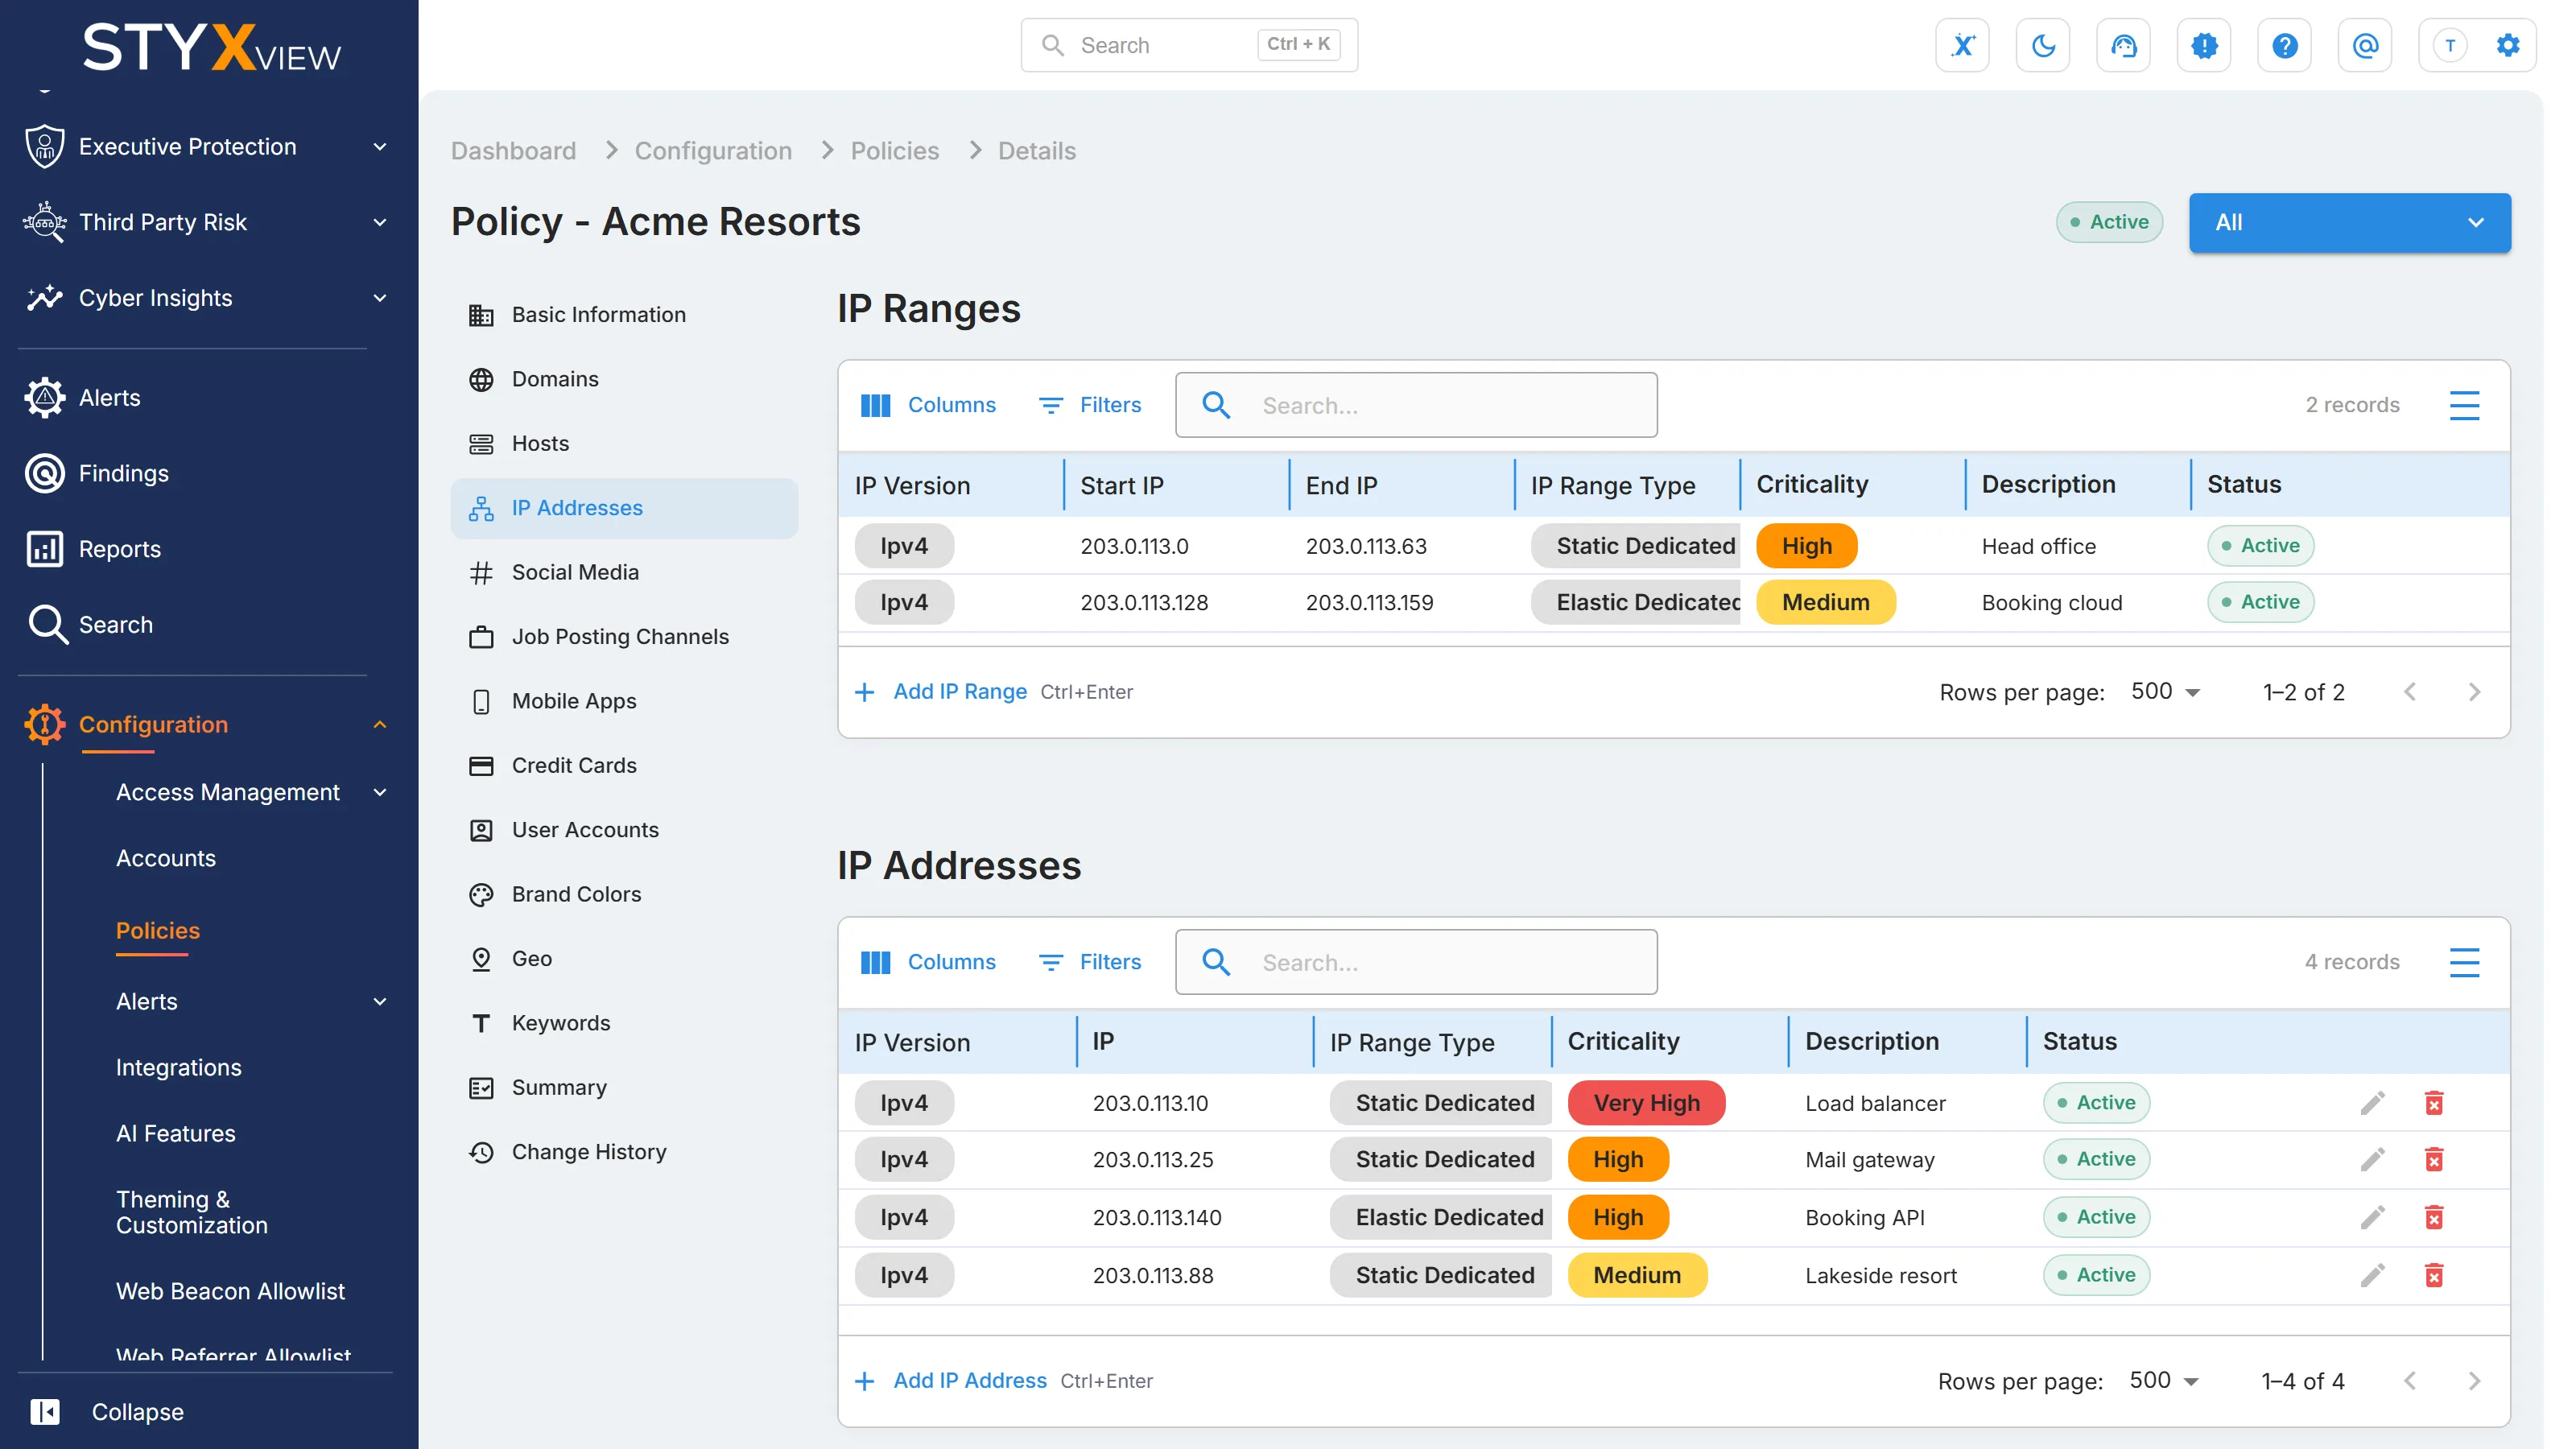
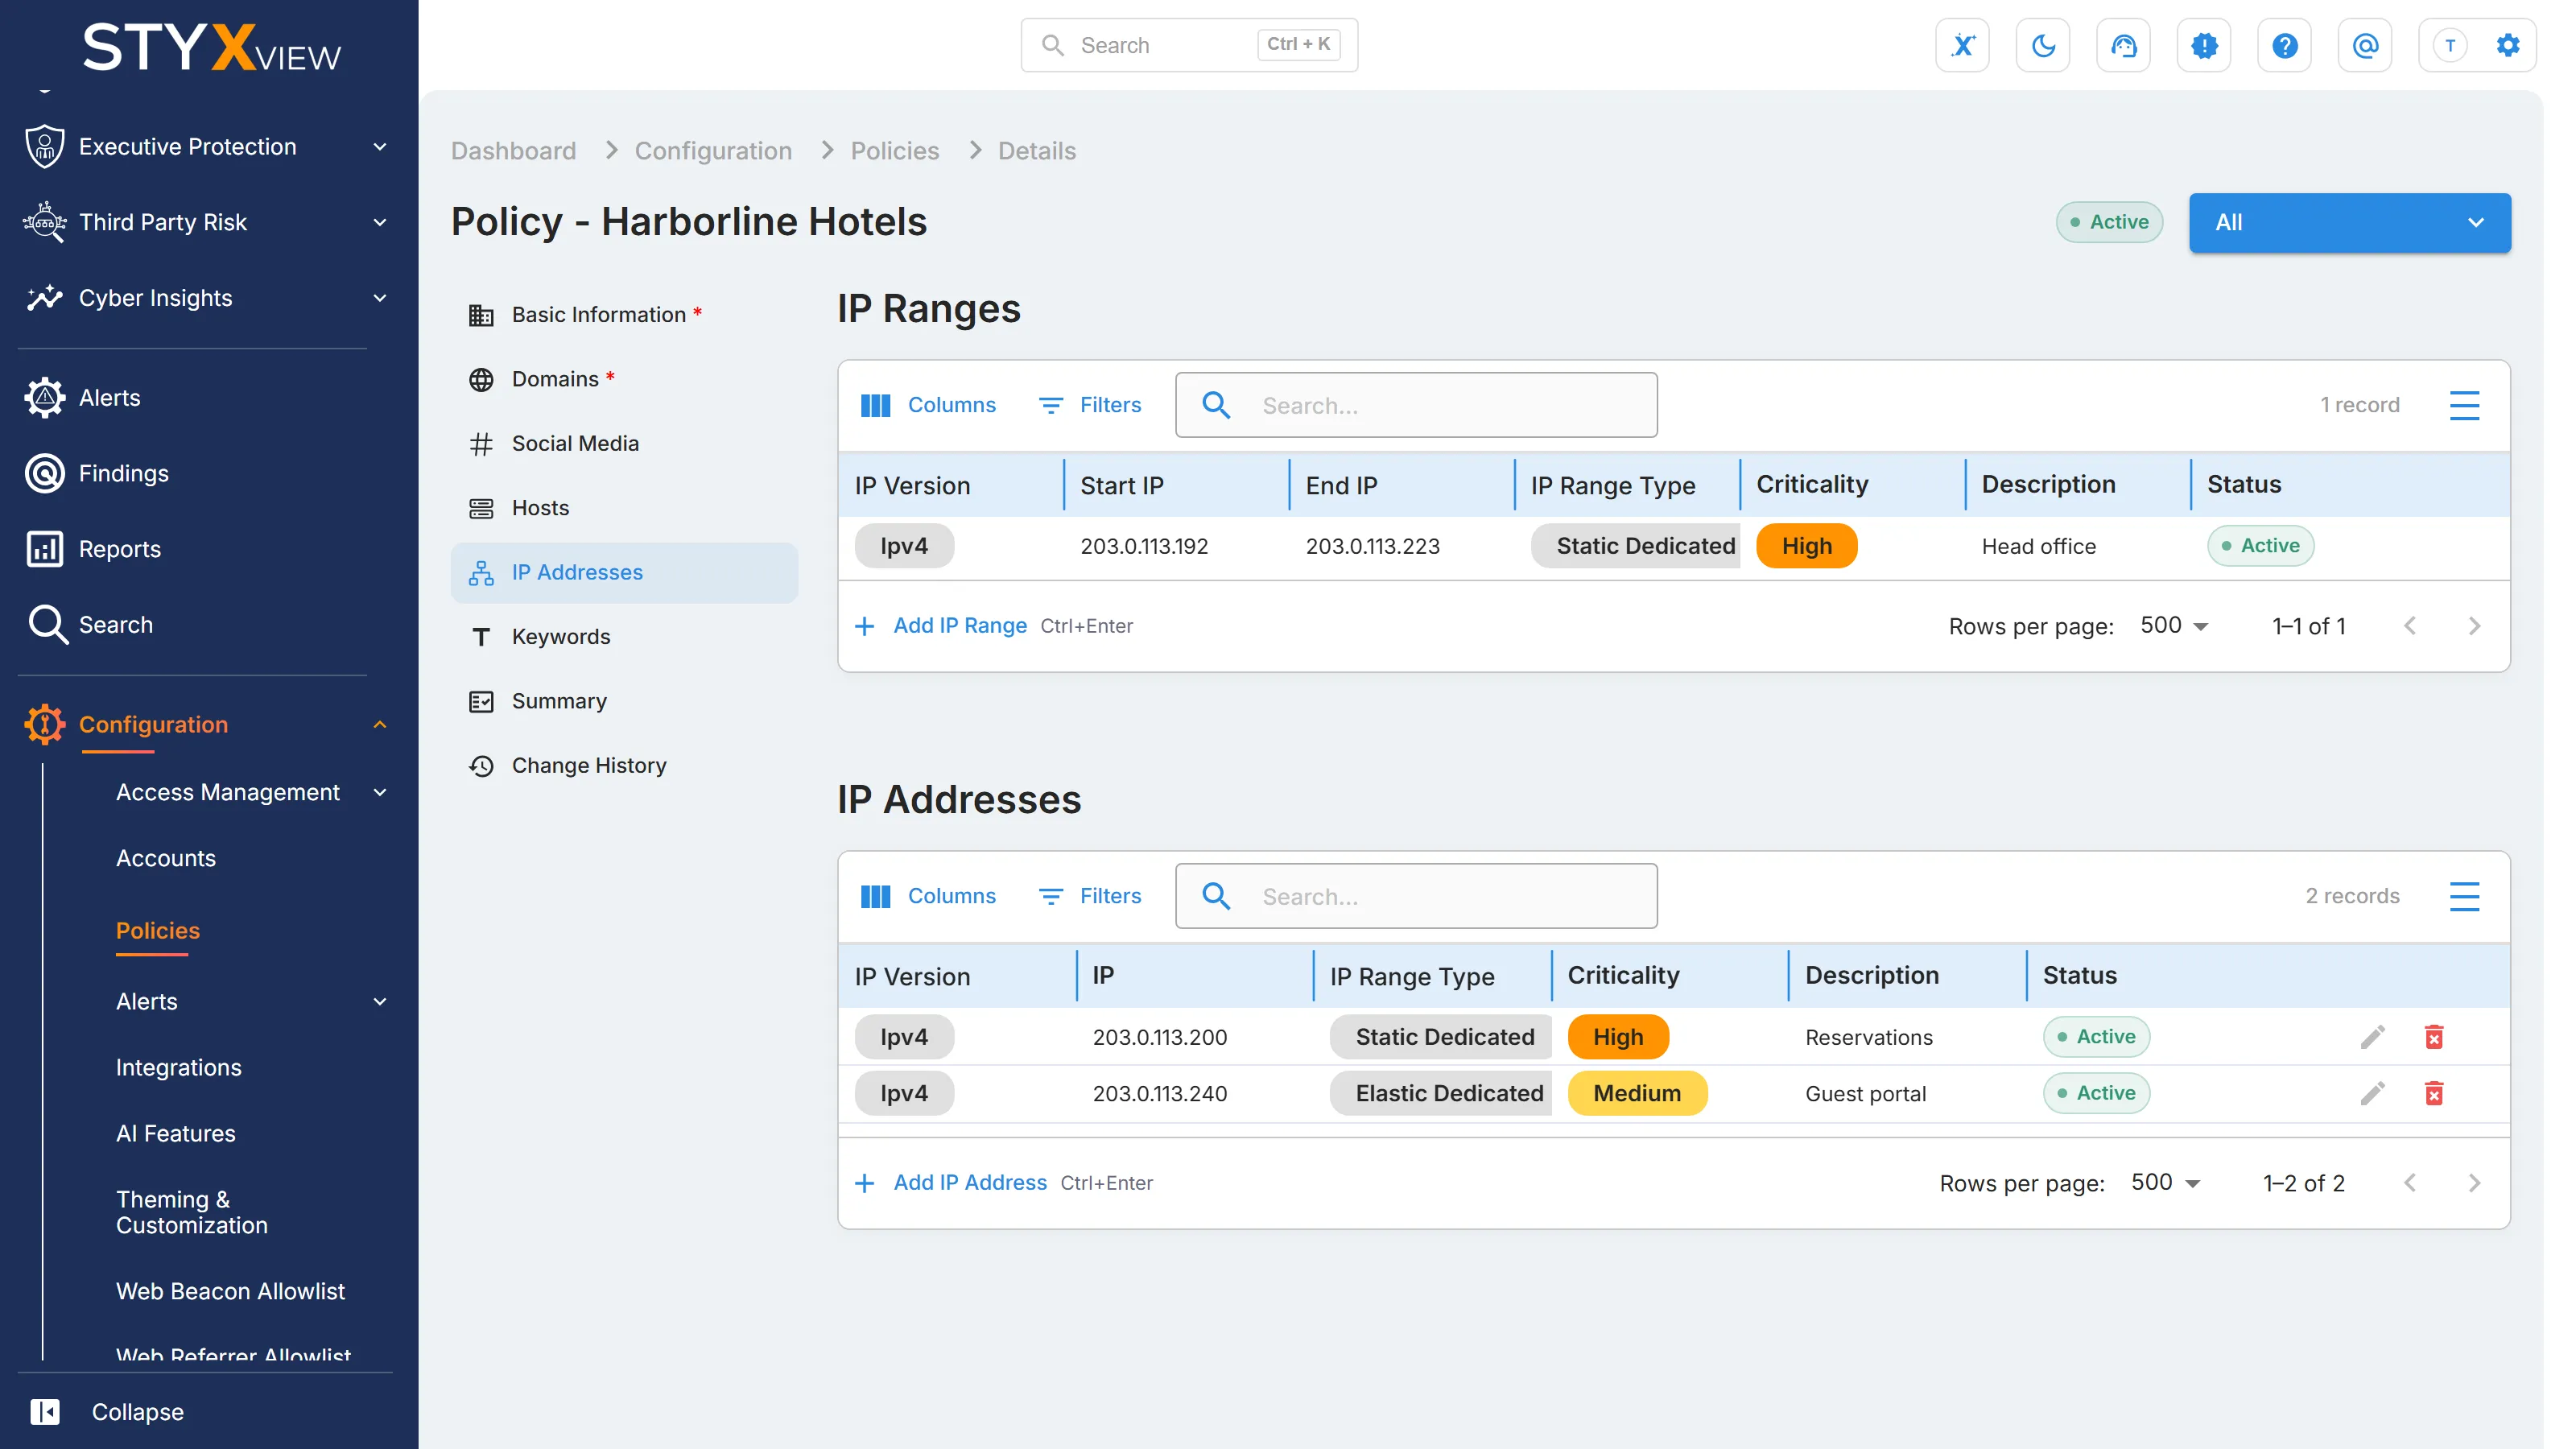
Section titled “IP Addresses”The section has two tables. Add a range of addresses to "IP Ranges" with "Add IP Range", and a single address to "IP Addresses" with "Add IP Address".
- "IP Version" (required): "IPv4" or "IPv6".
- "Start IP" and "End IP" (required, ranges only), or "IP" (required, single addresses only).
- "IP Range Type" (required): "Static Dedicated" or "Elastic Dedicated".
- "Criticality" (required).
- "Description".
Each address in a range counts separately toward the IP address allowance on Subscriptions.
Social Media
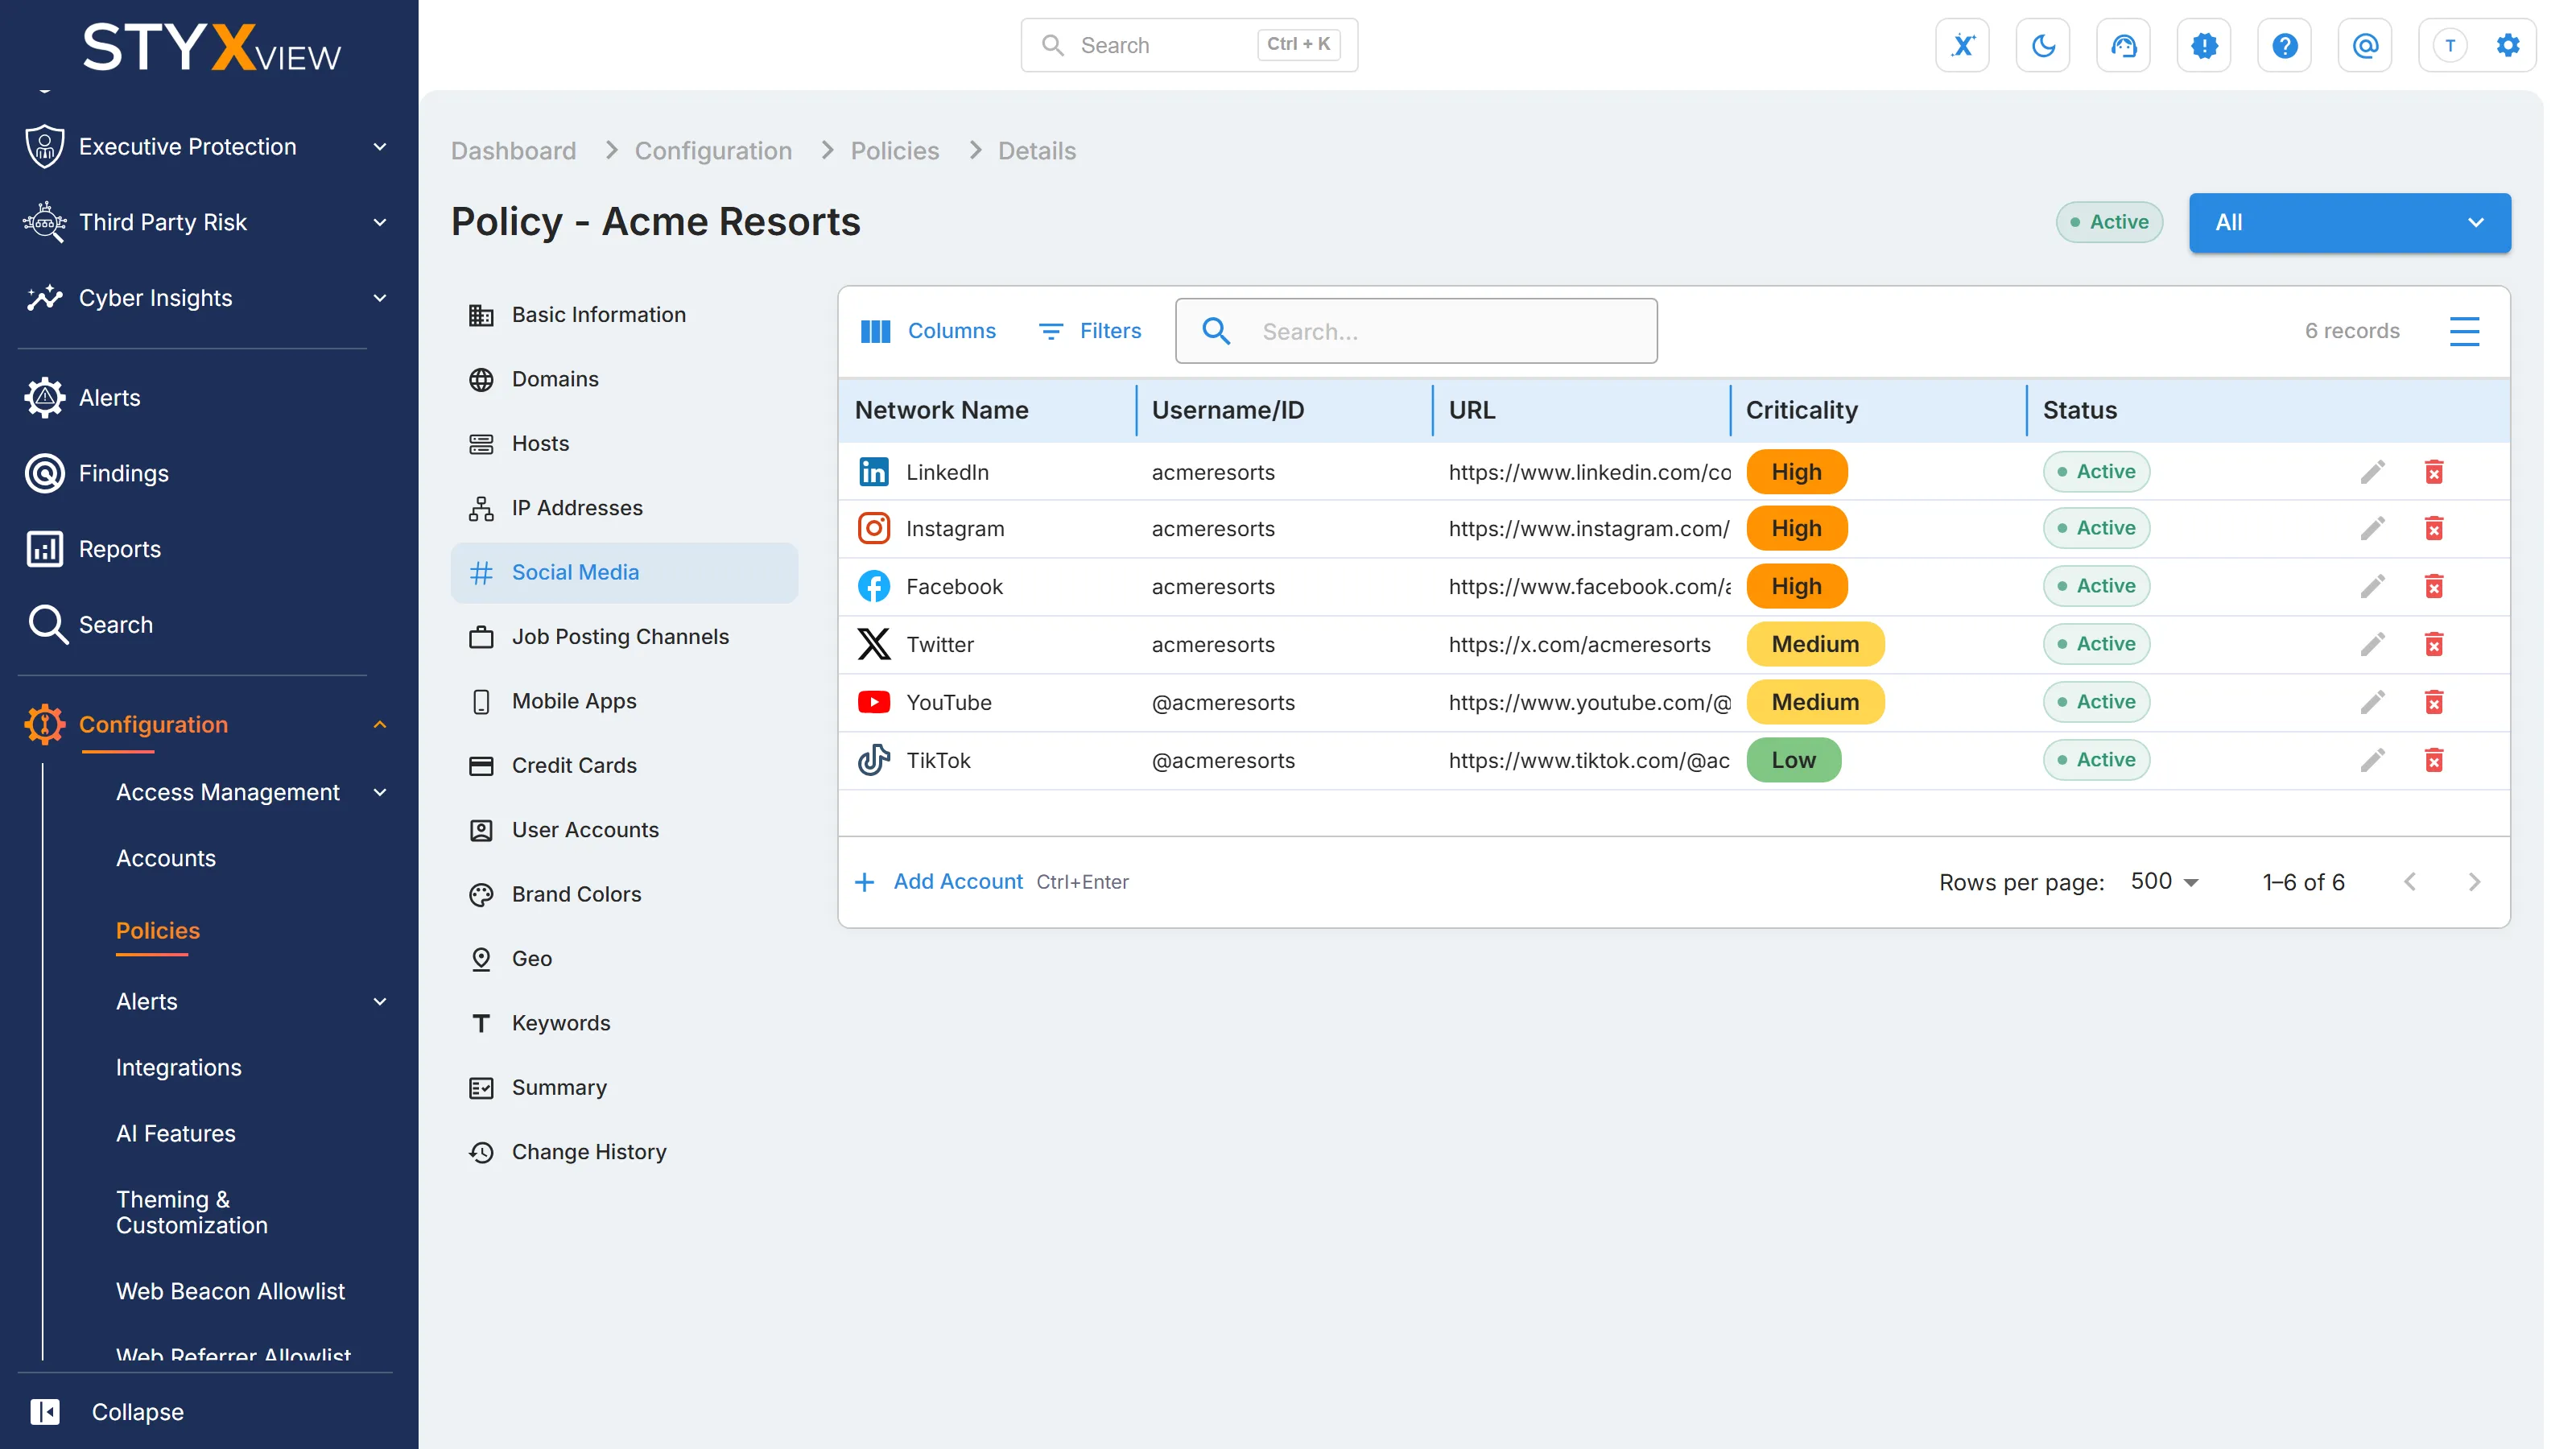
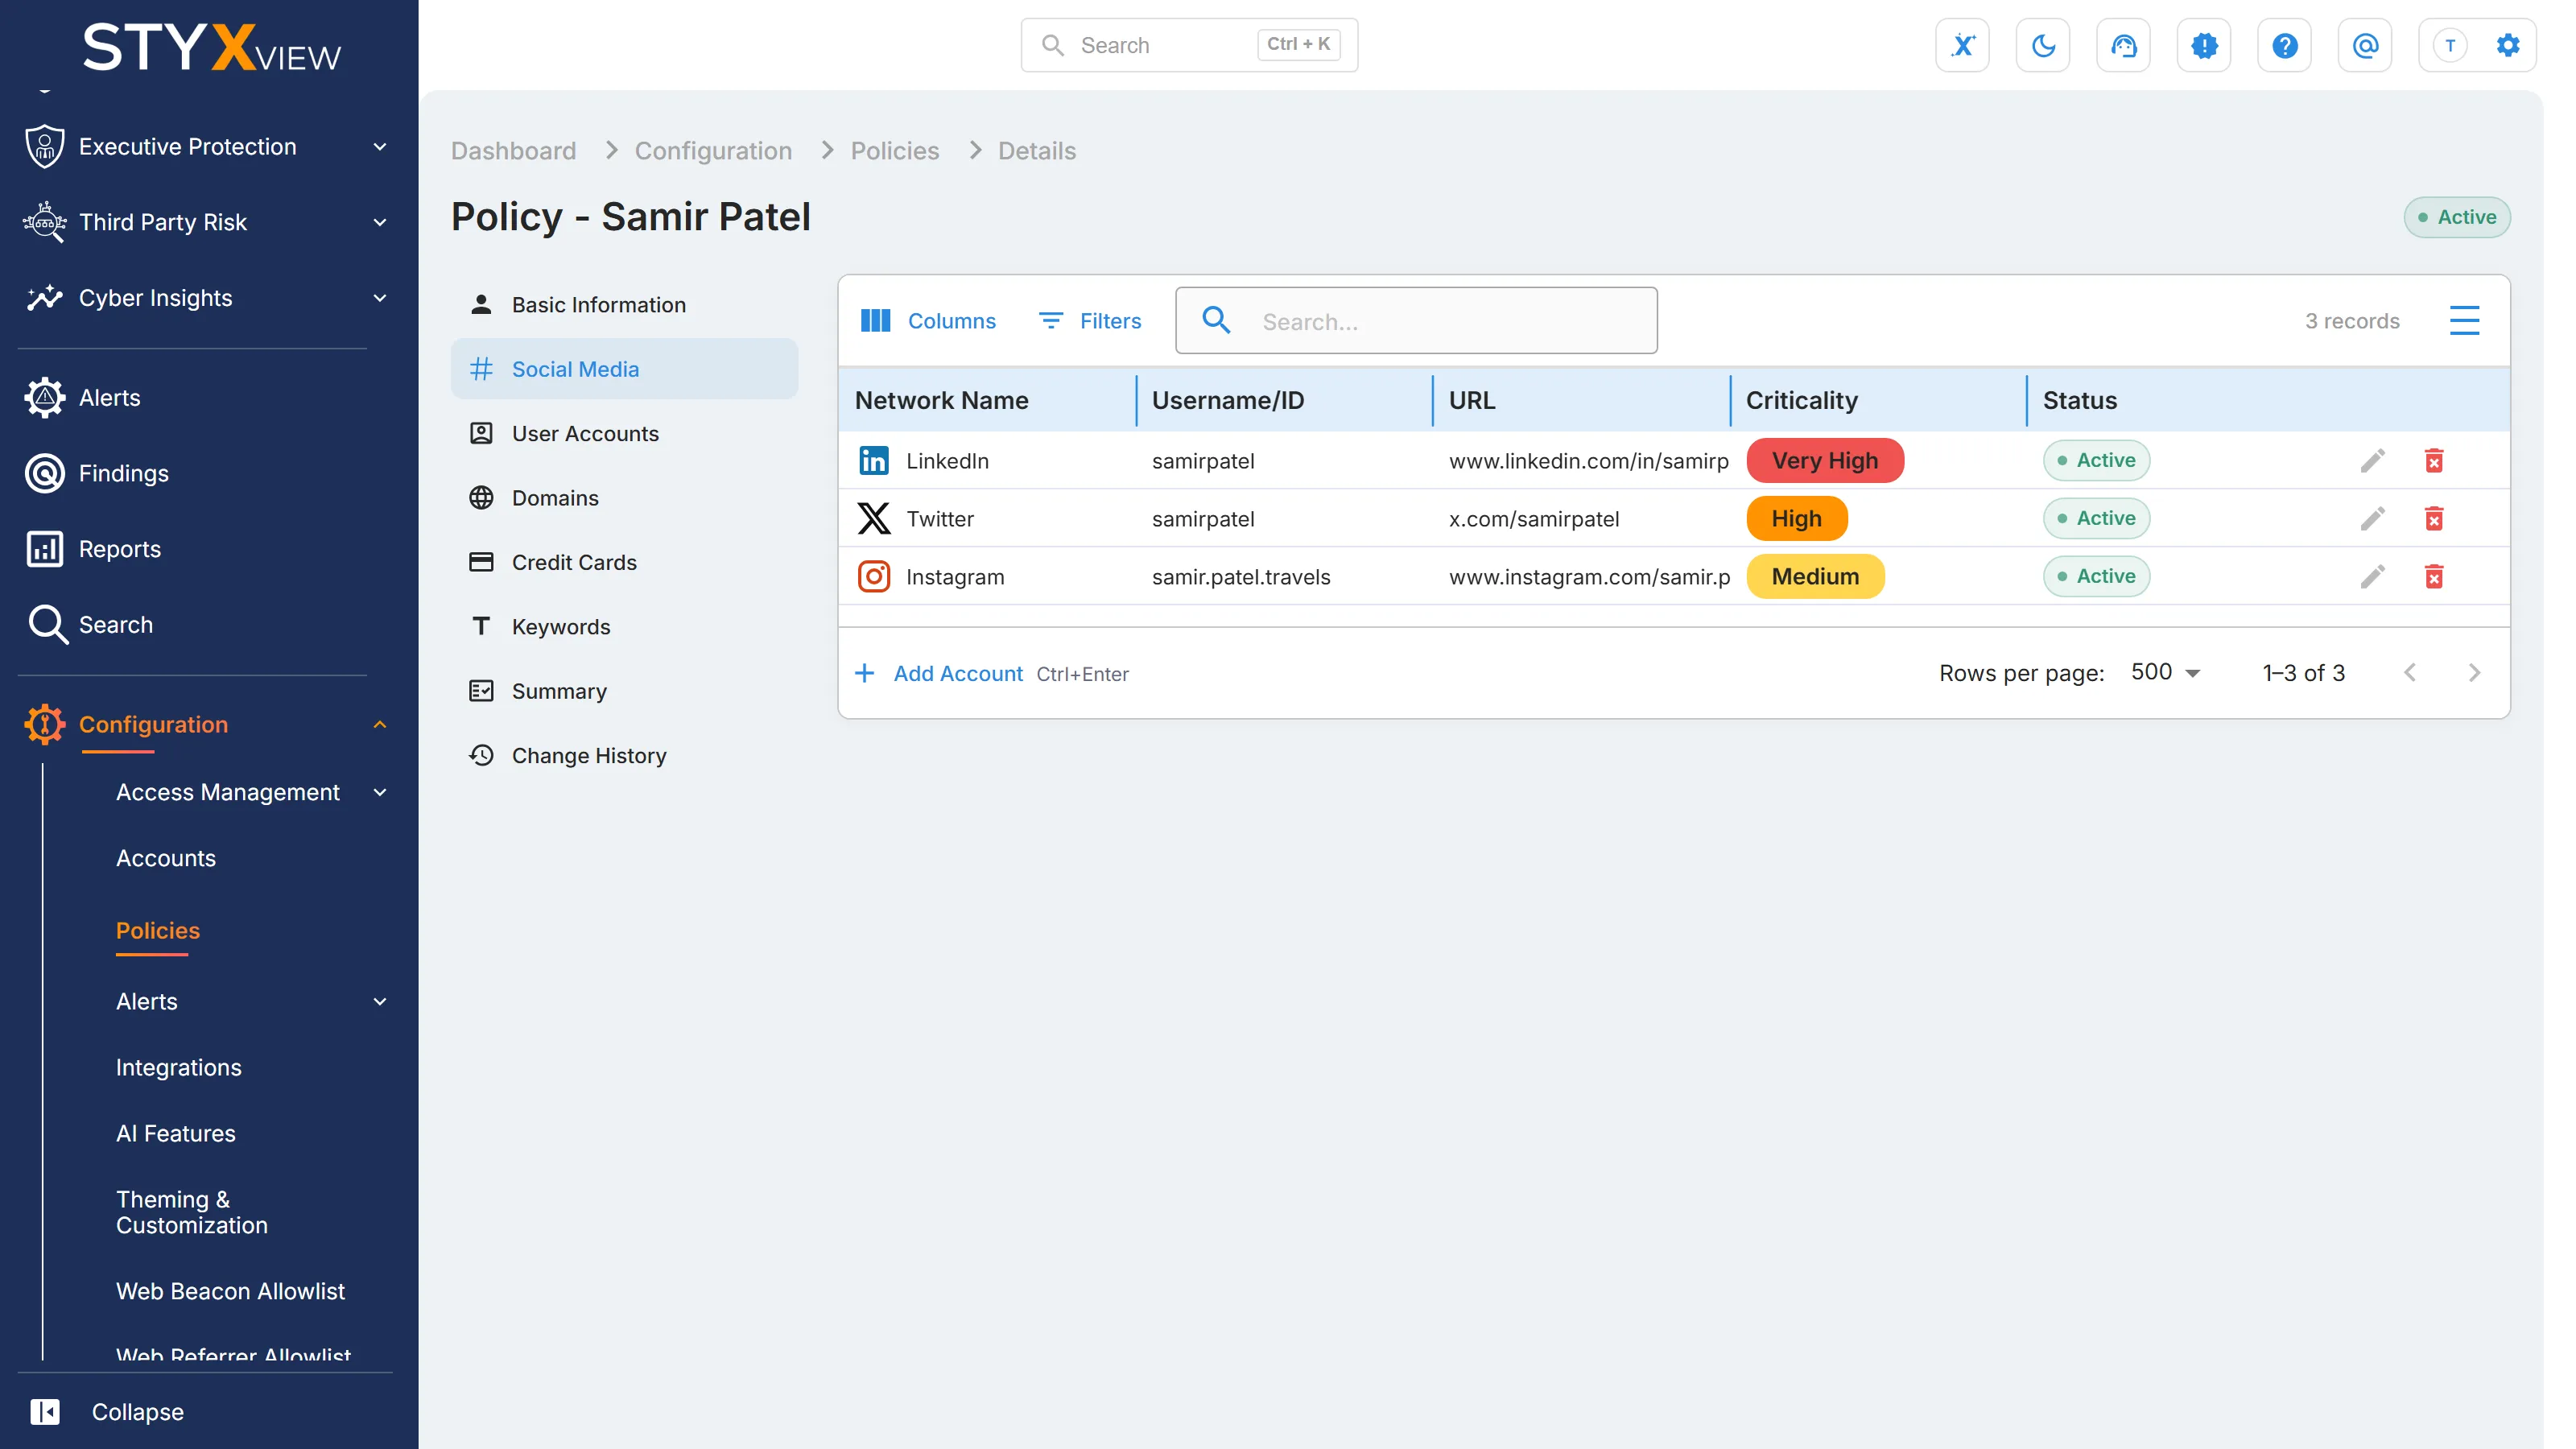
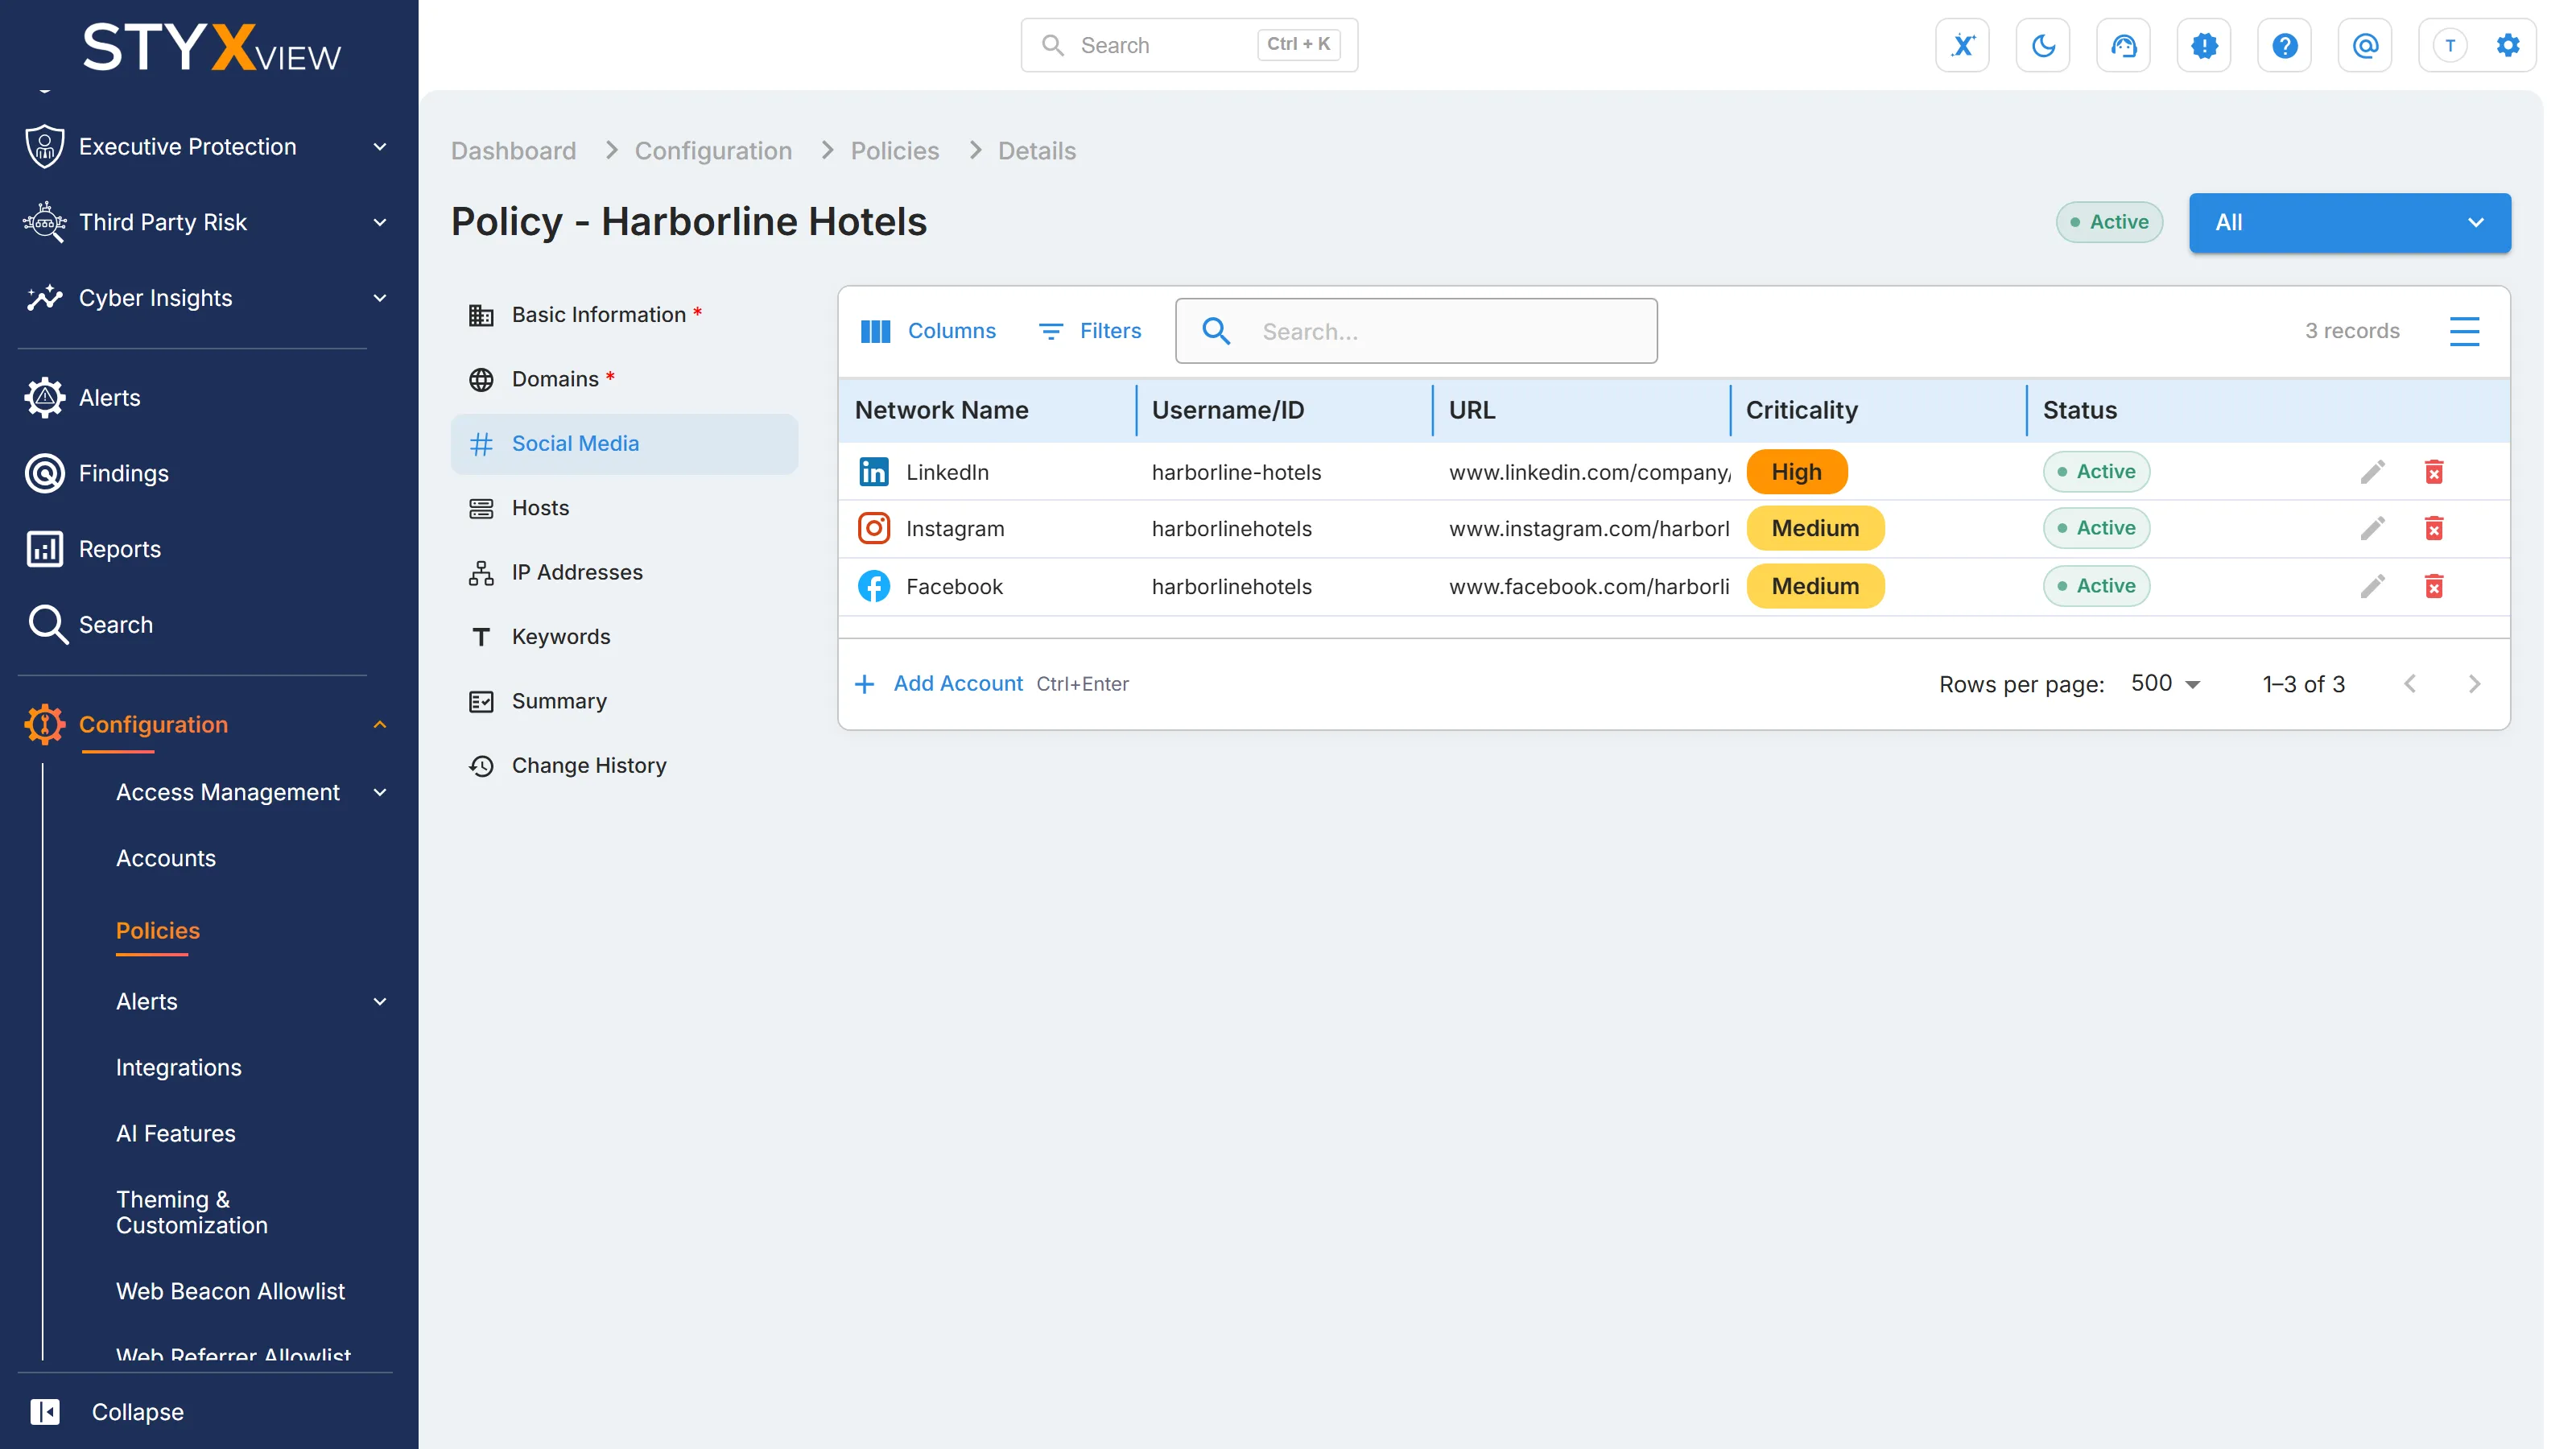
Section titled “Social Media”Add with "Add Account".
- "Network Name" (required): the platform, for example LinkedIn or Instagram.
- "Username/ID" (required): up to 50 characters.
- "URL" (required): the profile address.
- "Criticality" (required).
Job Posting Channels
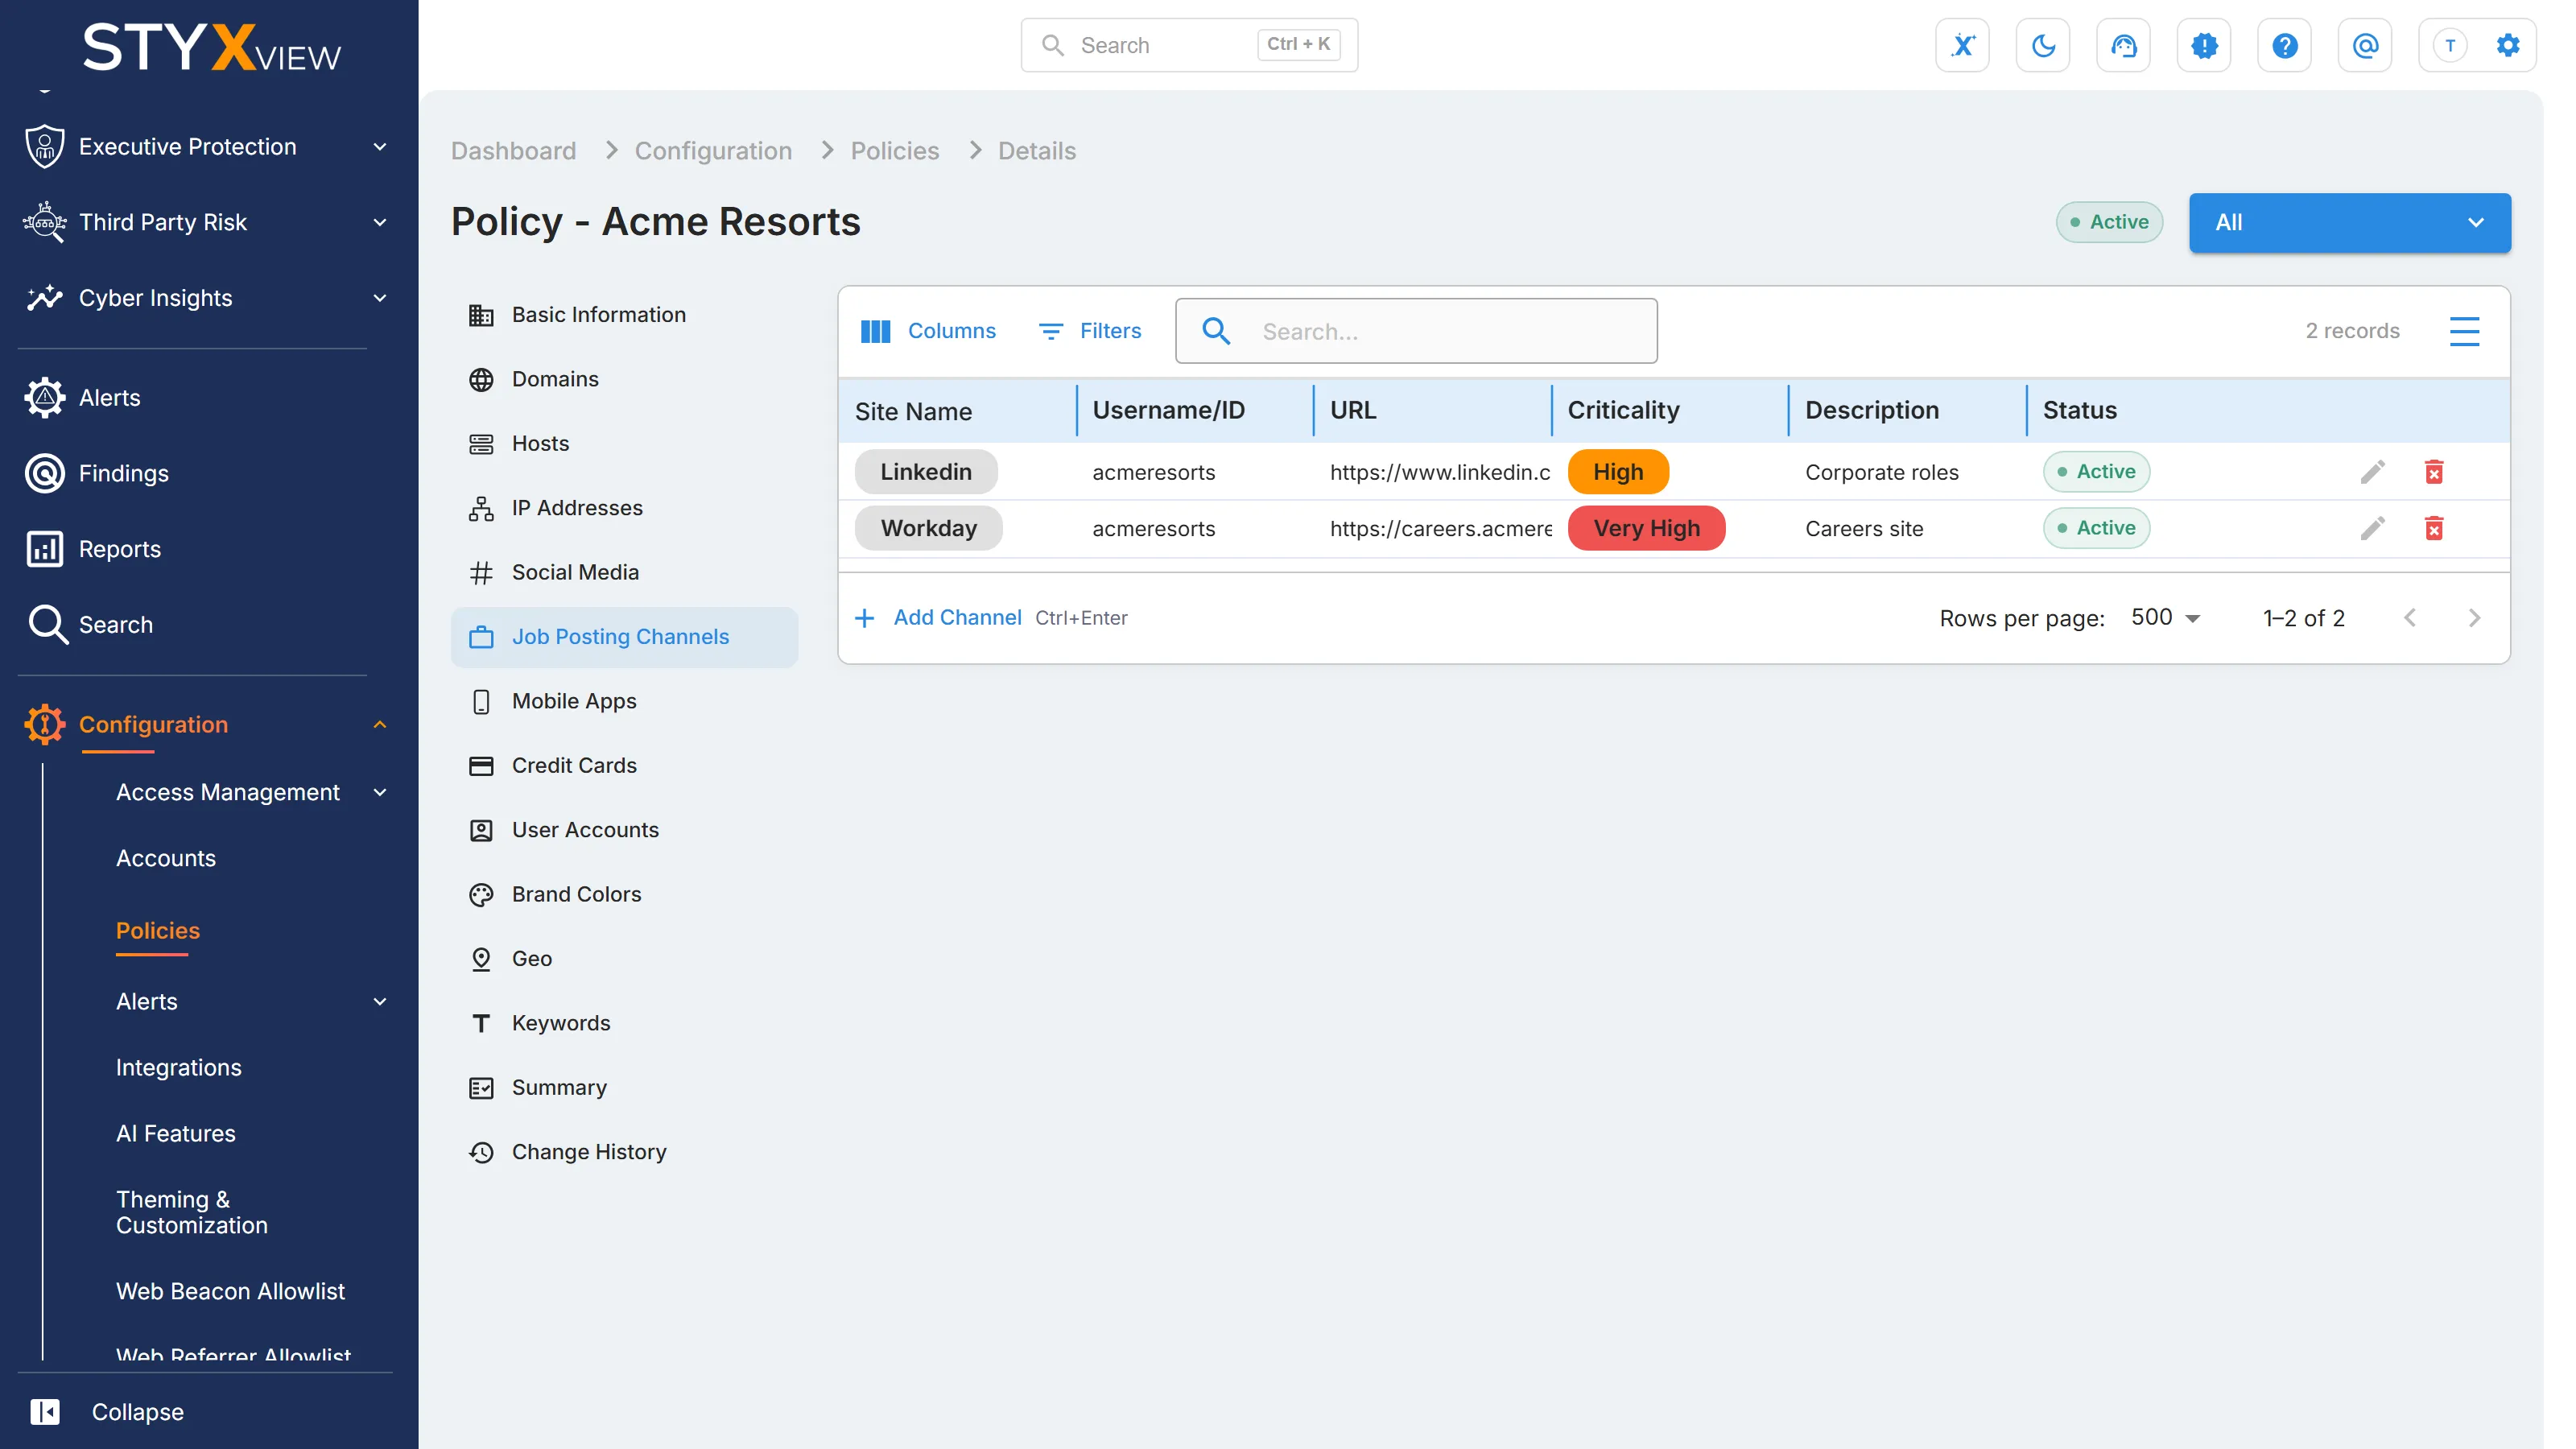
Section titled “Job Posting Channels”The accounts where your organisation posts jobs. Add with "Add Channel".
- "Site Name" (required): "LinkedIn", "Indeed", "Glassdoor", "Monster", "SnagAJob", or "Njoyn".
- "Username/ID" (required): up to 50 characters.
- "URL" (required).
- "Criticality" (required).
- "Description".
Mobile Apps
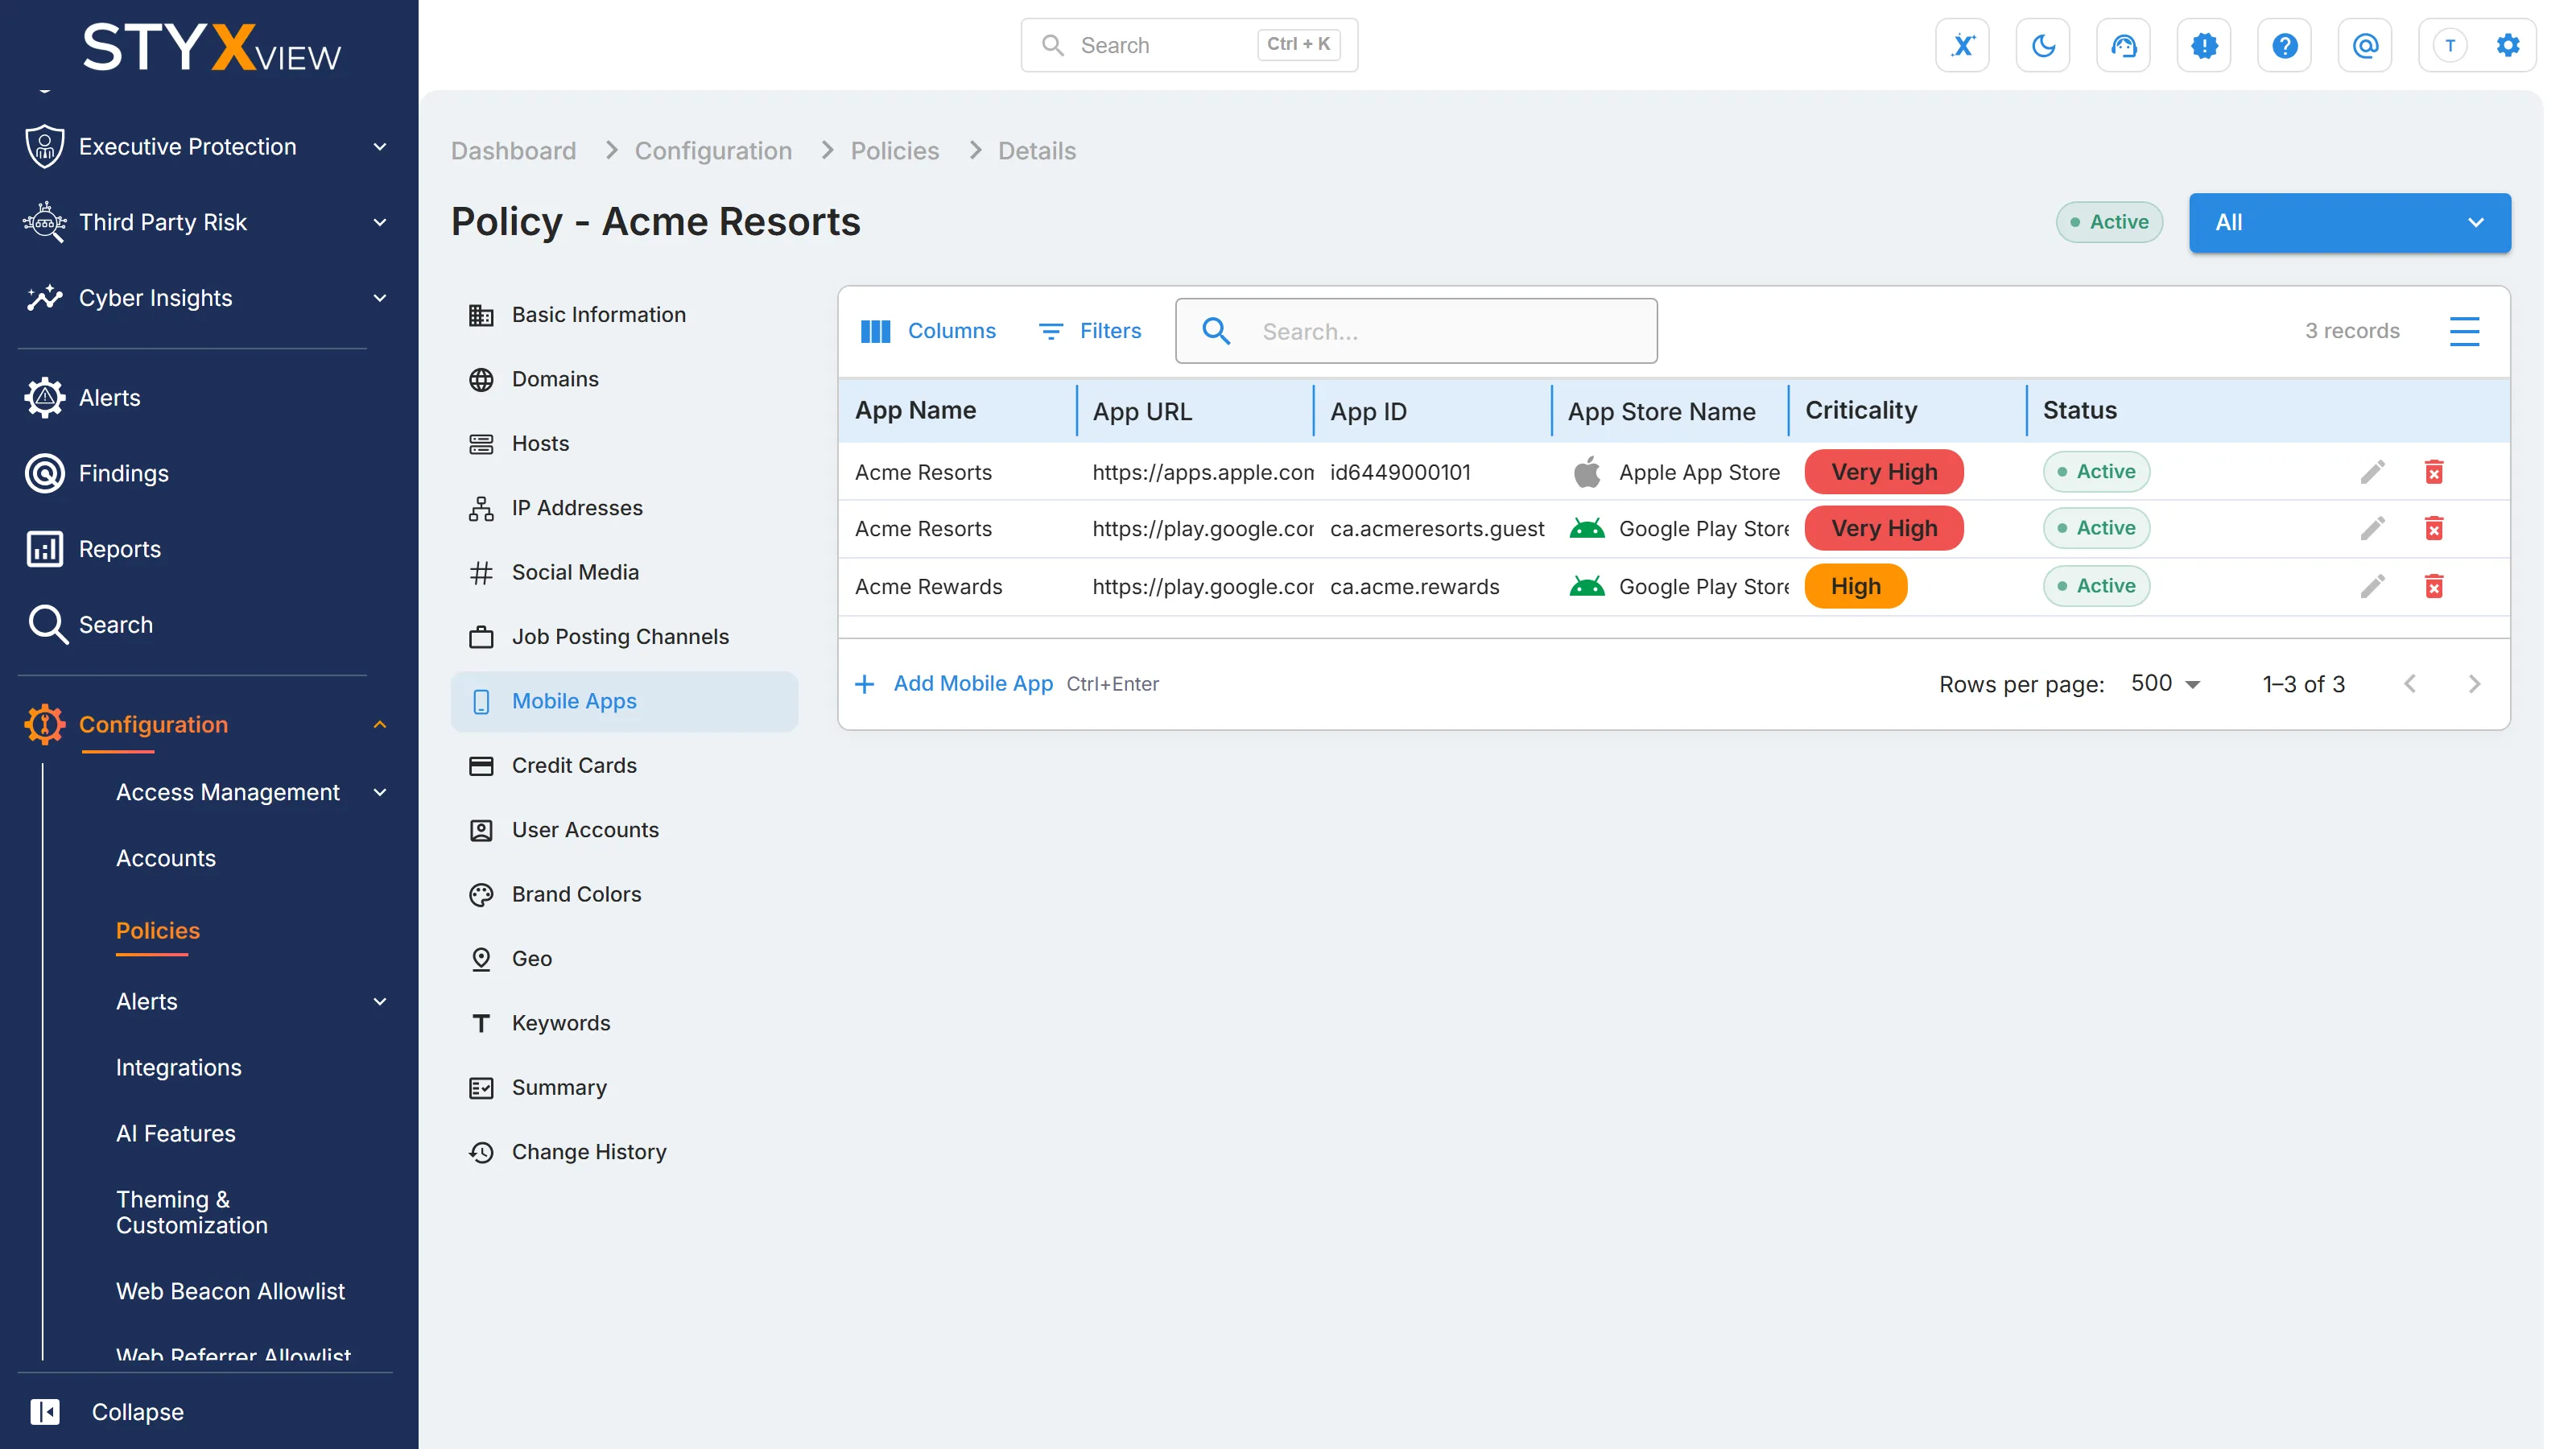
Section titled “Mobile Apps”Your organisation's own apps. Add with "Add Mobile App".
- "App Name".
- "App URL" (required): the app's store page. StyxView adds
https://if you leave it out. - "App ID".
- "App Store Name" (required): "Apple App Store", "Google Play Store", "Samsung App Store", "Huawei App Store", "Microsoft App Store", or "Amazon App Store".
- "Criticality" (required).
Credit Cards
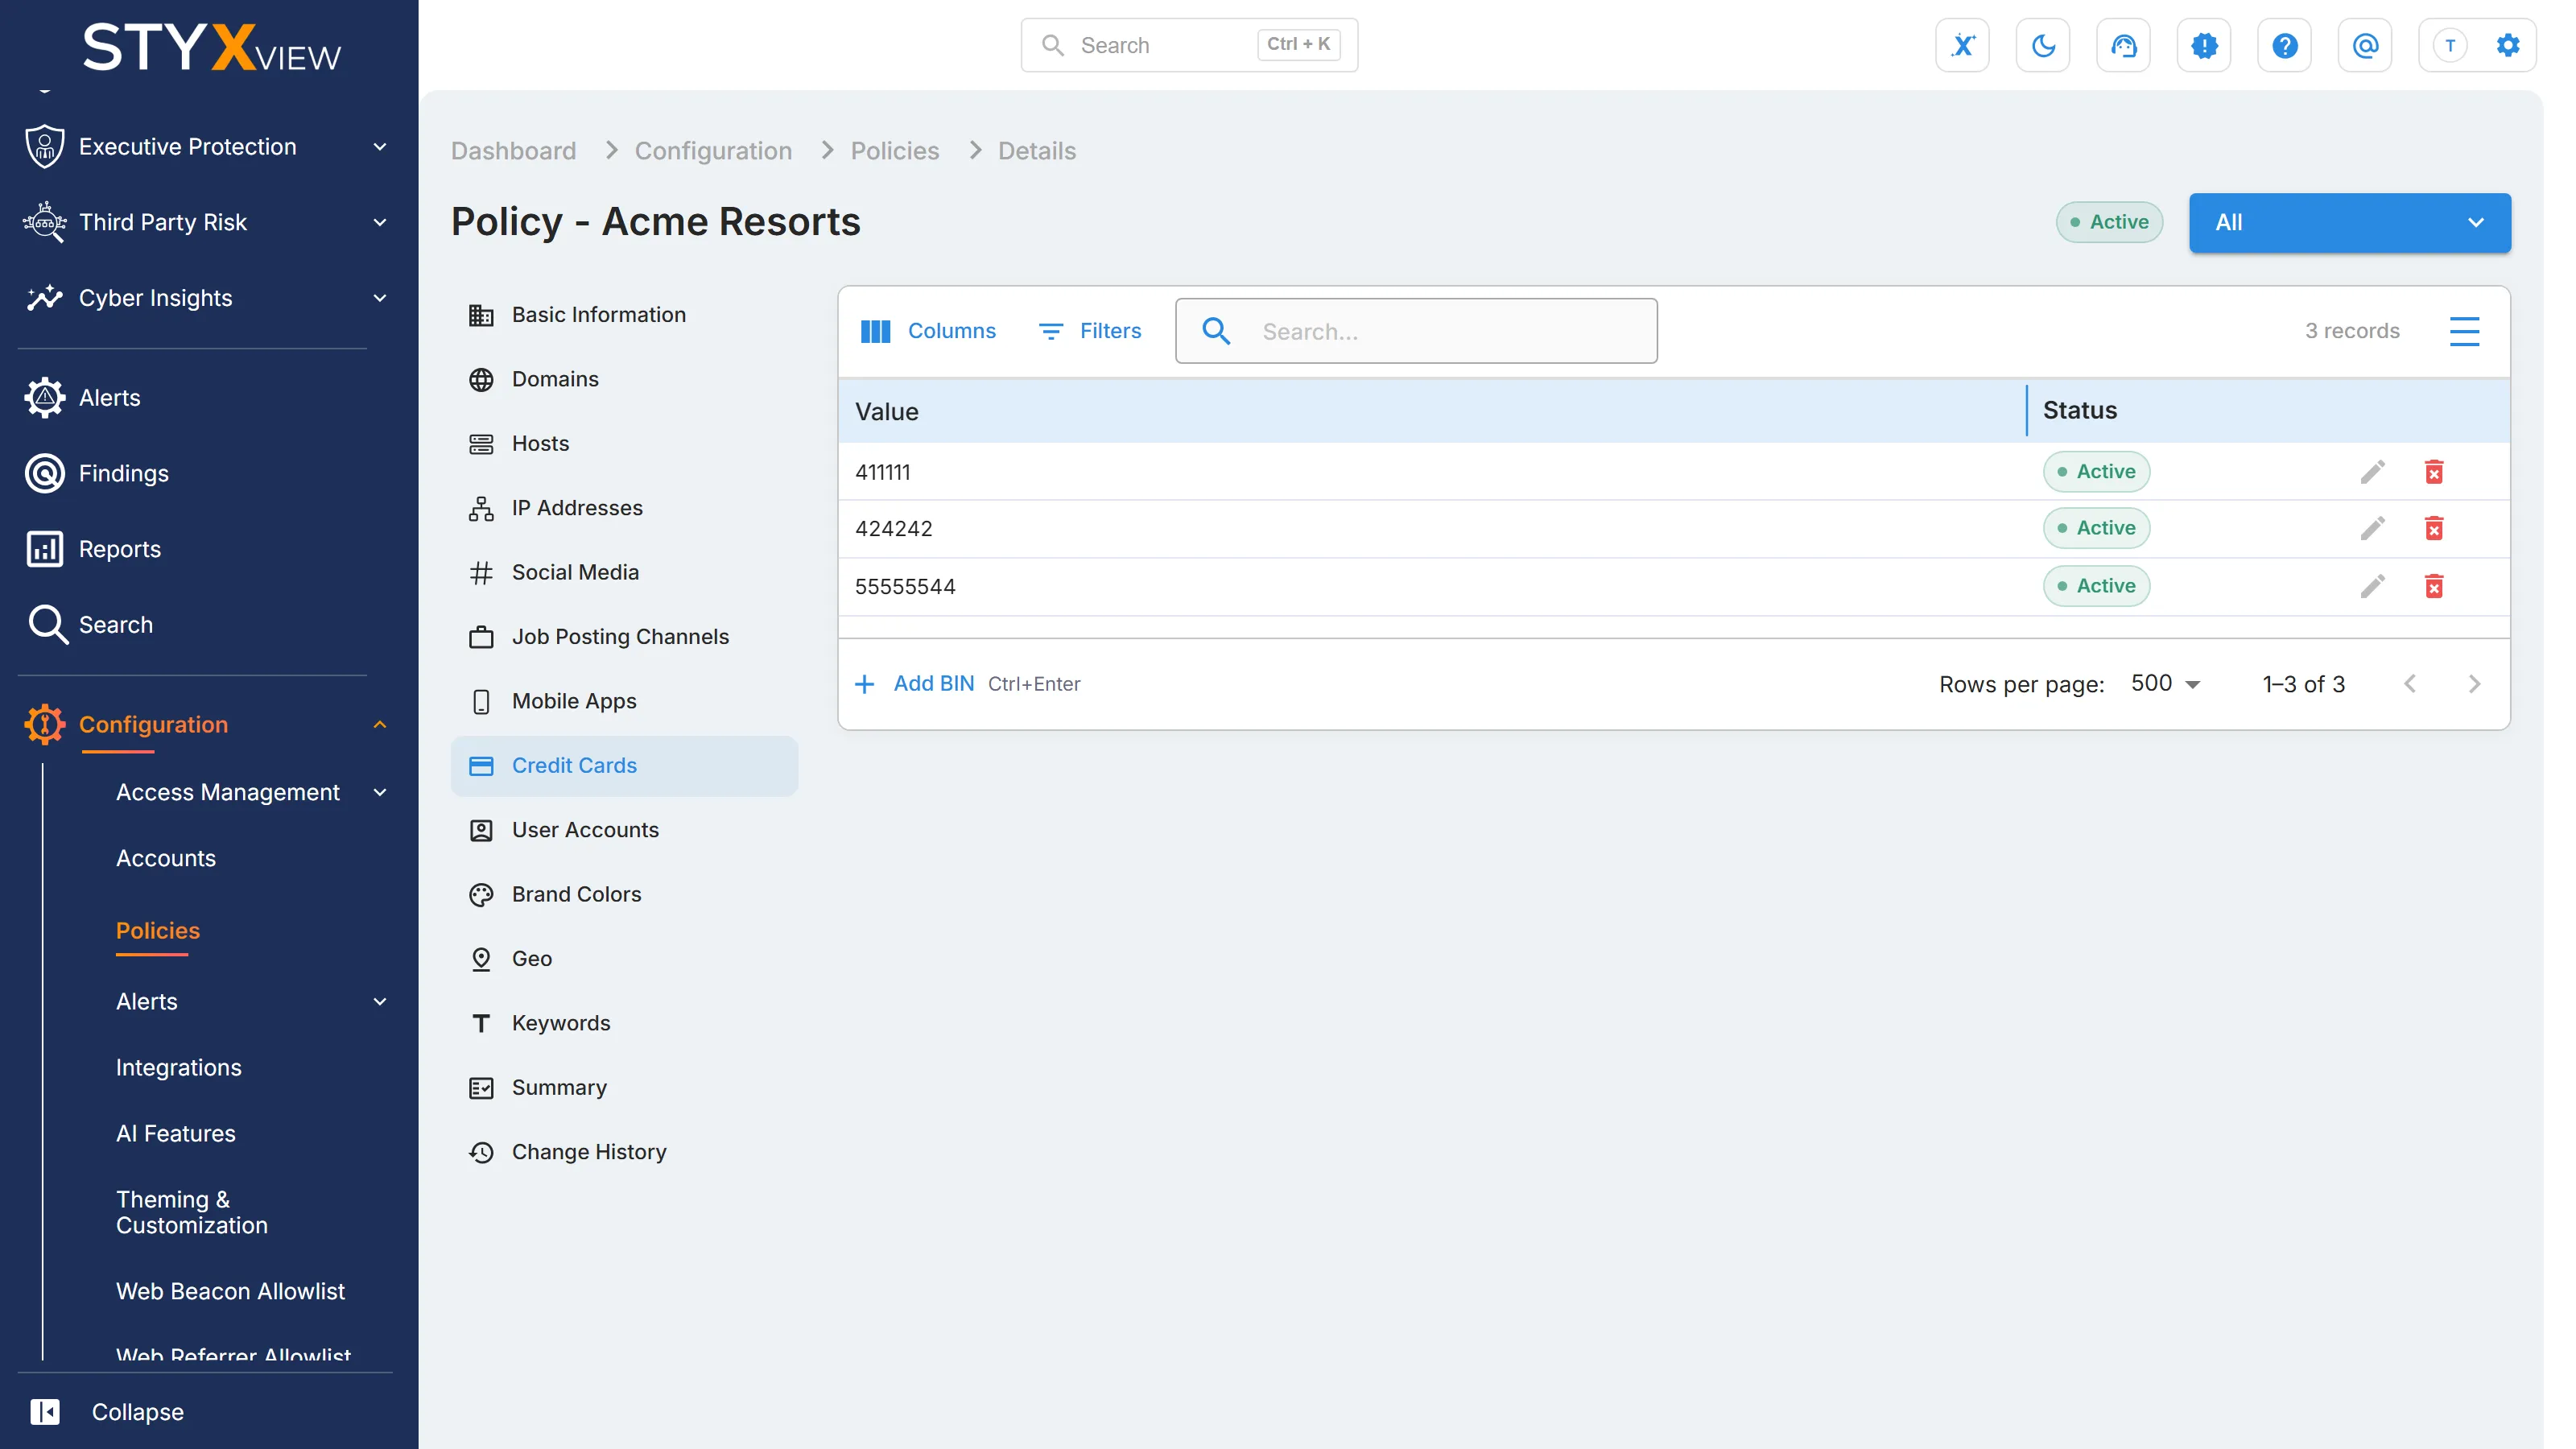
Section titled “Credit Cards”The bank identification numbers (BINs) of your organisation's or the executive's payment cards. Add with "Add BIN".
- "Value" (required): 6 to 10 digits.
User Accounts
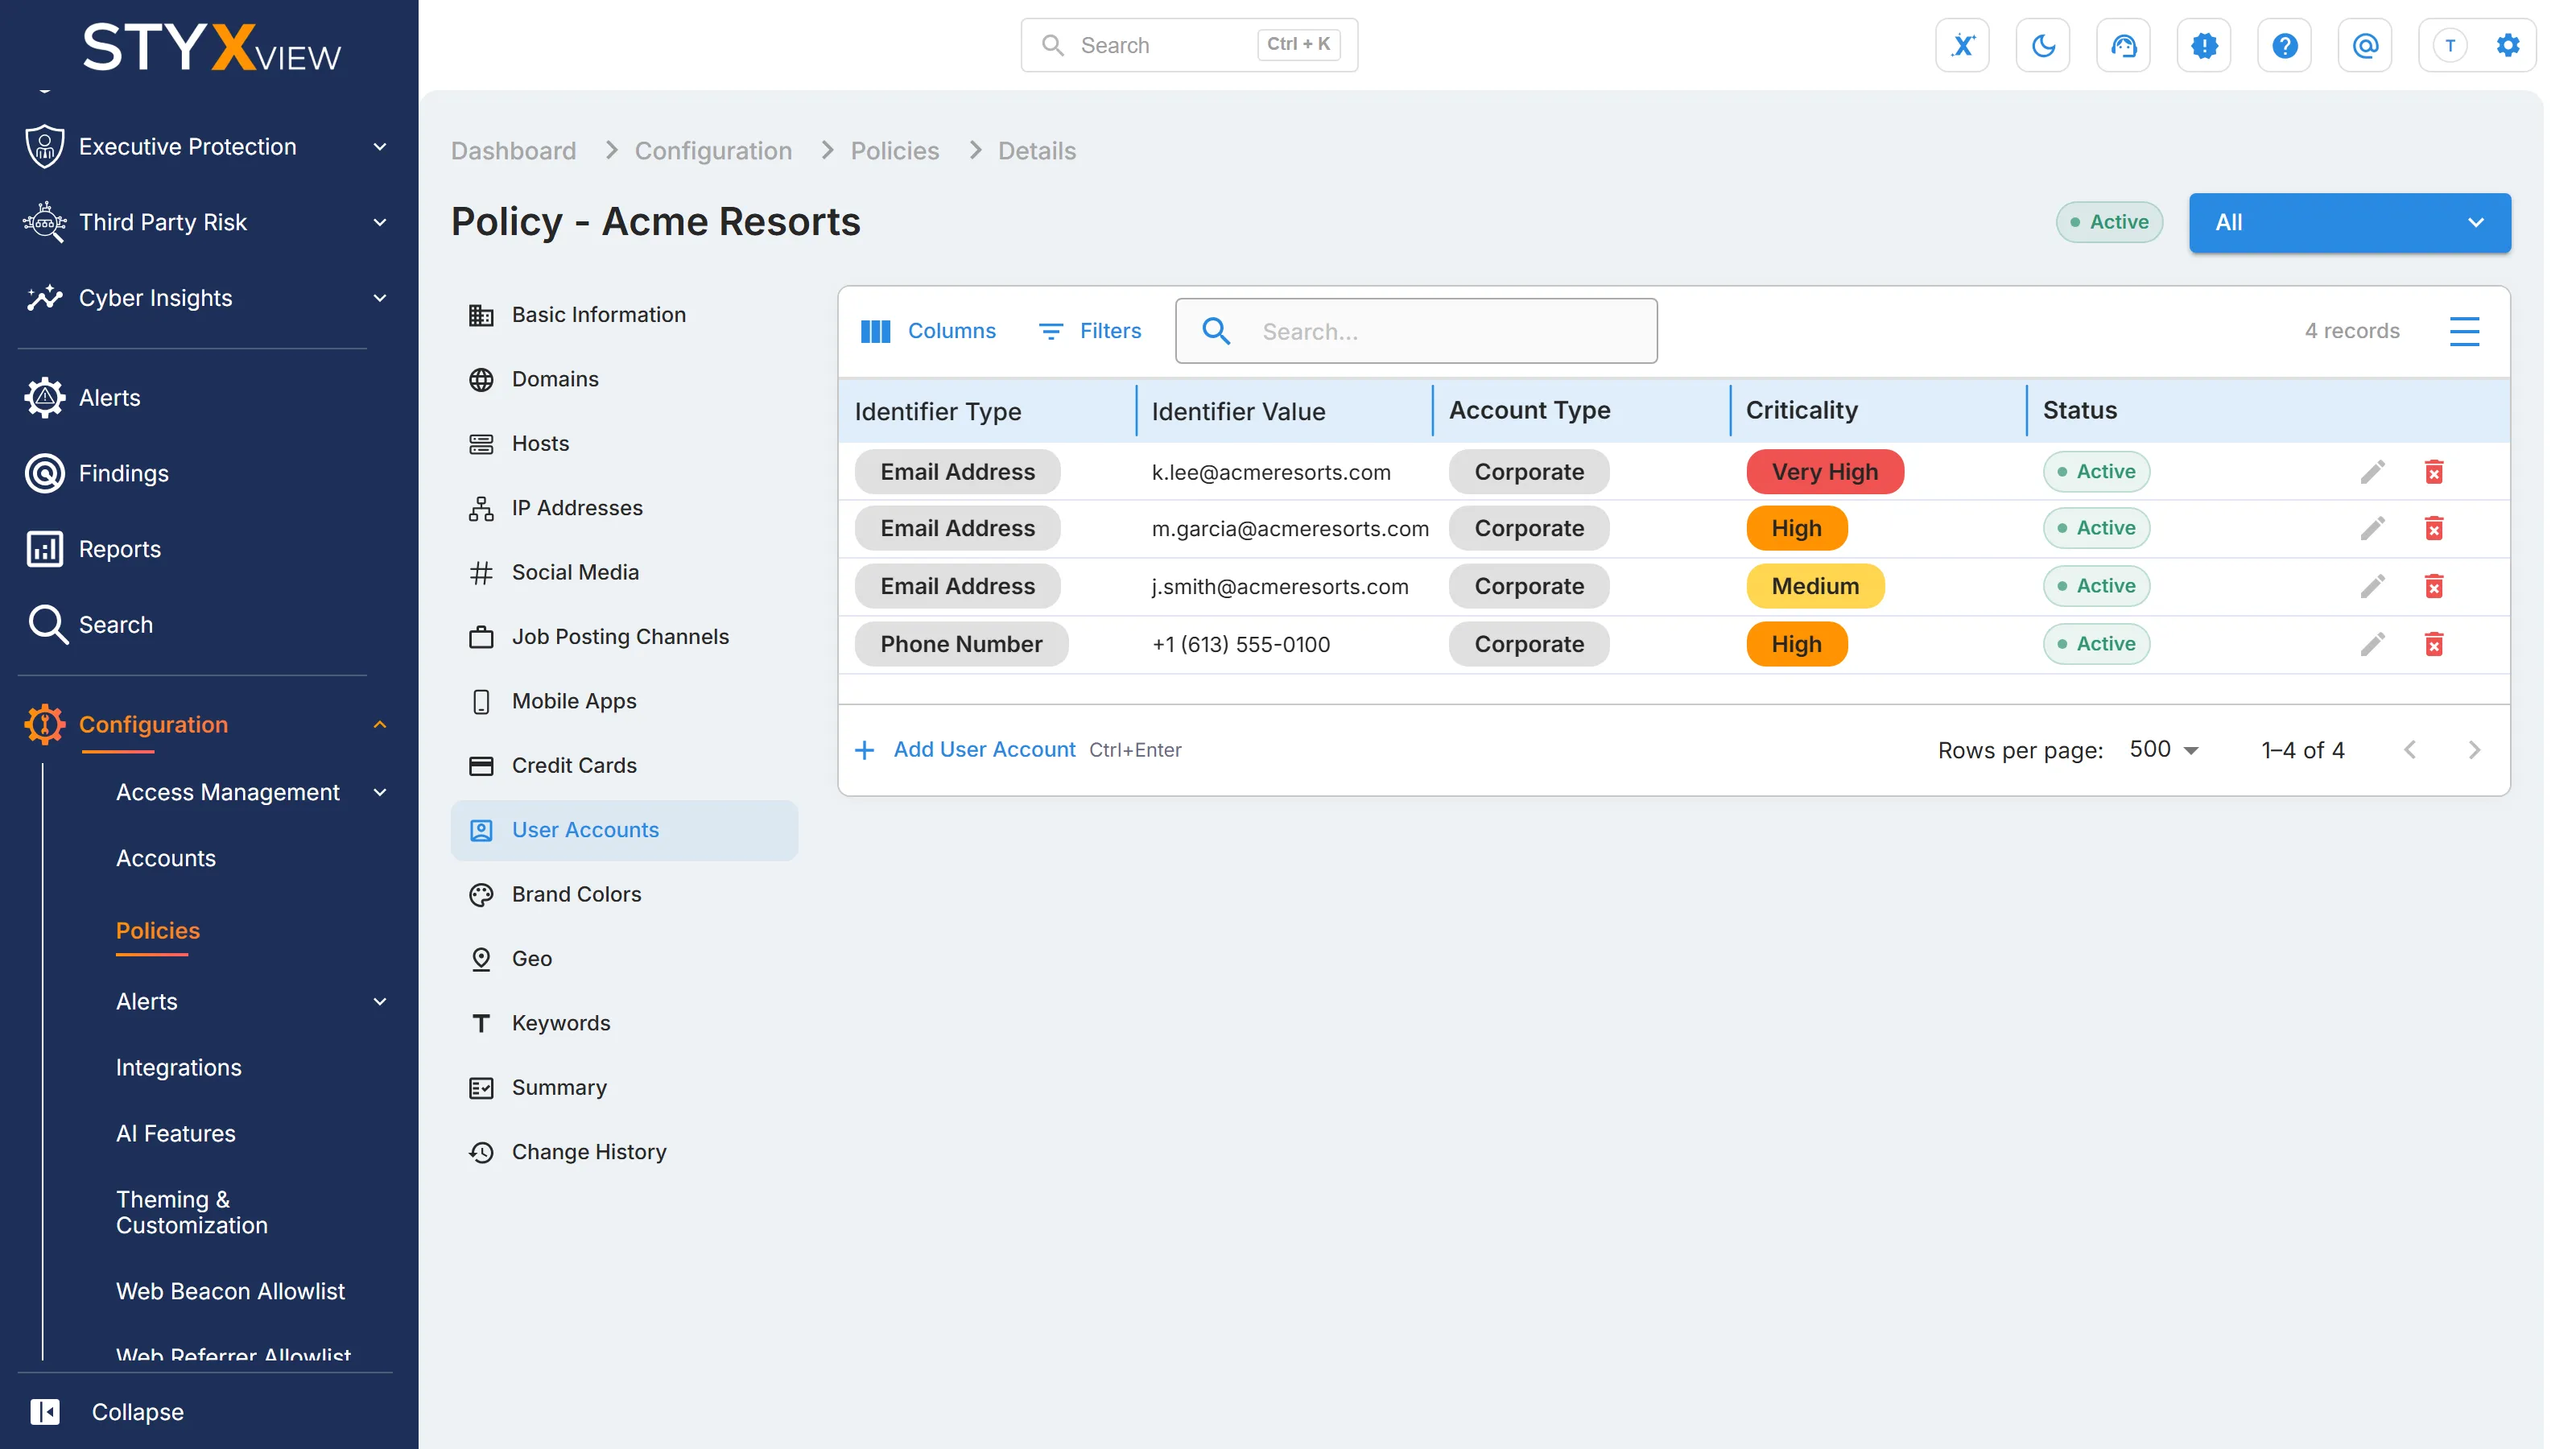
Section titled “User Accounts”Email addresses and phone numbers to watch for exposure. Add with "Add User Account".
- "Identifier Type" (required): "Email Address" or "Phone Number".
- "Identifier Value" (required): the address or number.
- "Account Type" (required): "Corporate" or "Personal".
- "Criticality" (required).
Keywords
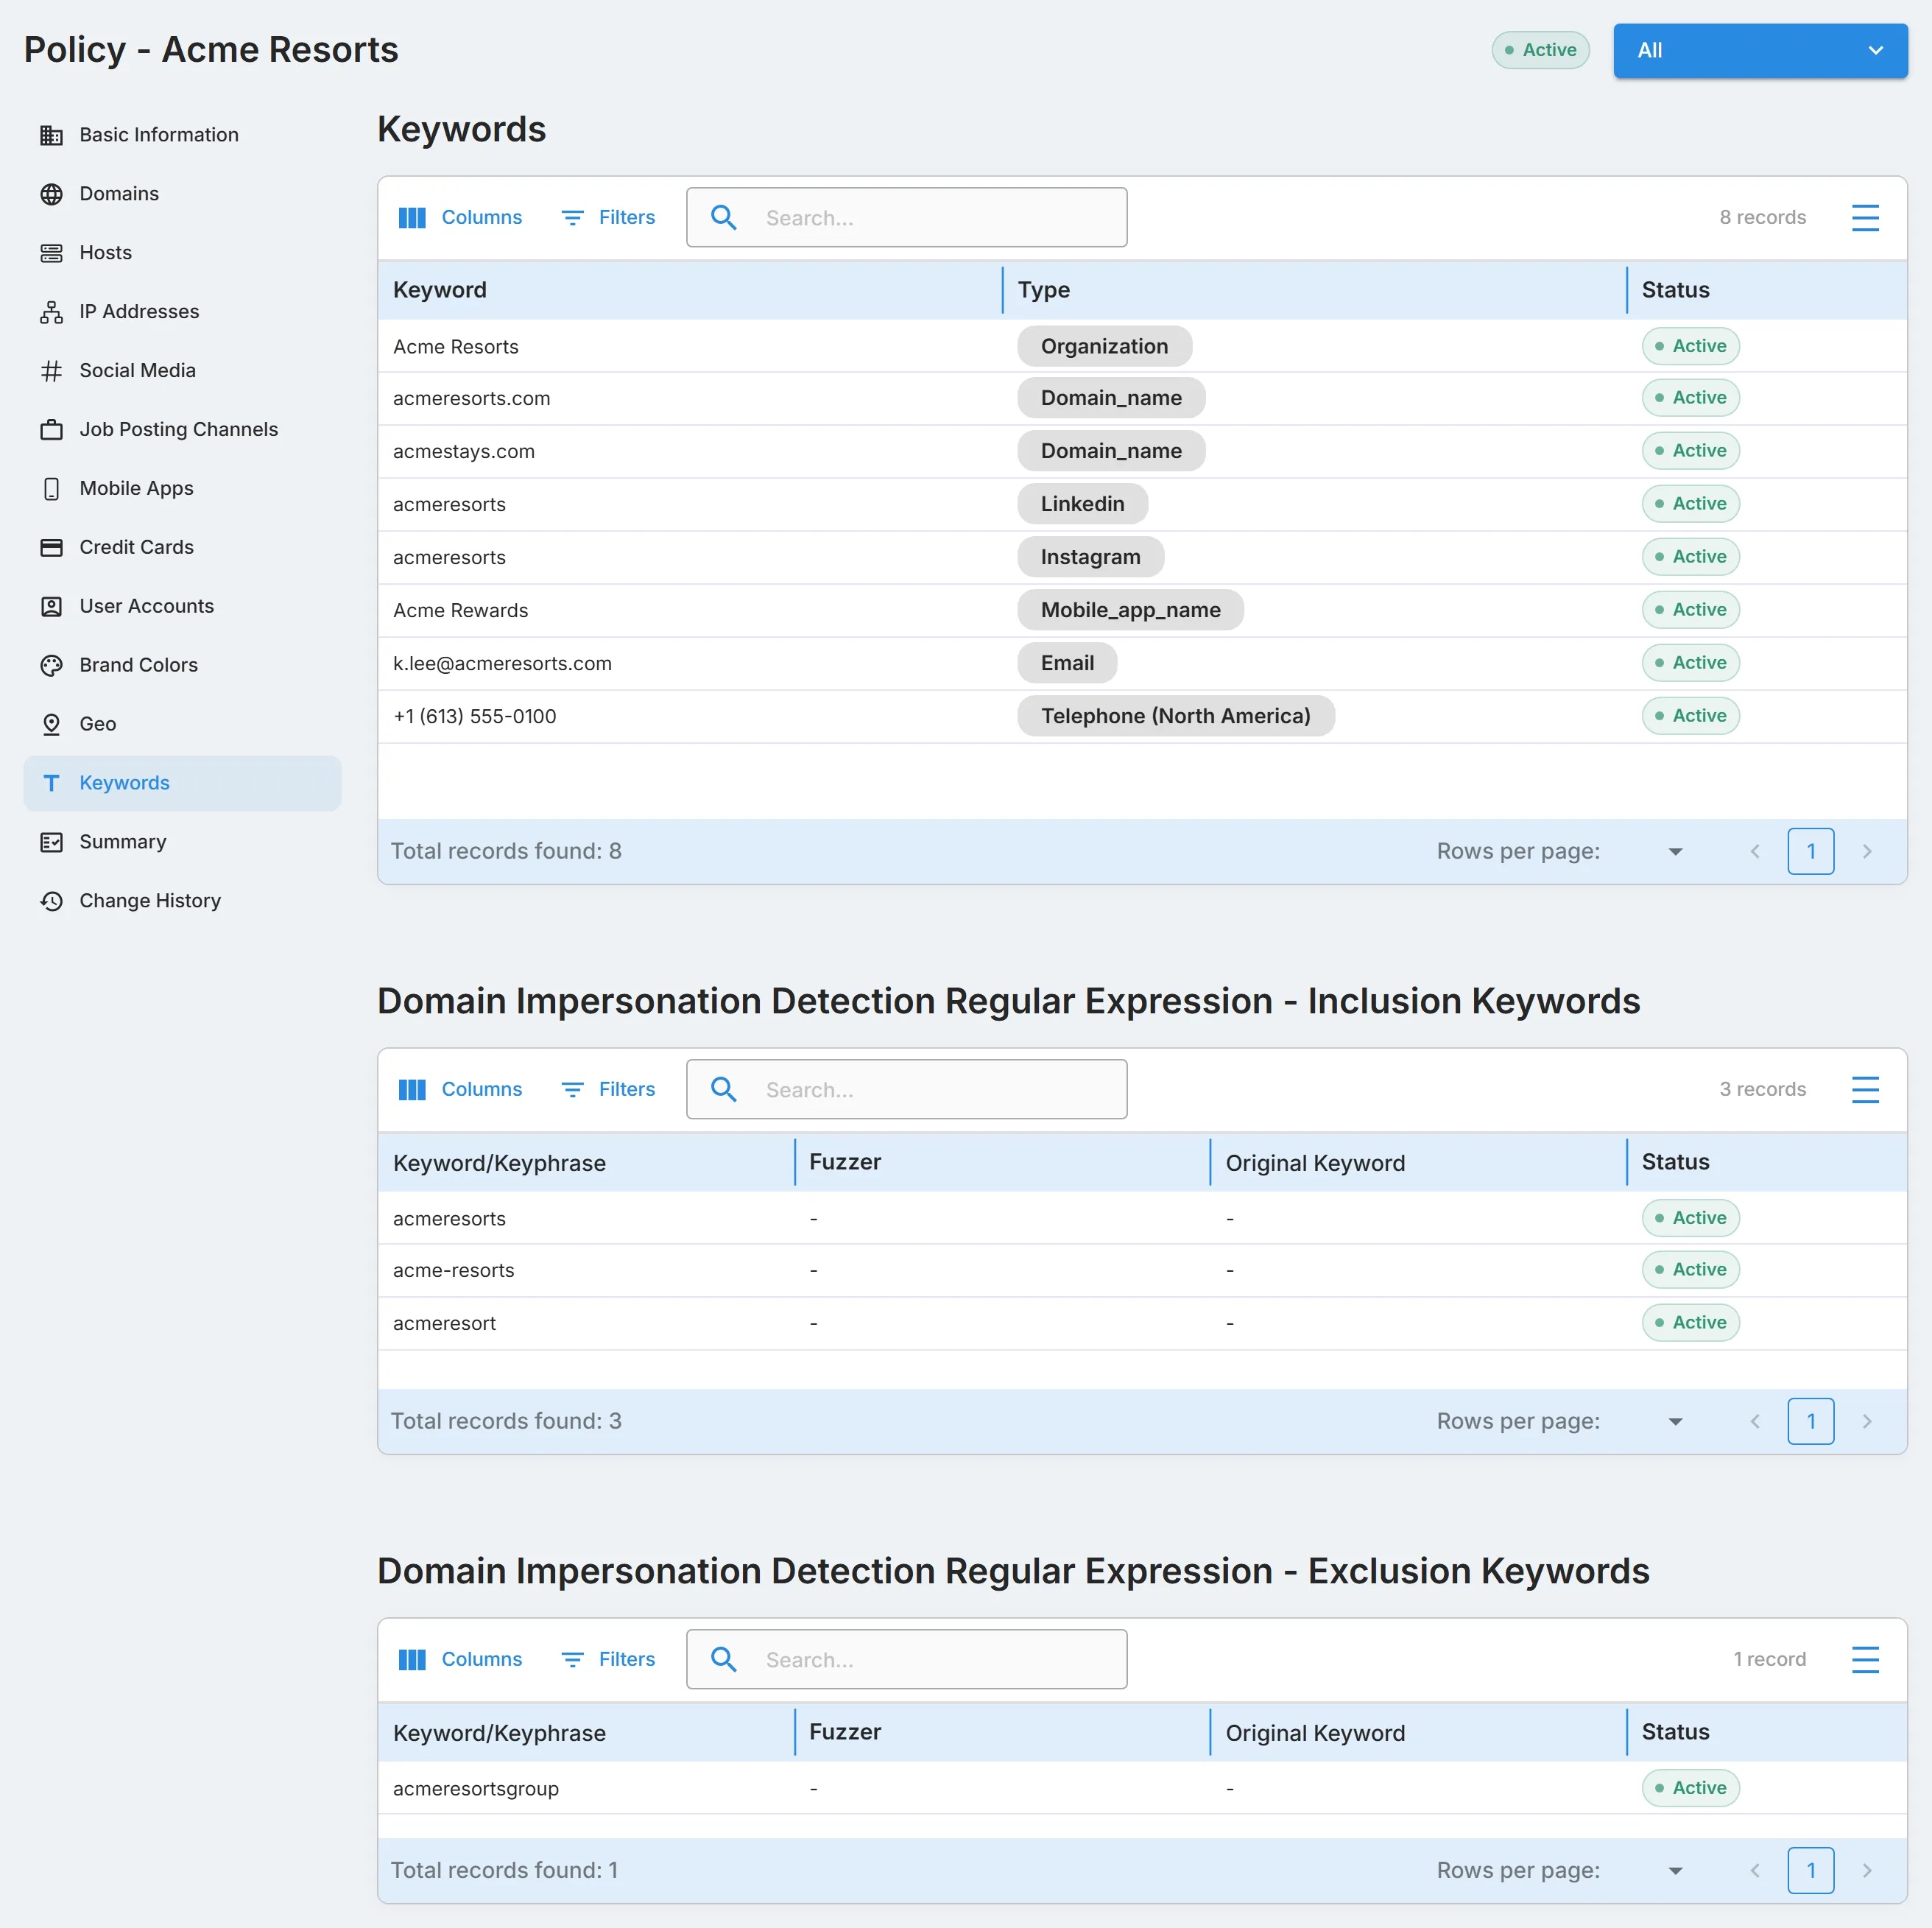
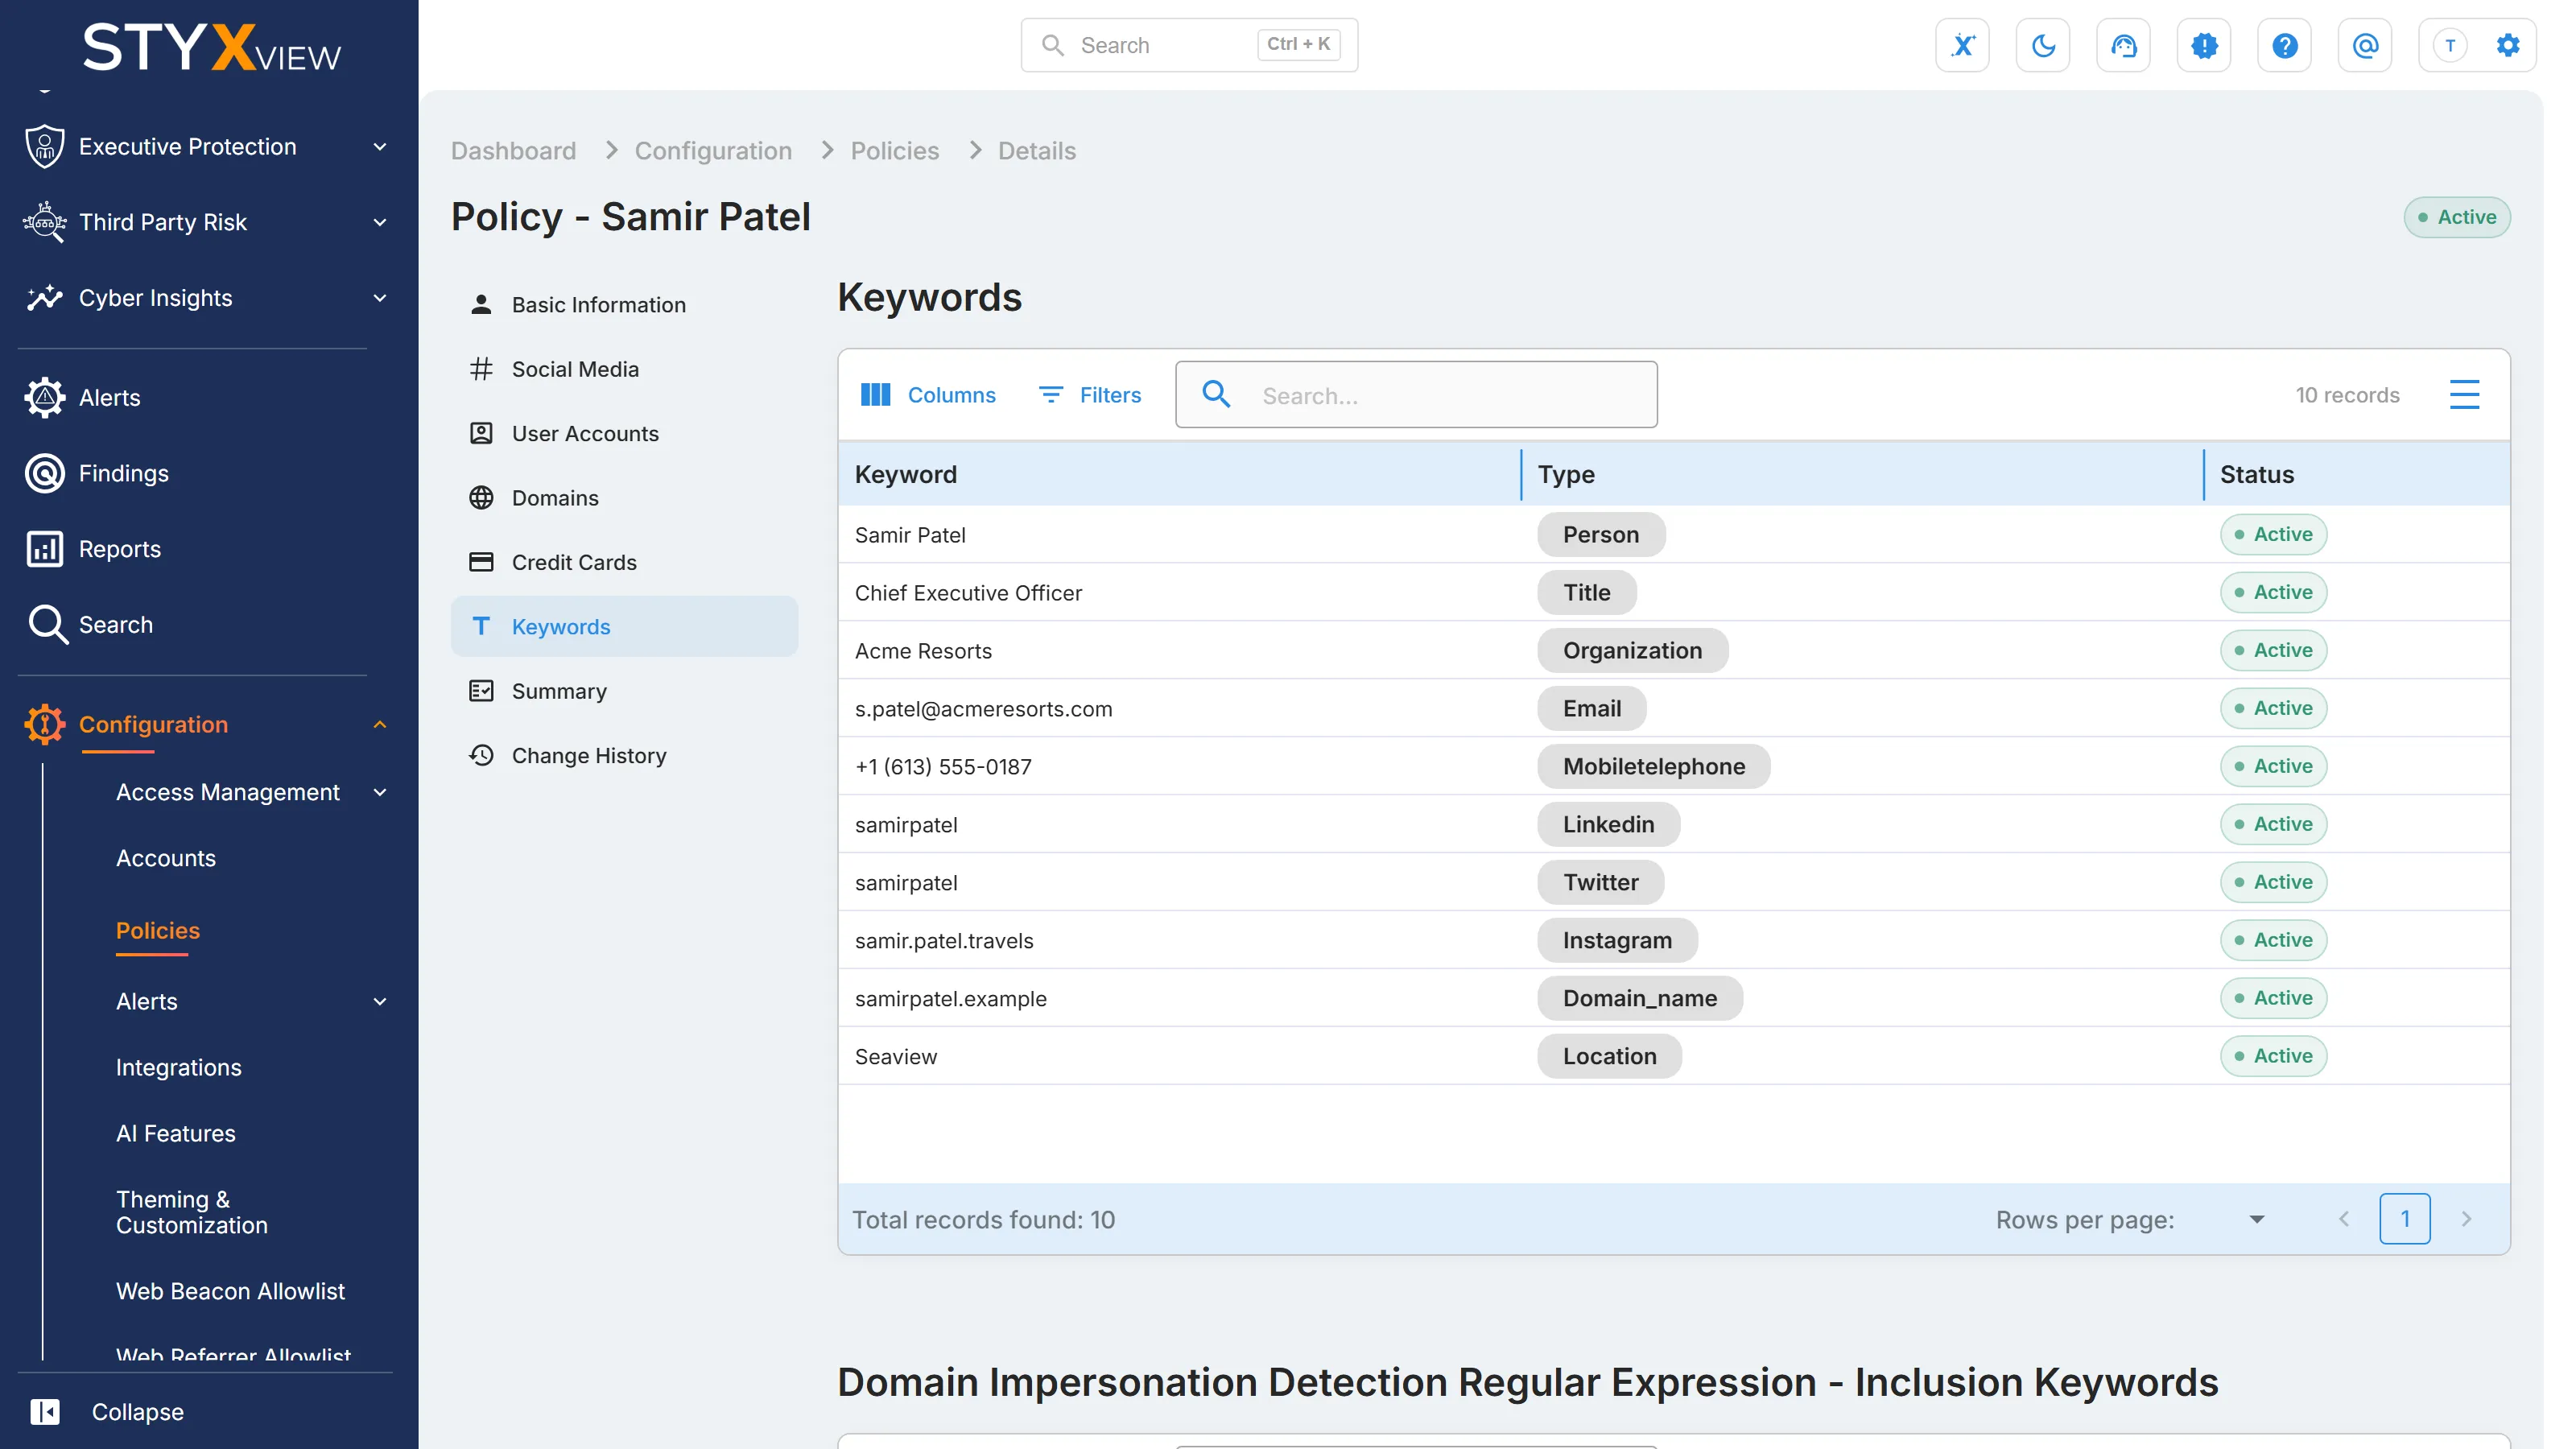
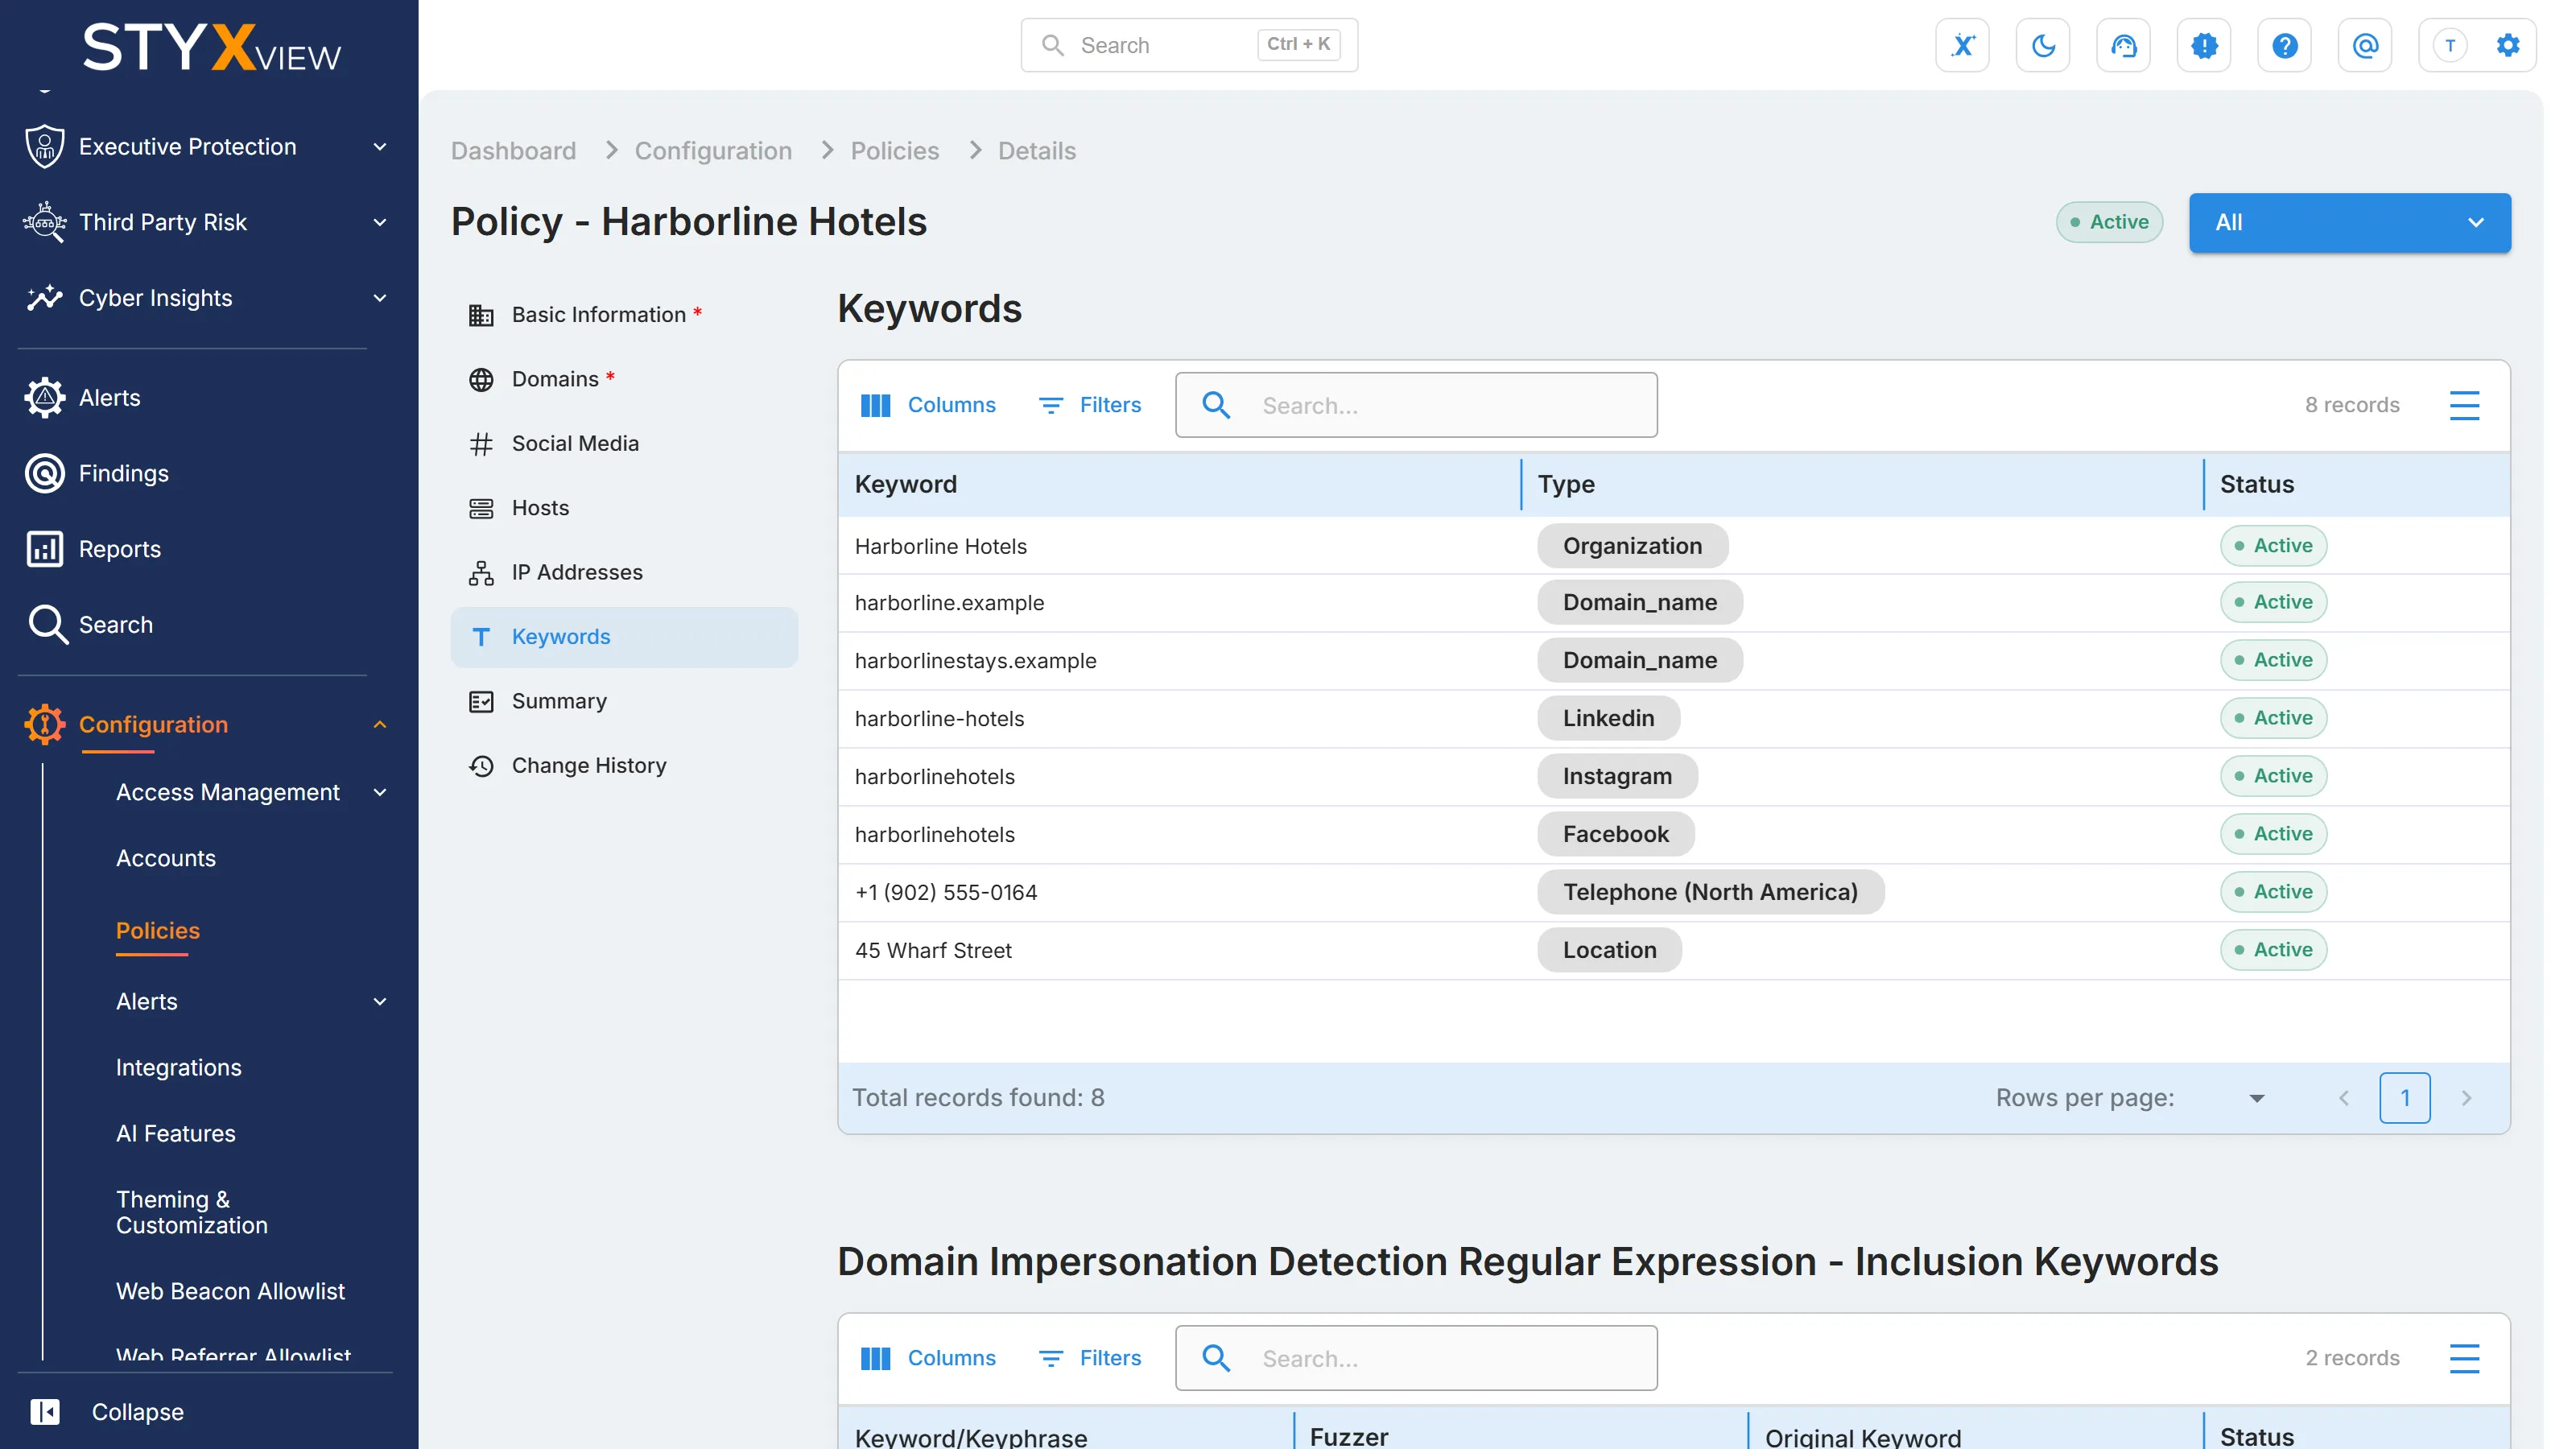
Section titled “Keywords”StyxView generates the keywords from the details already on the policy, such as its names, domains, apps, and accounts. You cannot add keywords yourself. The section has three tables:
- "Keywords": each keyword and its "Type".
- "Domain Impersonation Detection Regular Expression - Inclusion Keywords": the patterns Domain Impersonation searches for.
- "Domain Impersonation Detection Regular Expression - Exclusion Keywords": the patterns Domain Impersonation ignores.
To remove a keyword, open a configured policy in edit mode and request its removal. See Changing a Configured Policy.
Brand Colors and Geo
Section titled “Brand Colors and Geo”These two Company Protection sections save straight away and have no status column.
-
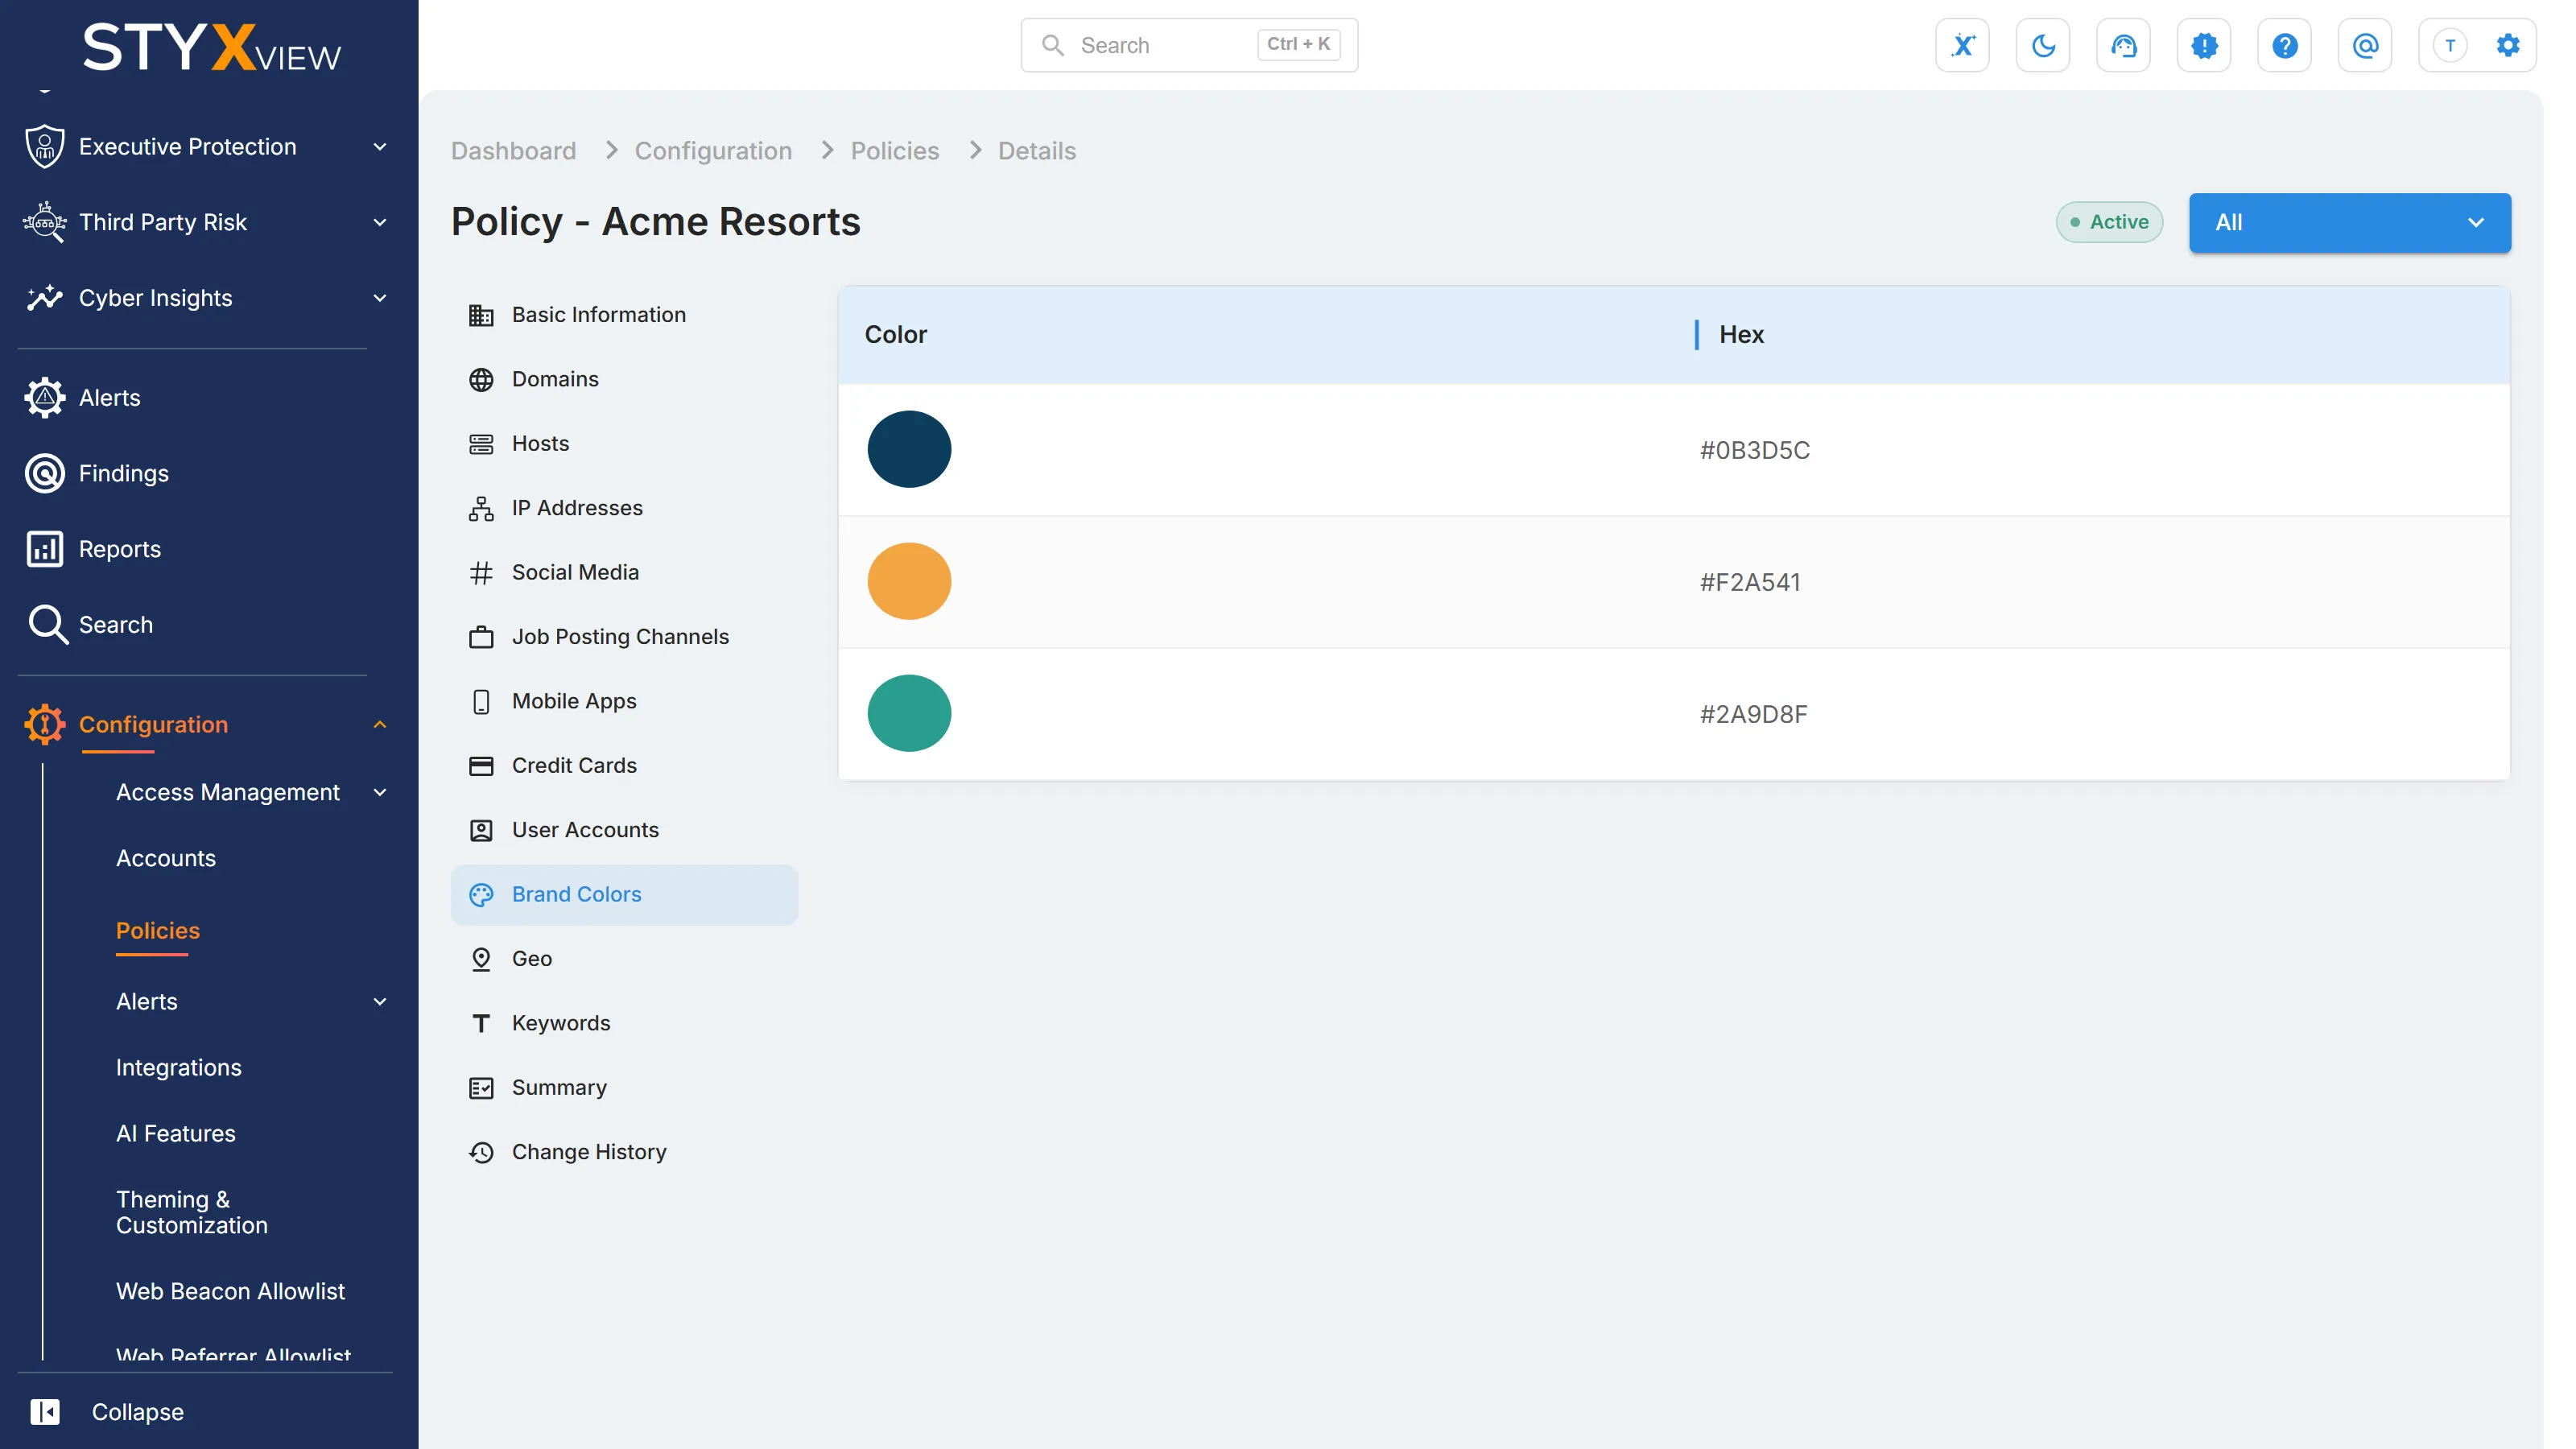
"Brand Colors": select "ADD CLIENT COLOR" for each brand colour, enter its 6-digit hex code (for example #1A2B3C), select "Save", and confirm with "Yes". Once saved, the colours cannot be changed in StyxView.
-
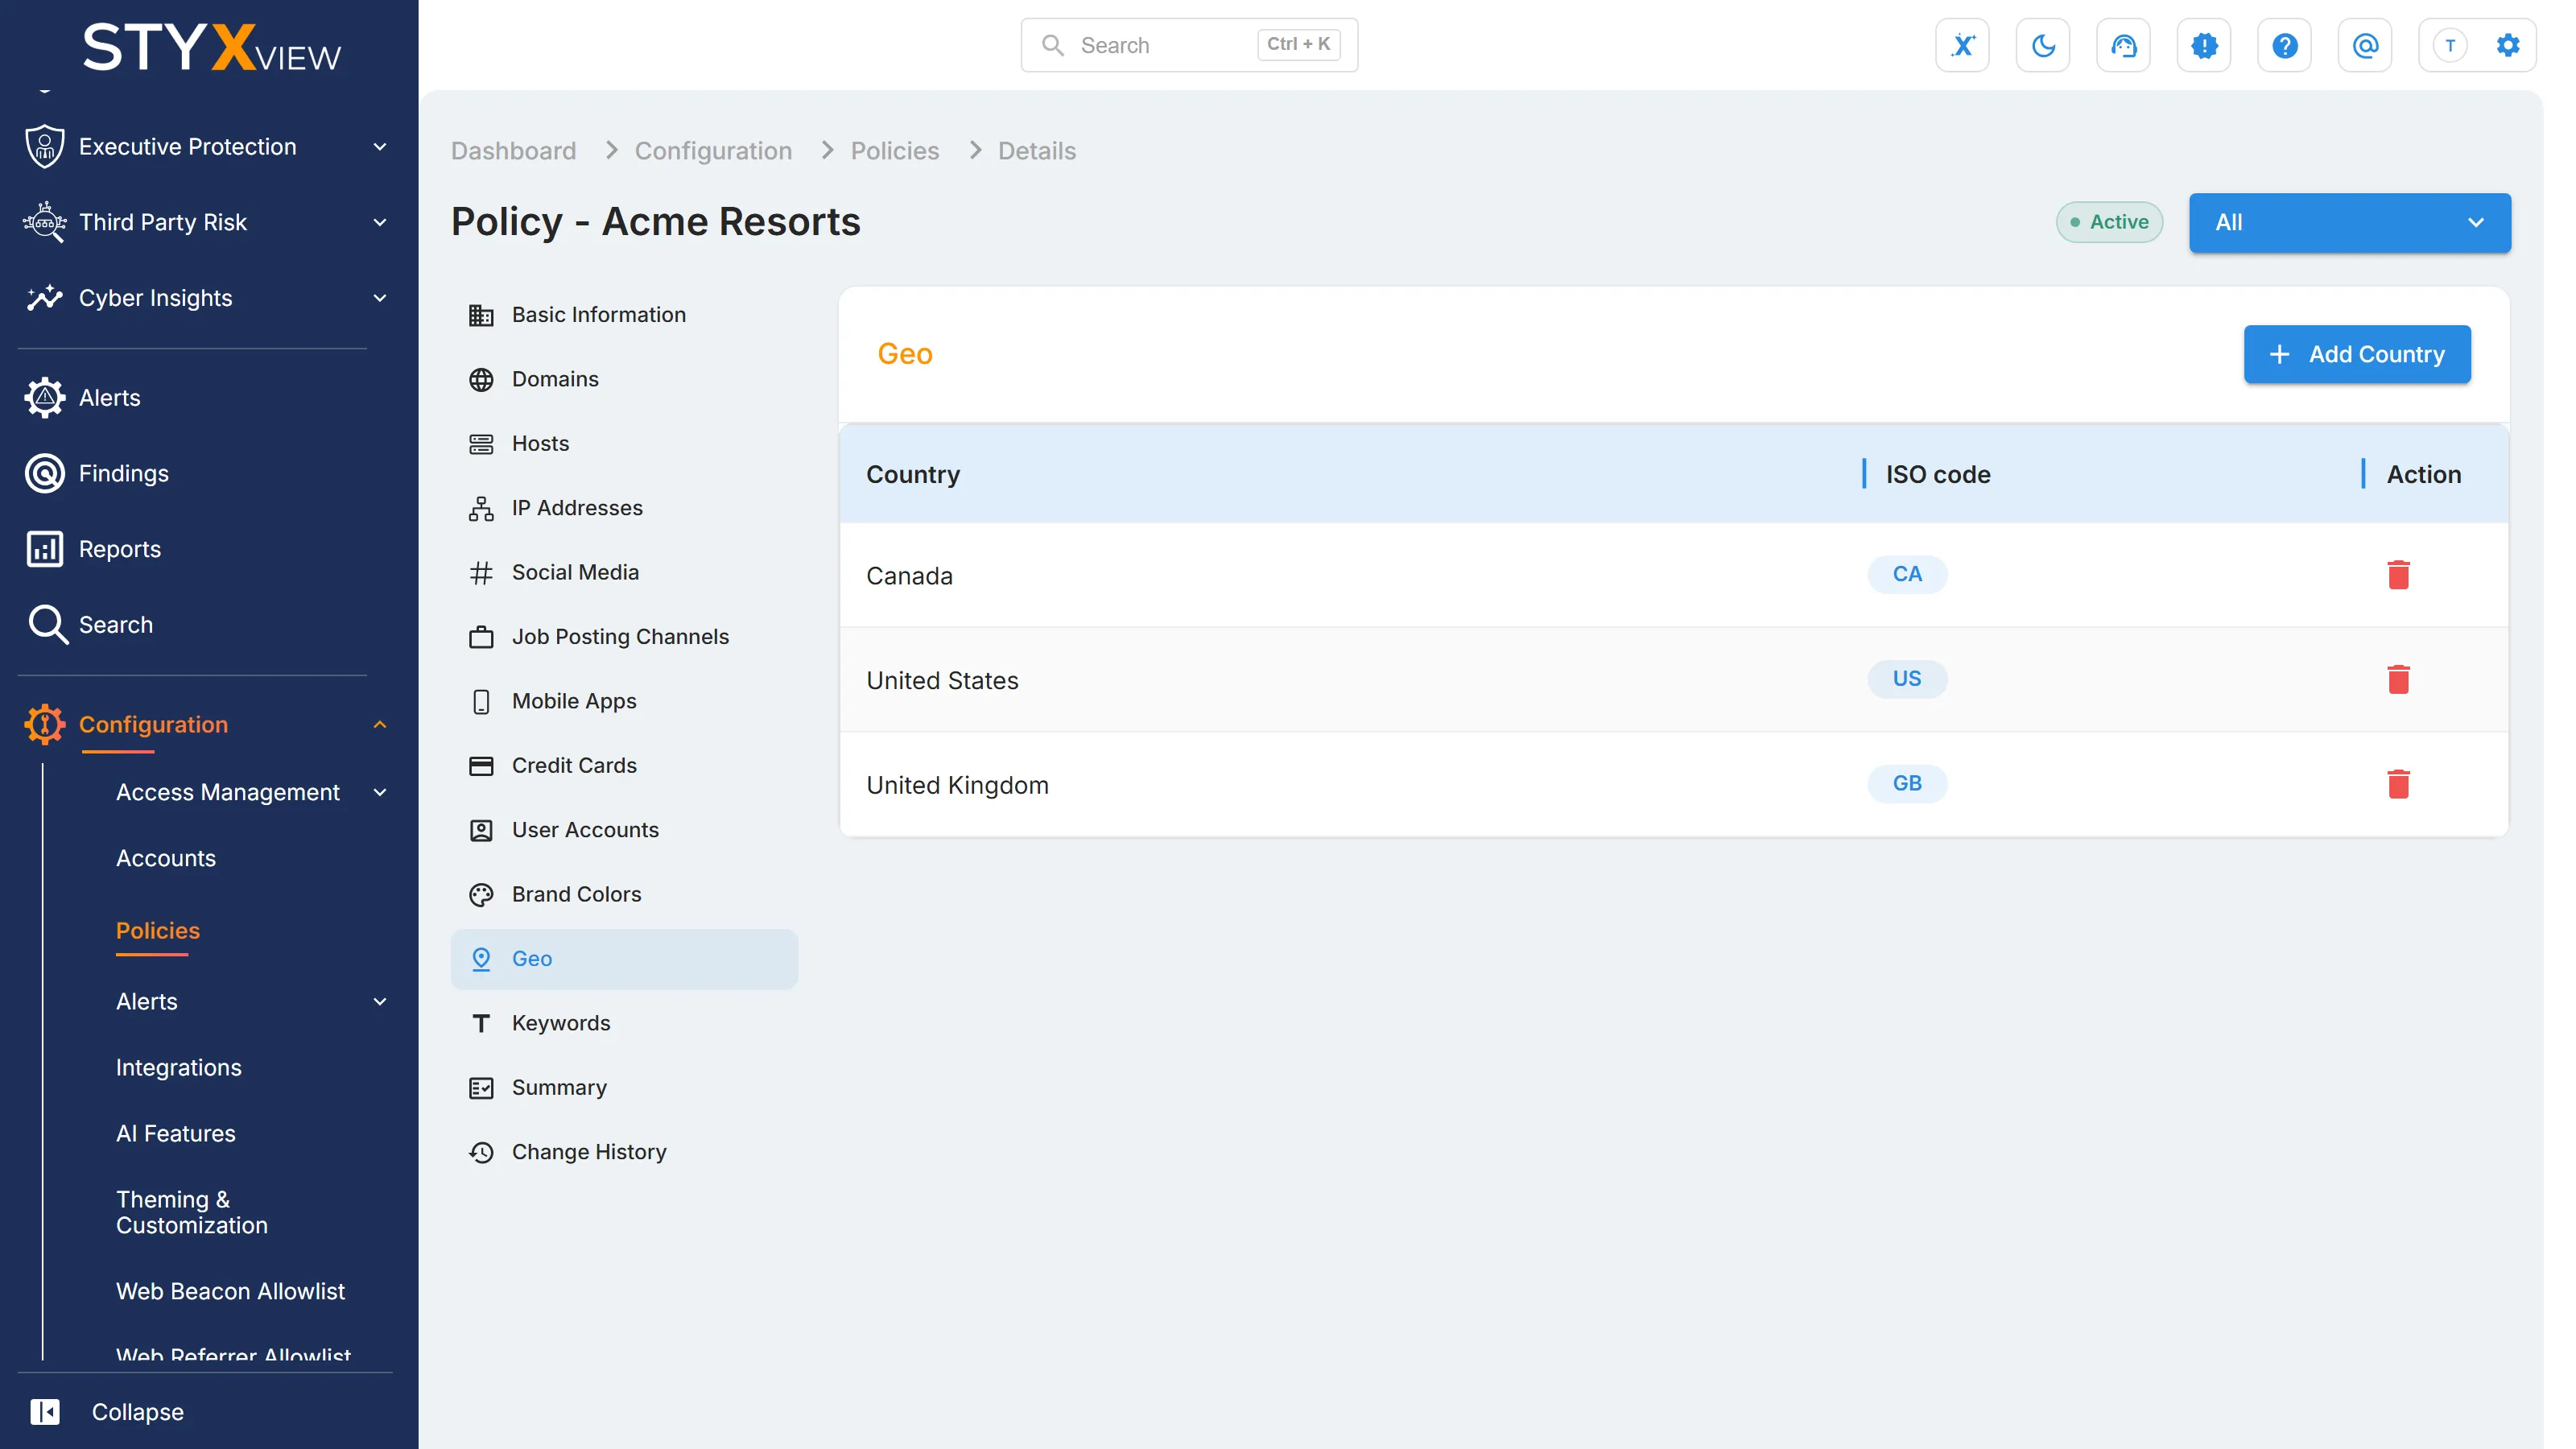
"Geo": the countries that monitoring is scoped to. Select "Add country", choose the "Country", and select the save icon. To remove a country, select its delete icon and confirm. Geo changes are not reviewed.
Submitting a Policy for Review
Section titled “Submitting a Policy for Review”-
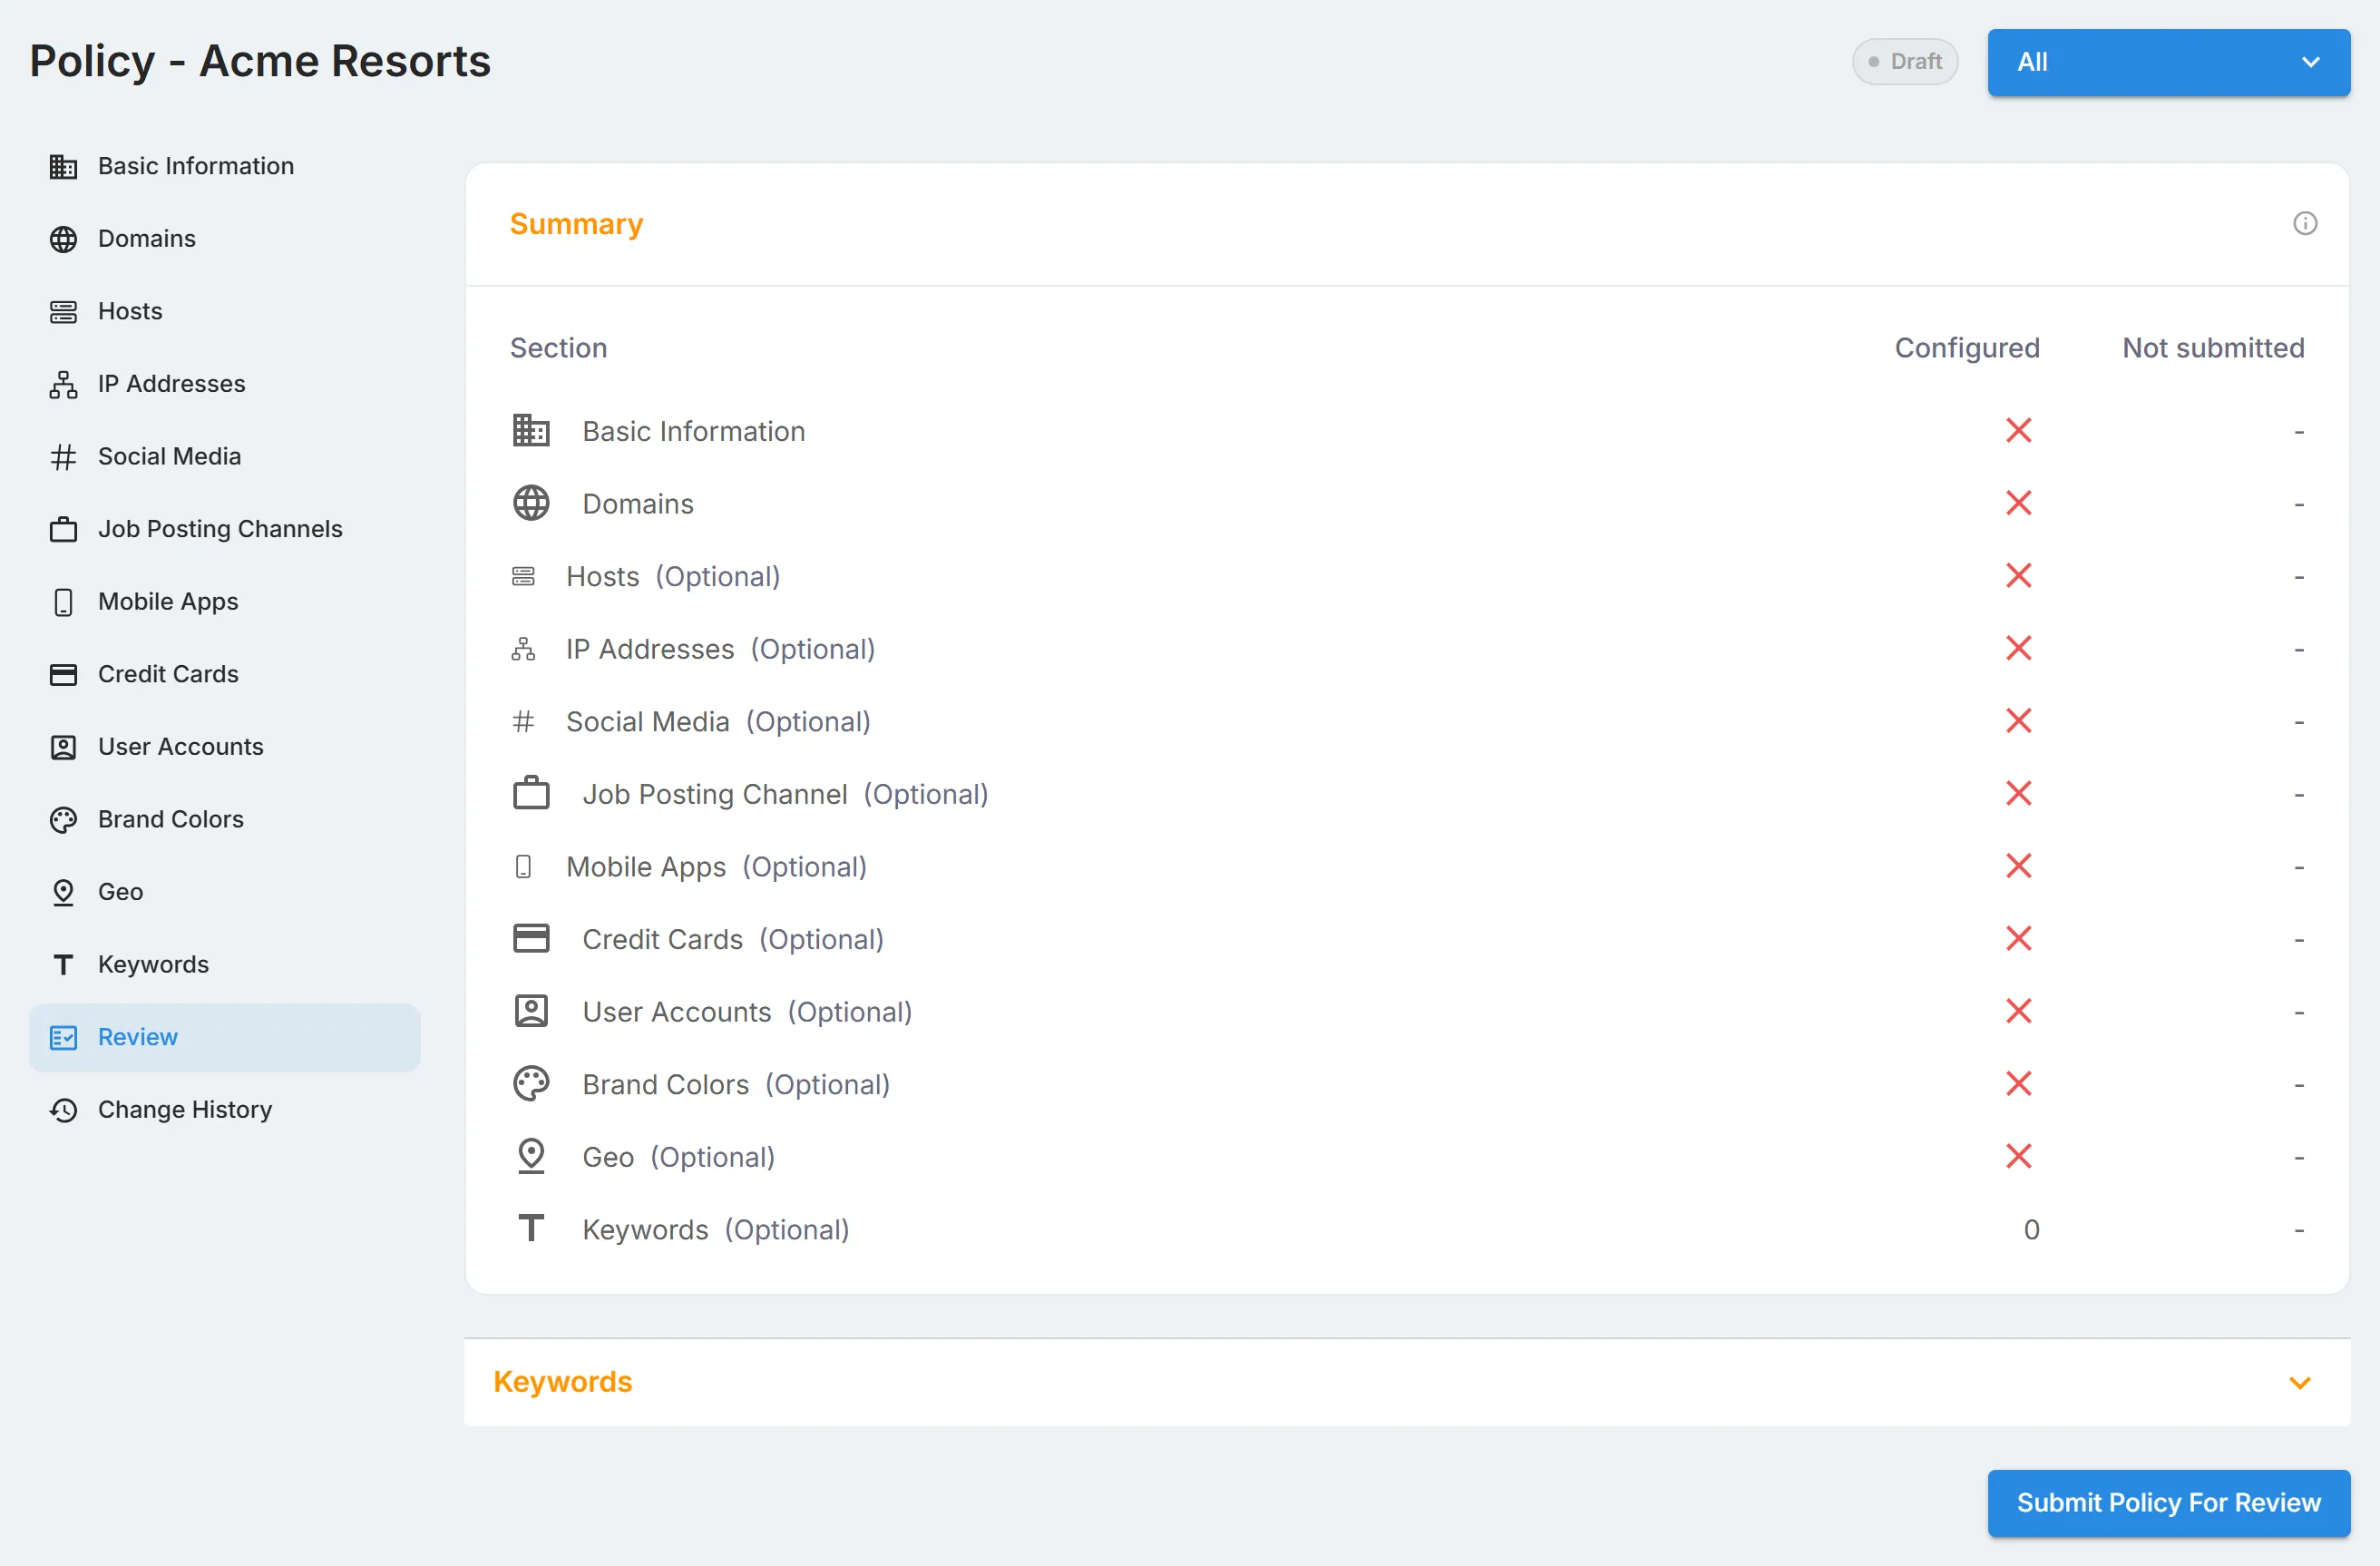
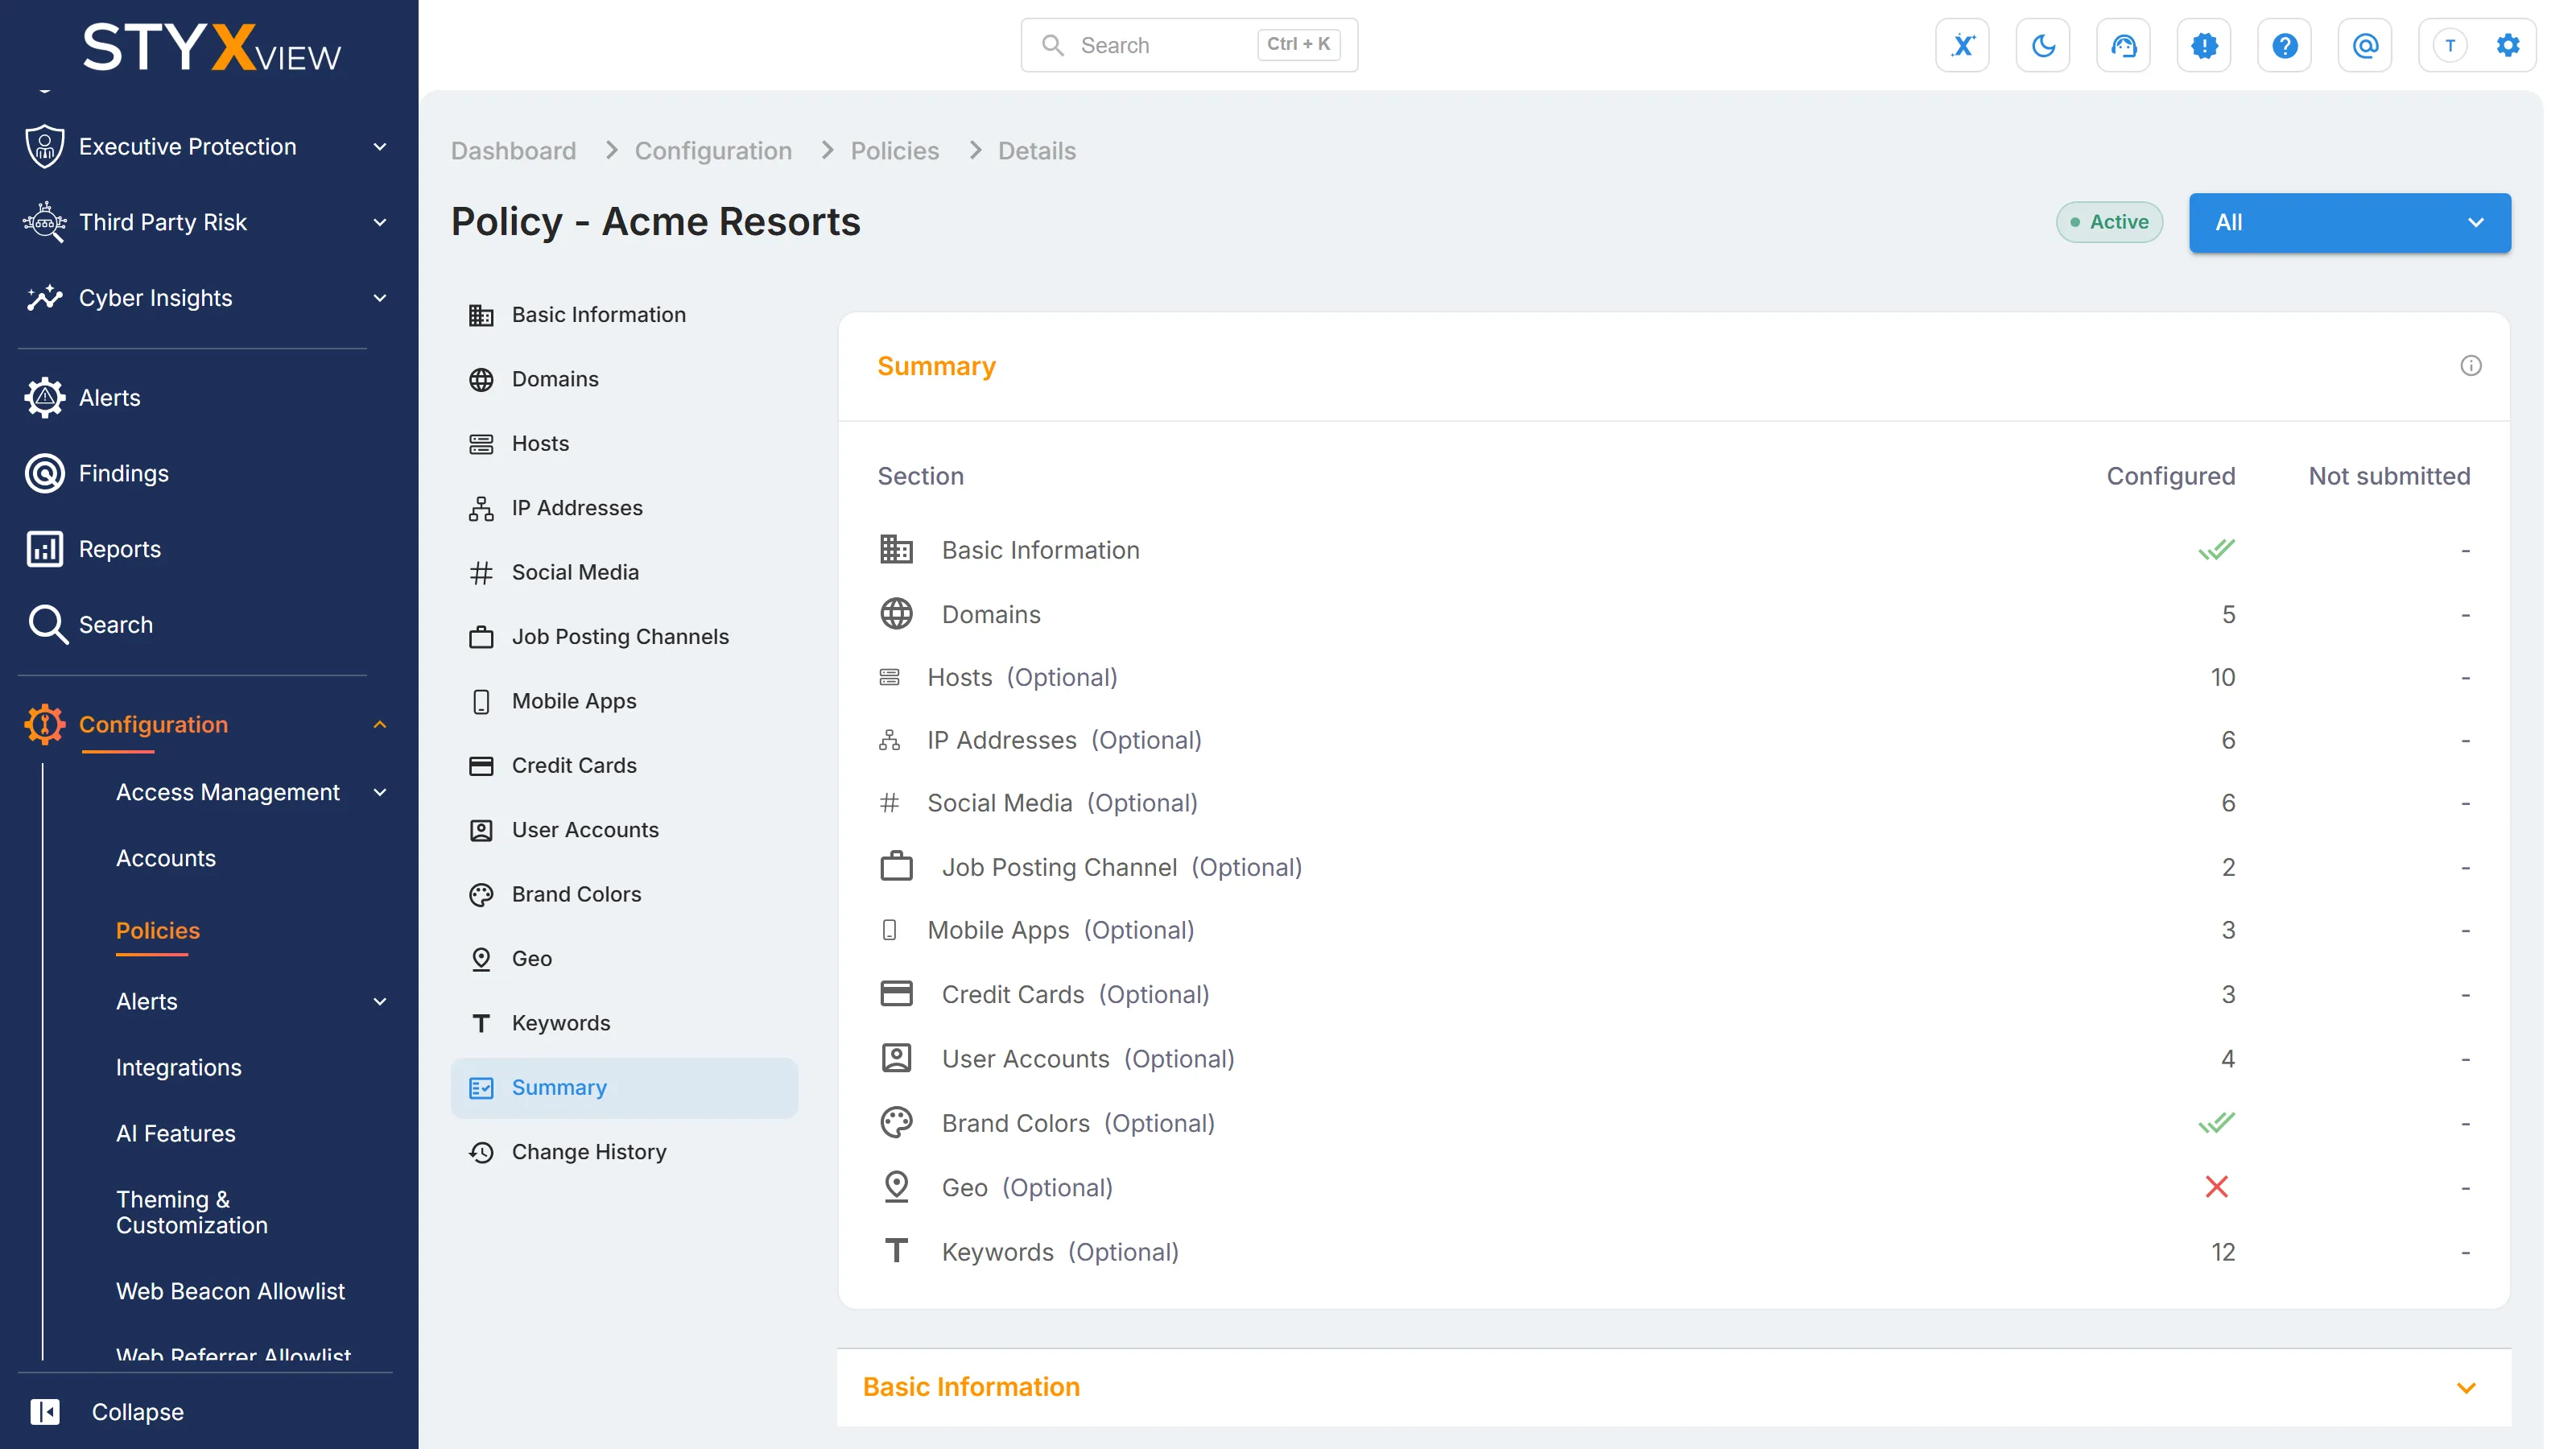
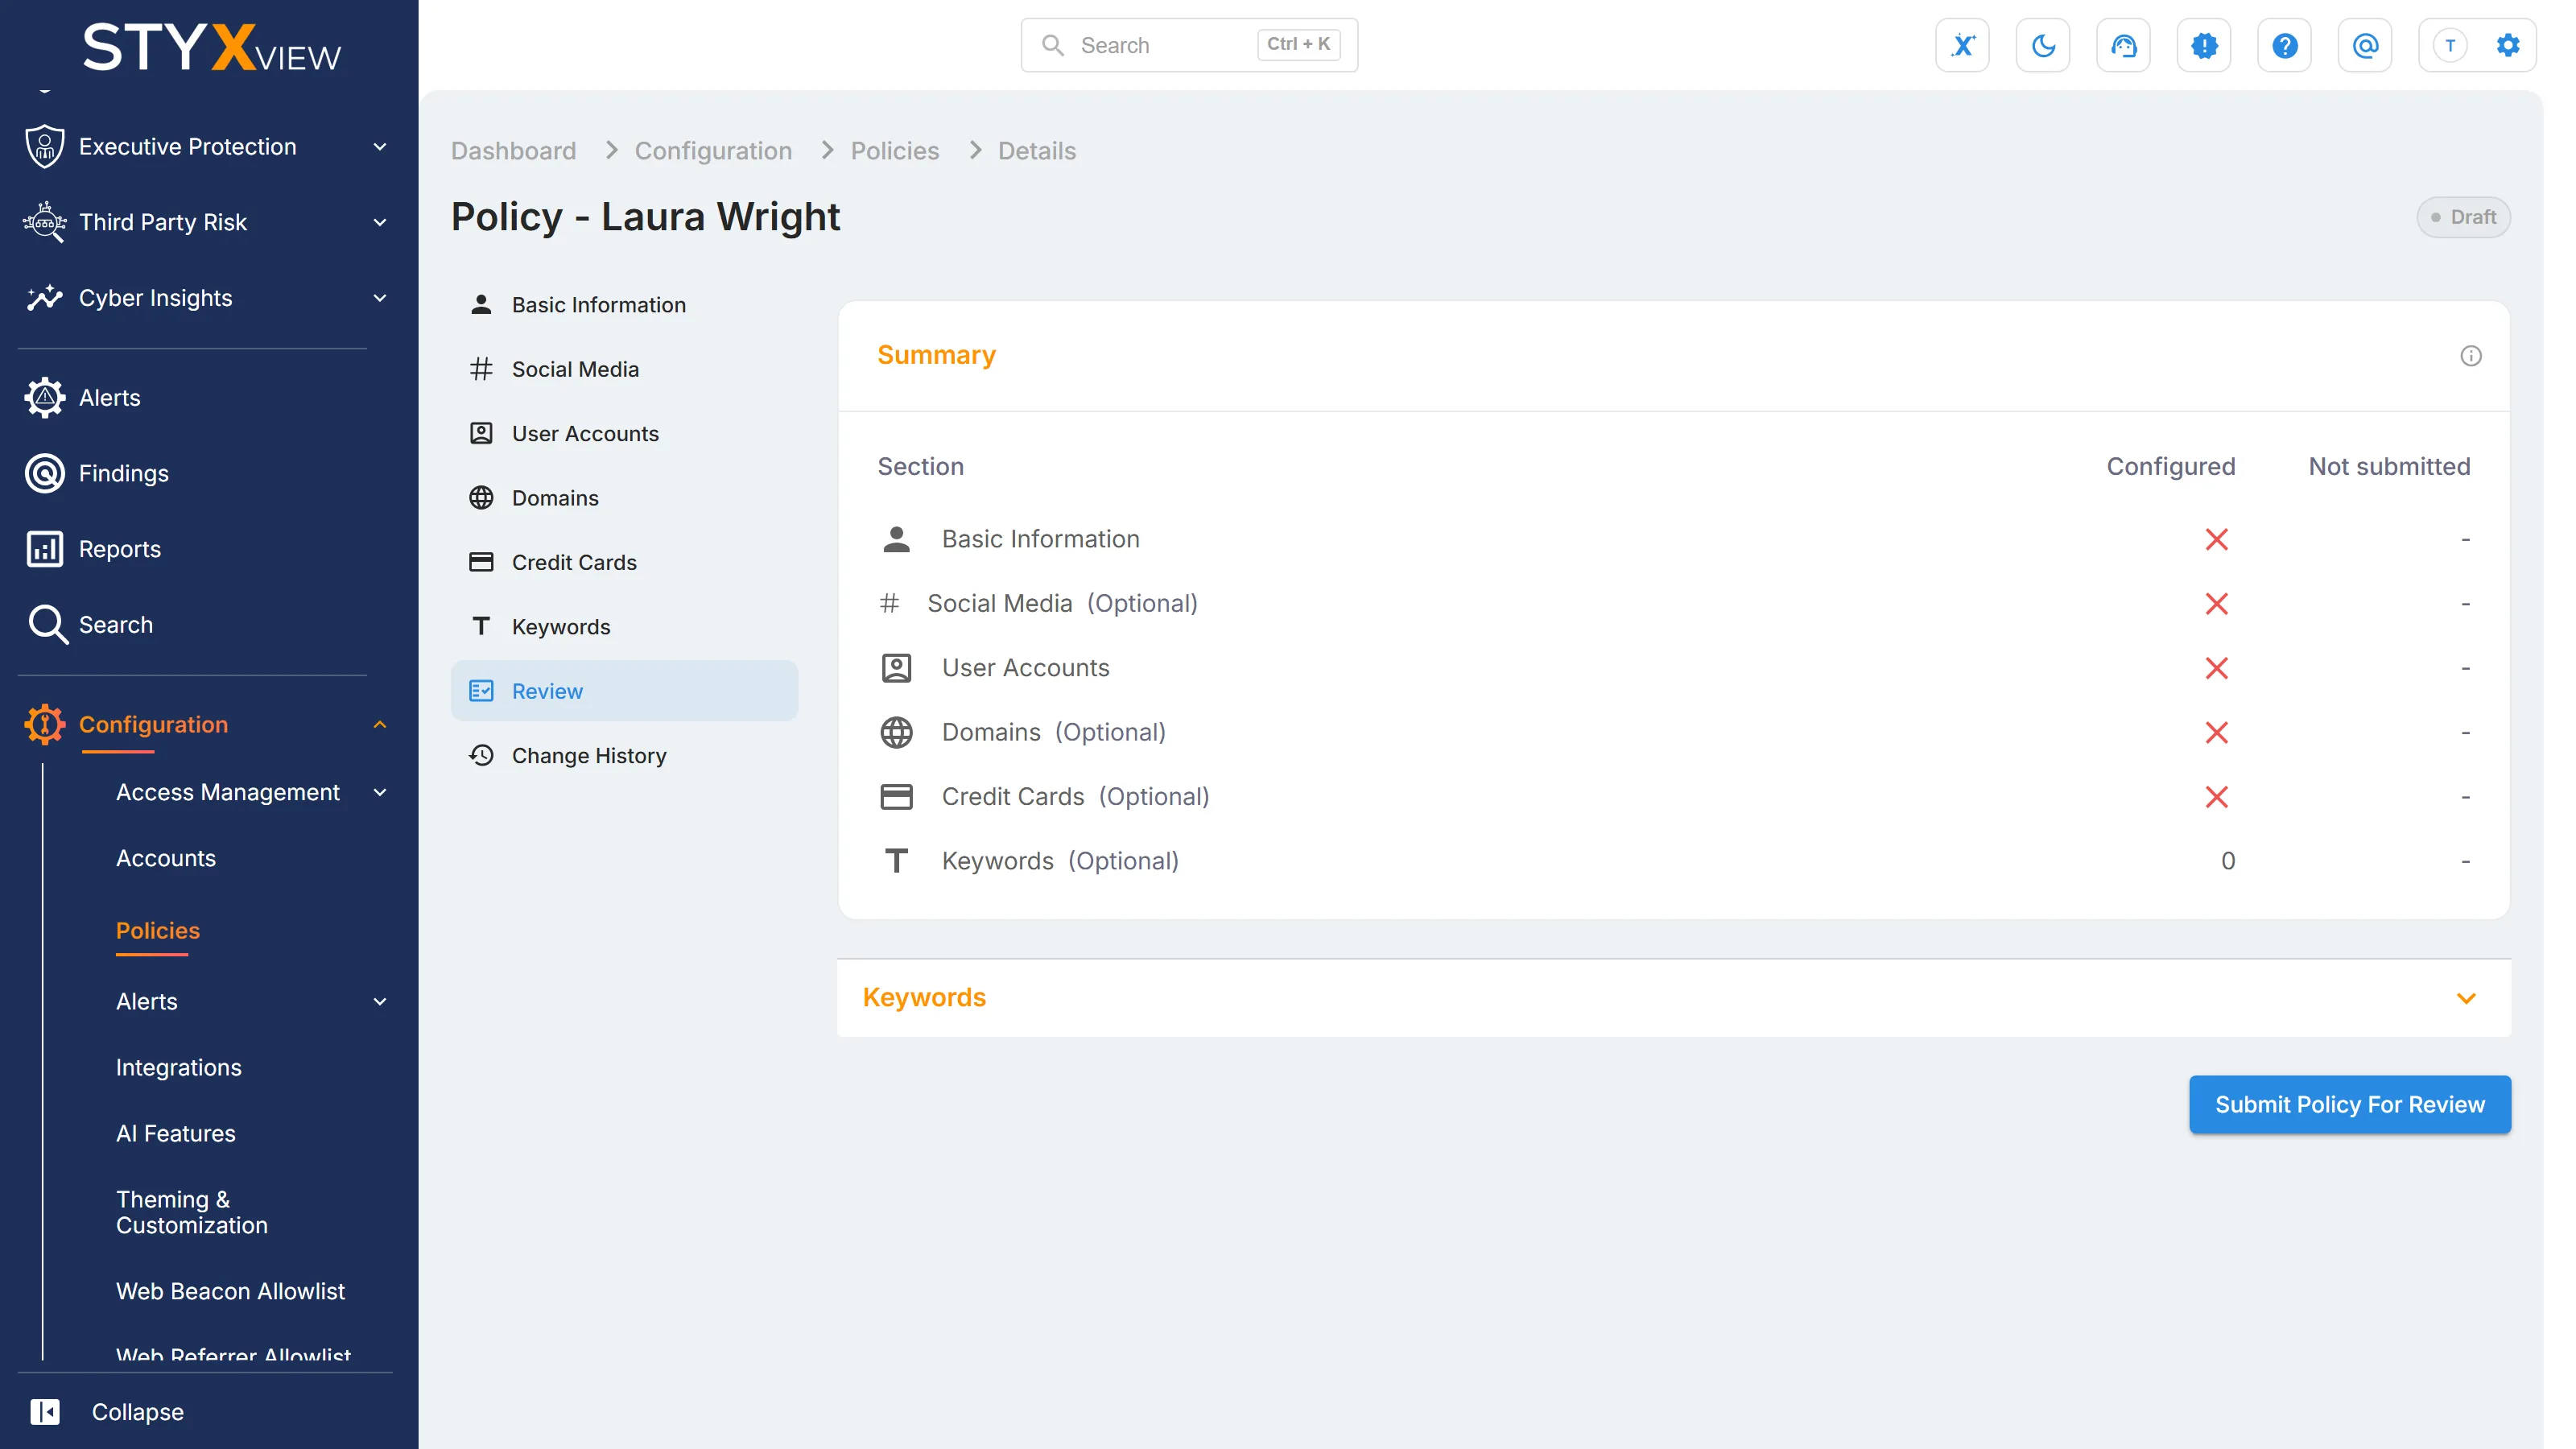
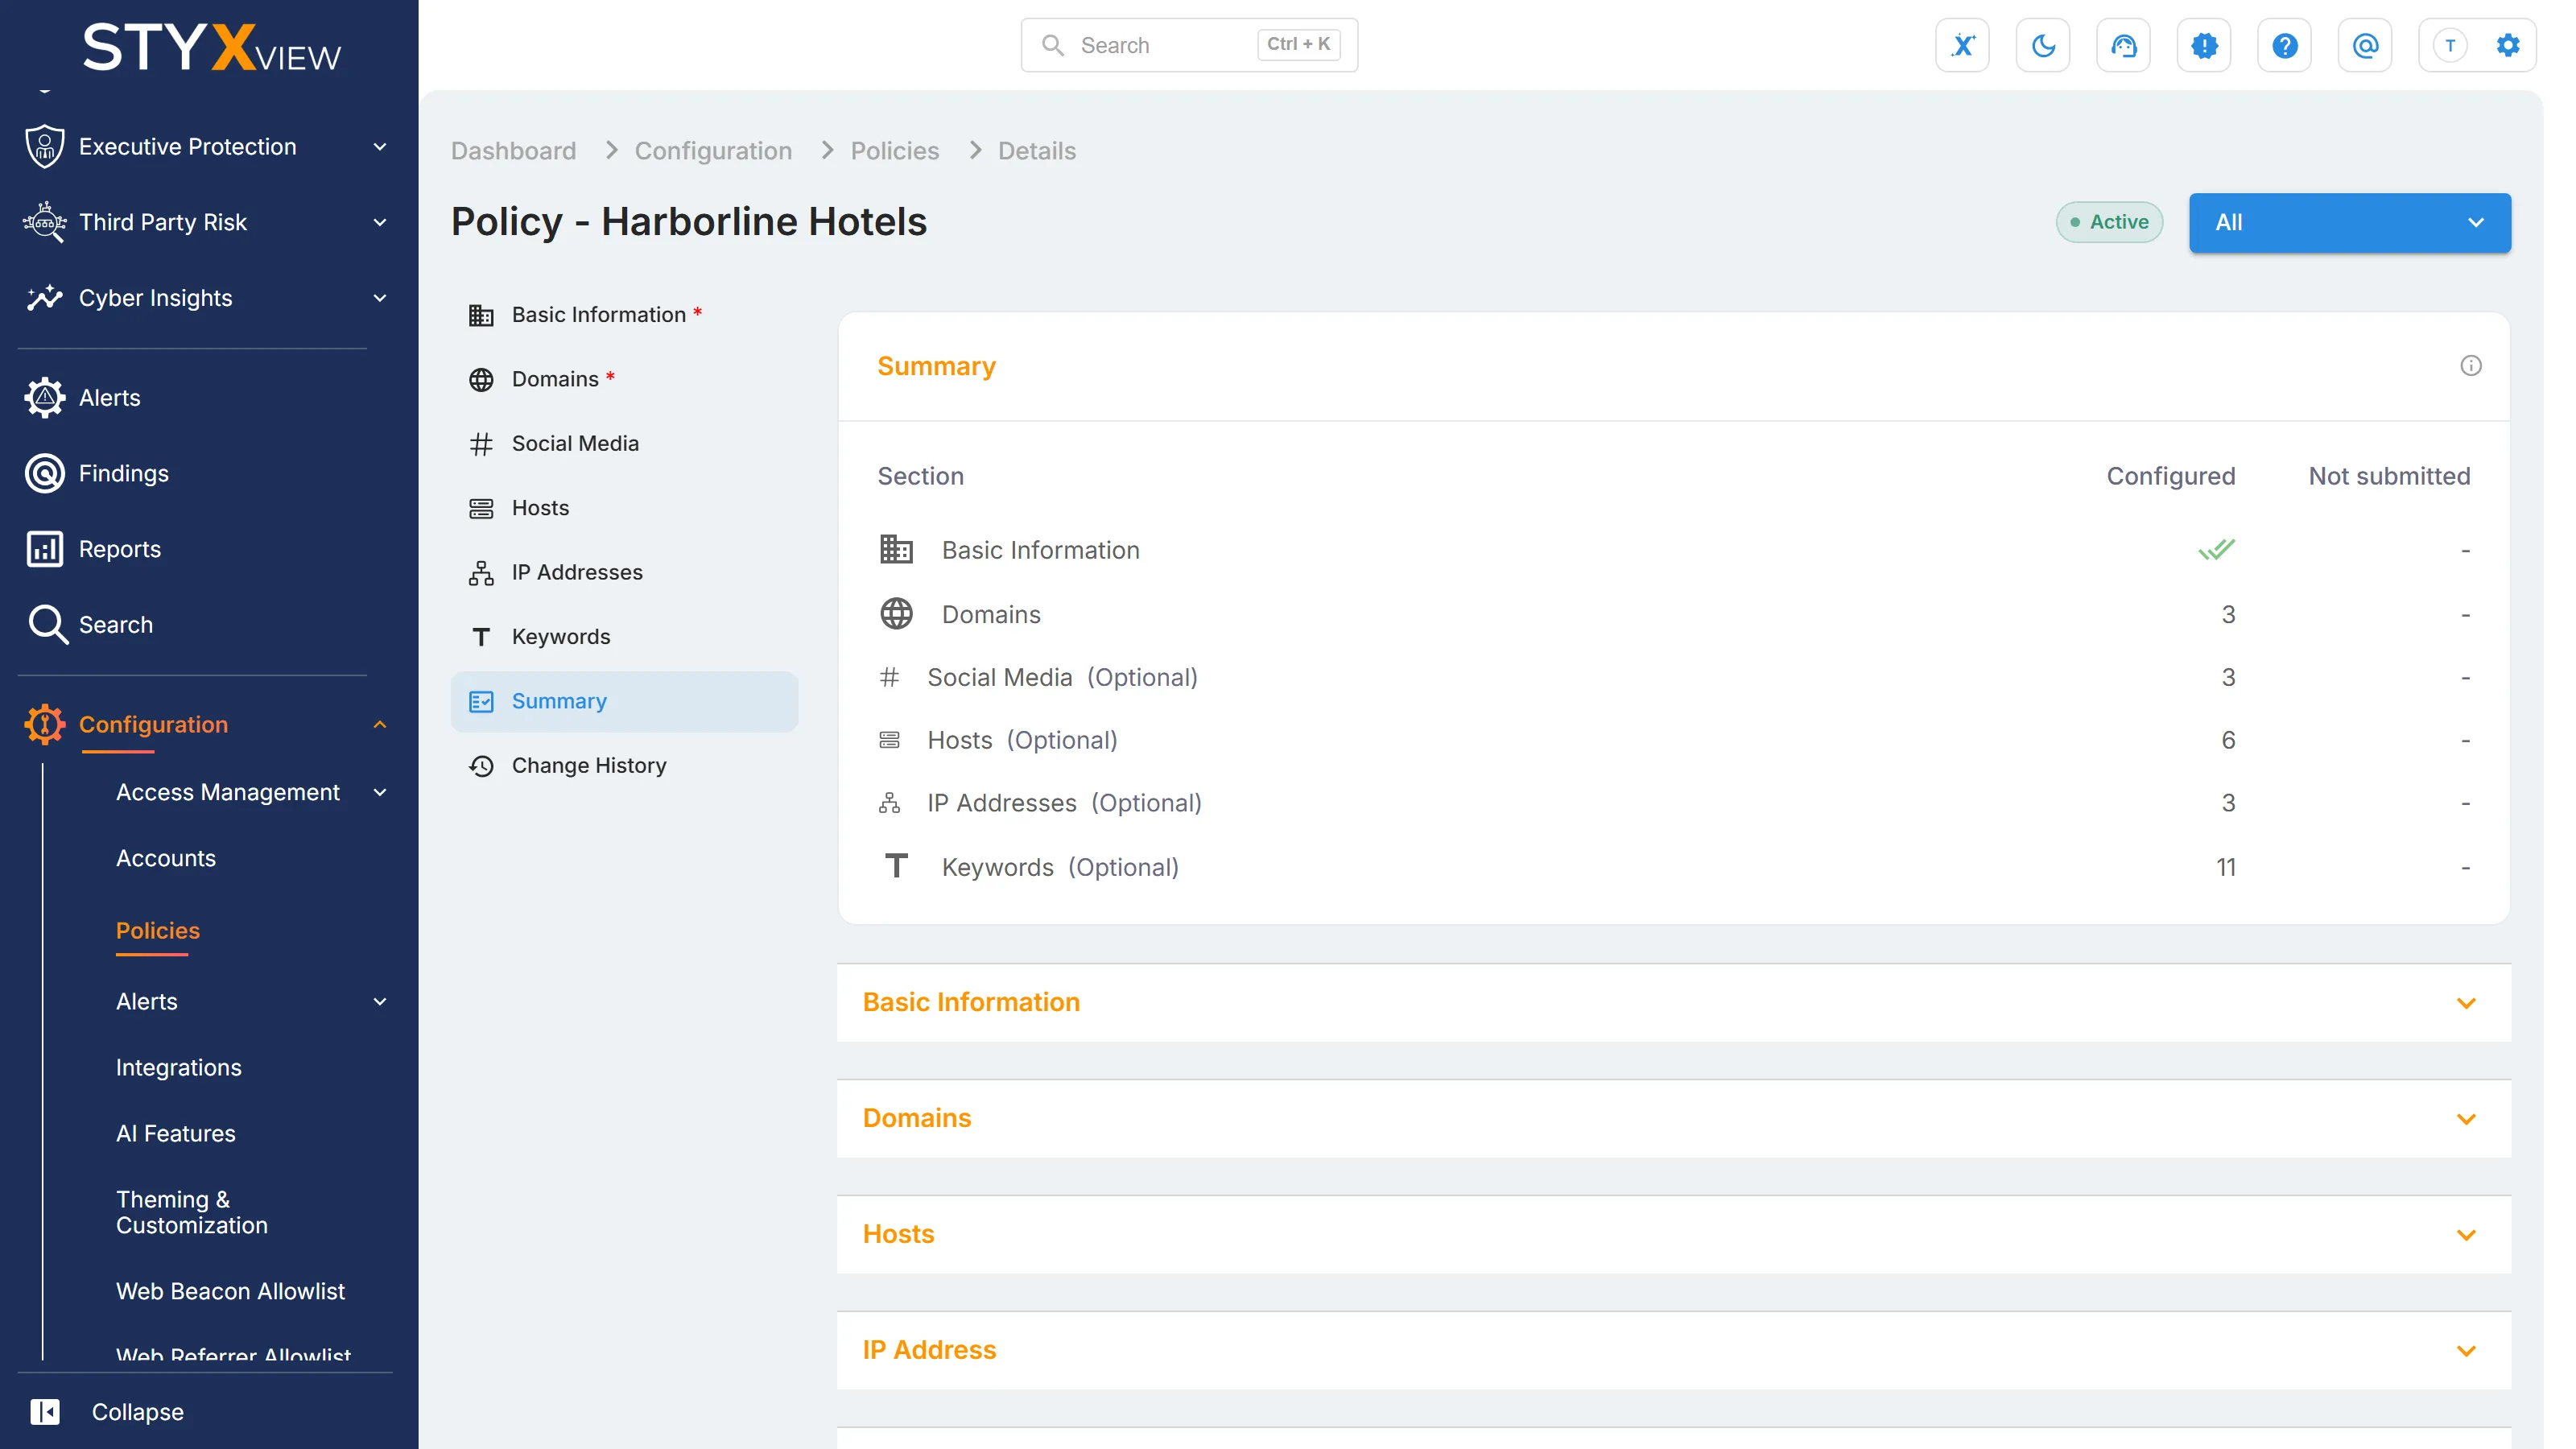
Open "Review". It lists every section with its state:
- "Configured": a tick, or the number of active assets, when the section has entries. A cross when it has none.
- "Not submitted": the additions (+) and removals (-) you have saved but not yet submitted.
- "In review": shown only while a review is open, with the number of assets the StyxView Support Team is reviewing.
-
Select "Submit Policy for Review". If a required section is empty, StyxView asks you to complete it first.
-
In the "Submit this policy for review?" dialog, select "Submit for review".
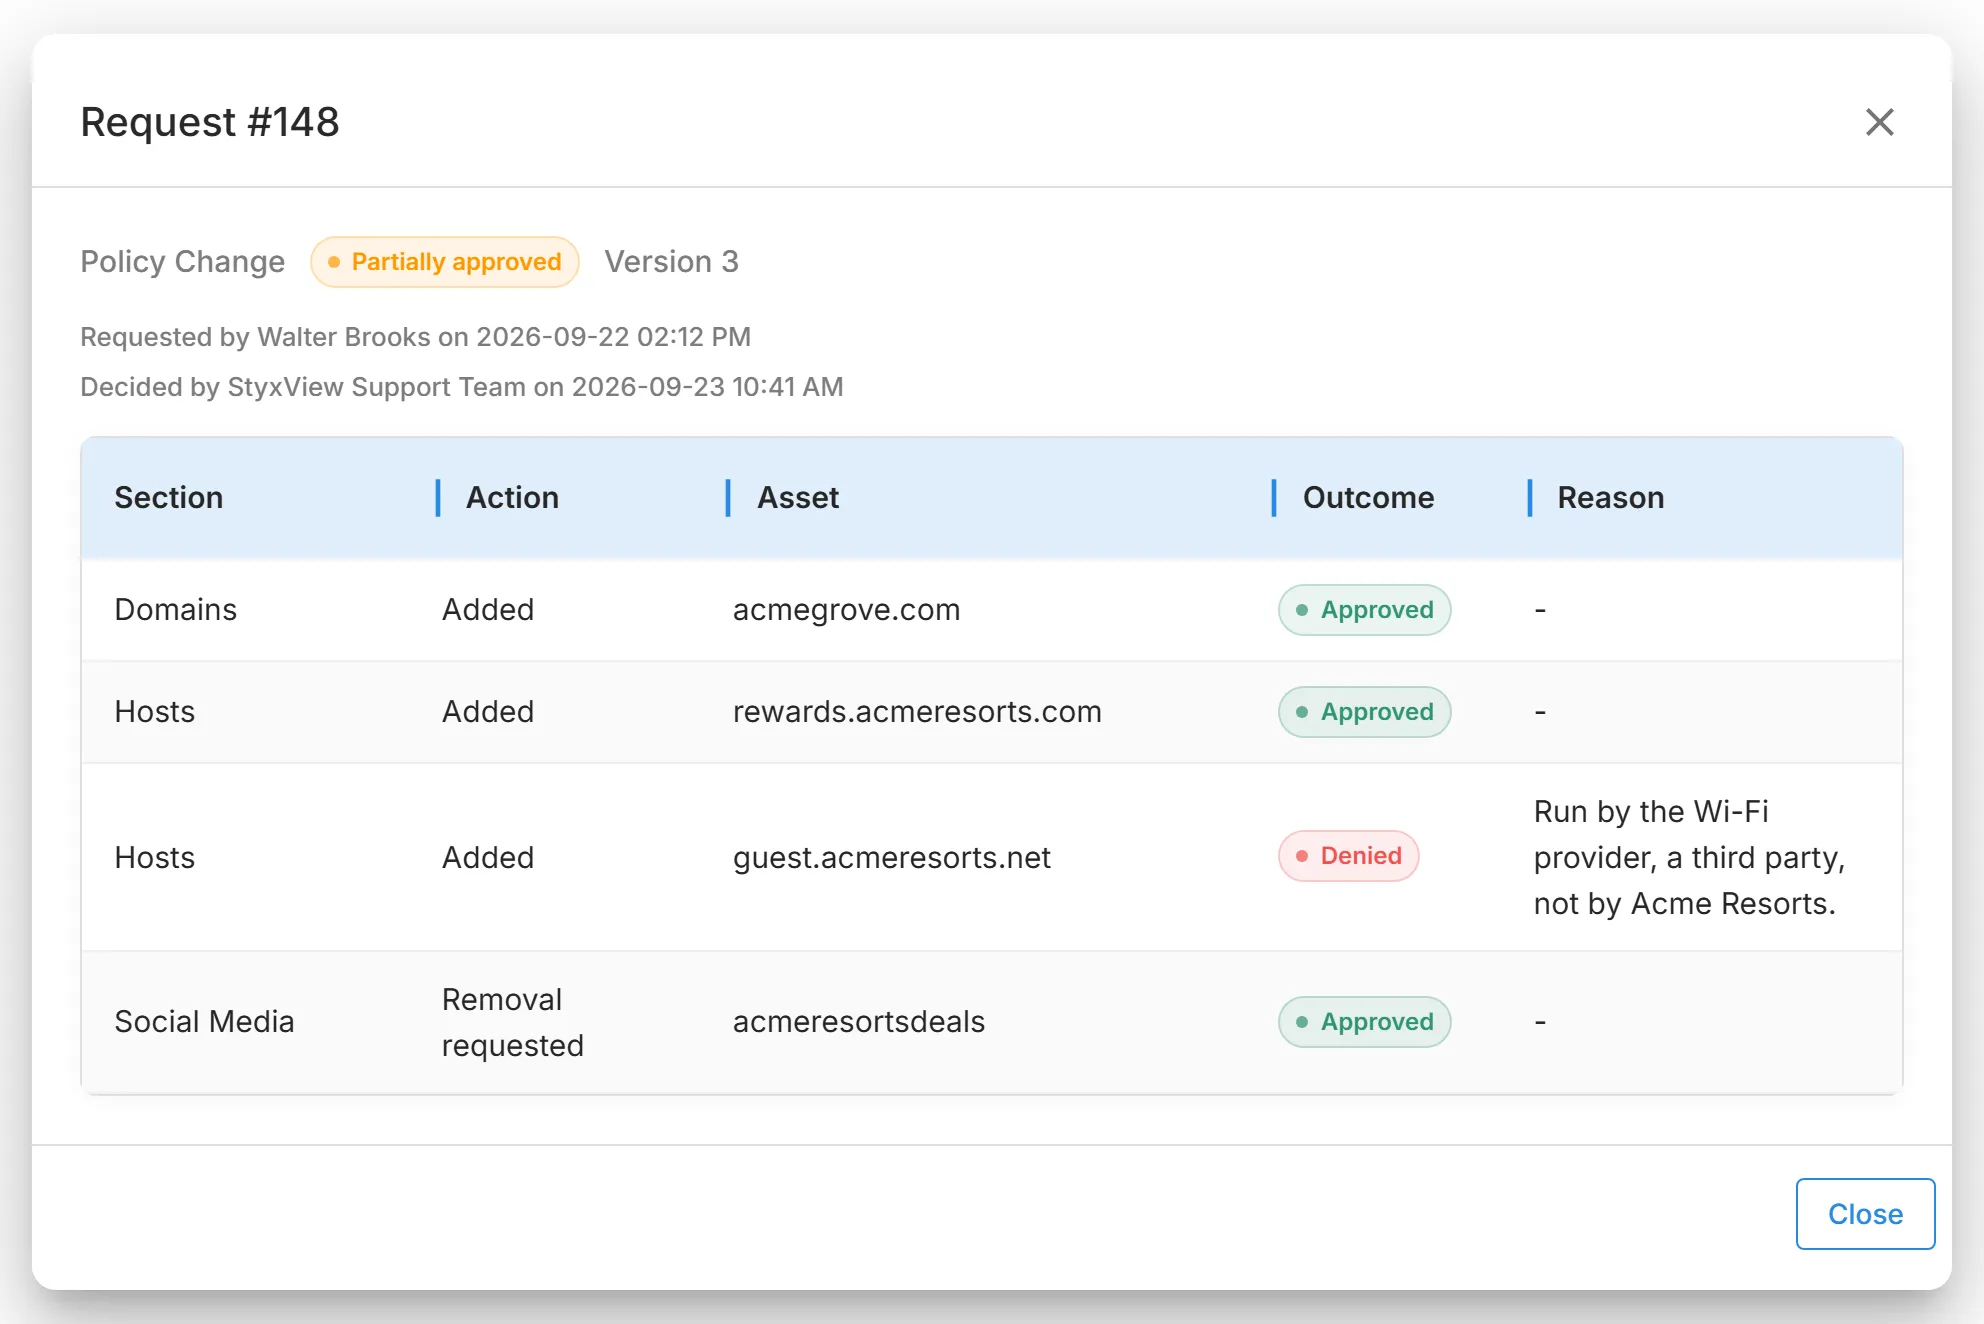
StyxView returns to the Policies page, where the policy now shows "Policy Configured". While the StyxView Support Team reviews it, the policy page shows "With the StyxView Support Team for review" and the policy is locked: you cannot add, remove, or submit anything until the review completes. Approved assets appear in scans within 24 hours. A denied asset comes back with a reason in "Change History".
Policy and Asset Statuses
Section titled “Policy and Asset Statuses”The label next to the policy name shows where the whole policy stands:
| Policy status | Meaning |
|---|---|
| "Draft" | The policy has never been submitted. |
| "1 change not submitted" (or more) | You have saved changes that are not yet submitted. |
| "Pending StyxView review" | The StyxView Support Team is reviewing the policy. It is locked until the review completes. |
| "Active" | The policy has been submitted and nothing is waiting. |
Each asset row has its own status:
| Asset status | Meaning |
|---|---|
| "Draft" | Saved on a policy that has never been submitted. |
| "Not submitted" | An addition you saved but have not submitted. |
| "Removal not submitted" | A removal you requested but have not submitted. The asset is still monitored. |
| "Pending review" | Submitted and waiting for the StyxView Support Team. |
| "Removal pending review" | A submitted removal. The asset stays monitored until the removal is approved. |
| "Active" | Approved and monitored. |
When a section has any, "Removed and denied assets" below it lists the assets StyxView has retired or turned down, with the "Outcome", the date it was "Decided", the "Request", and the "Reason". These assets are no longer monitored. Adding one again sends it back through review.
Changing a Configured Policy
Section titled “Changing a Configured Policy”-
On the Policies page, select the pencil icon of a "Policy Configured" policy.
-
Make your changes:
- To add an asset, add a row as in Adding Assets. It shows "Not submitted".
- To remove an active asset, select "Request removal" in its row and confirm with "Yes". The asset stays monitored until StyxView approves the removal.
- To undo an addition you have not submitted, select "Withdraw this entry". To undo a removal request, select "Cancel removal request".
-
A banner counts your unsubmitted changes. Select "Go to Summary".
-
"Summary" opens with "Show only unsubmitted changes" selected, so you see exactly what you are sending. Select "Submit Policy Changes for Review".
-
In the "Submit these changes for review?" dialog, select "Submit for review".
Additions appear in scans within 24 hours of approval. Basic Information and Brand Colors cannot be changed in edit mode, and Geo saves without review.
Change History
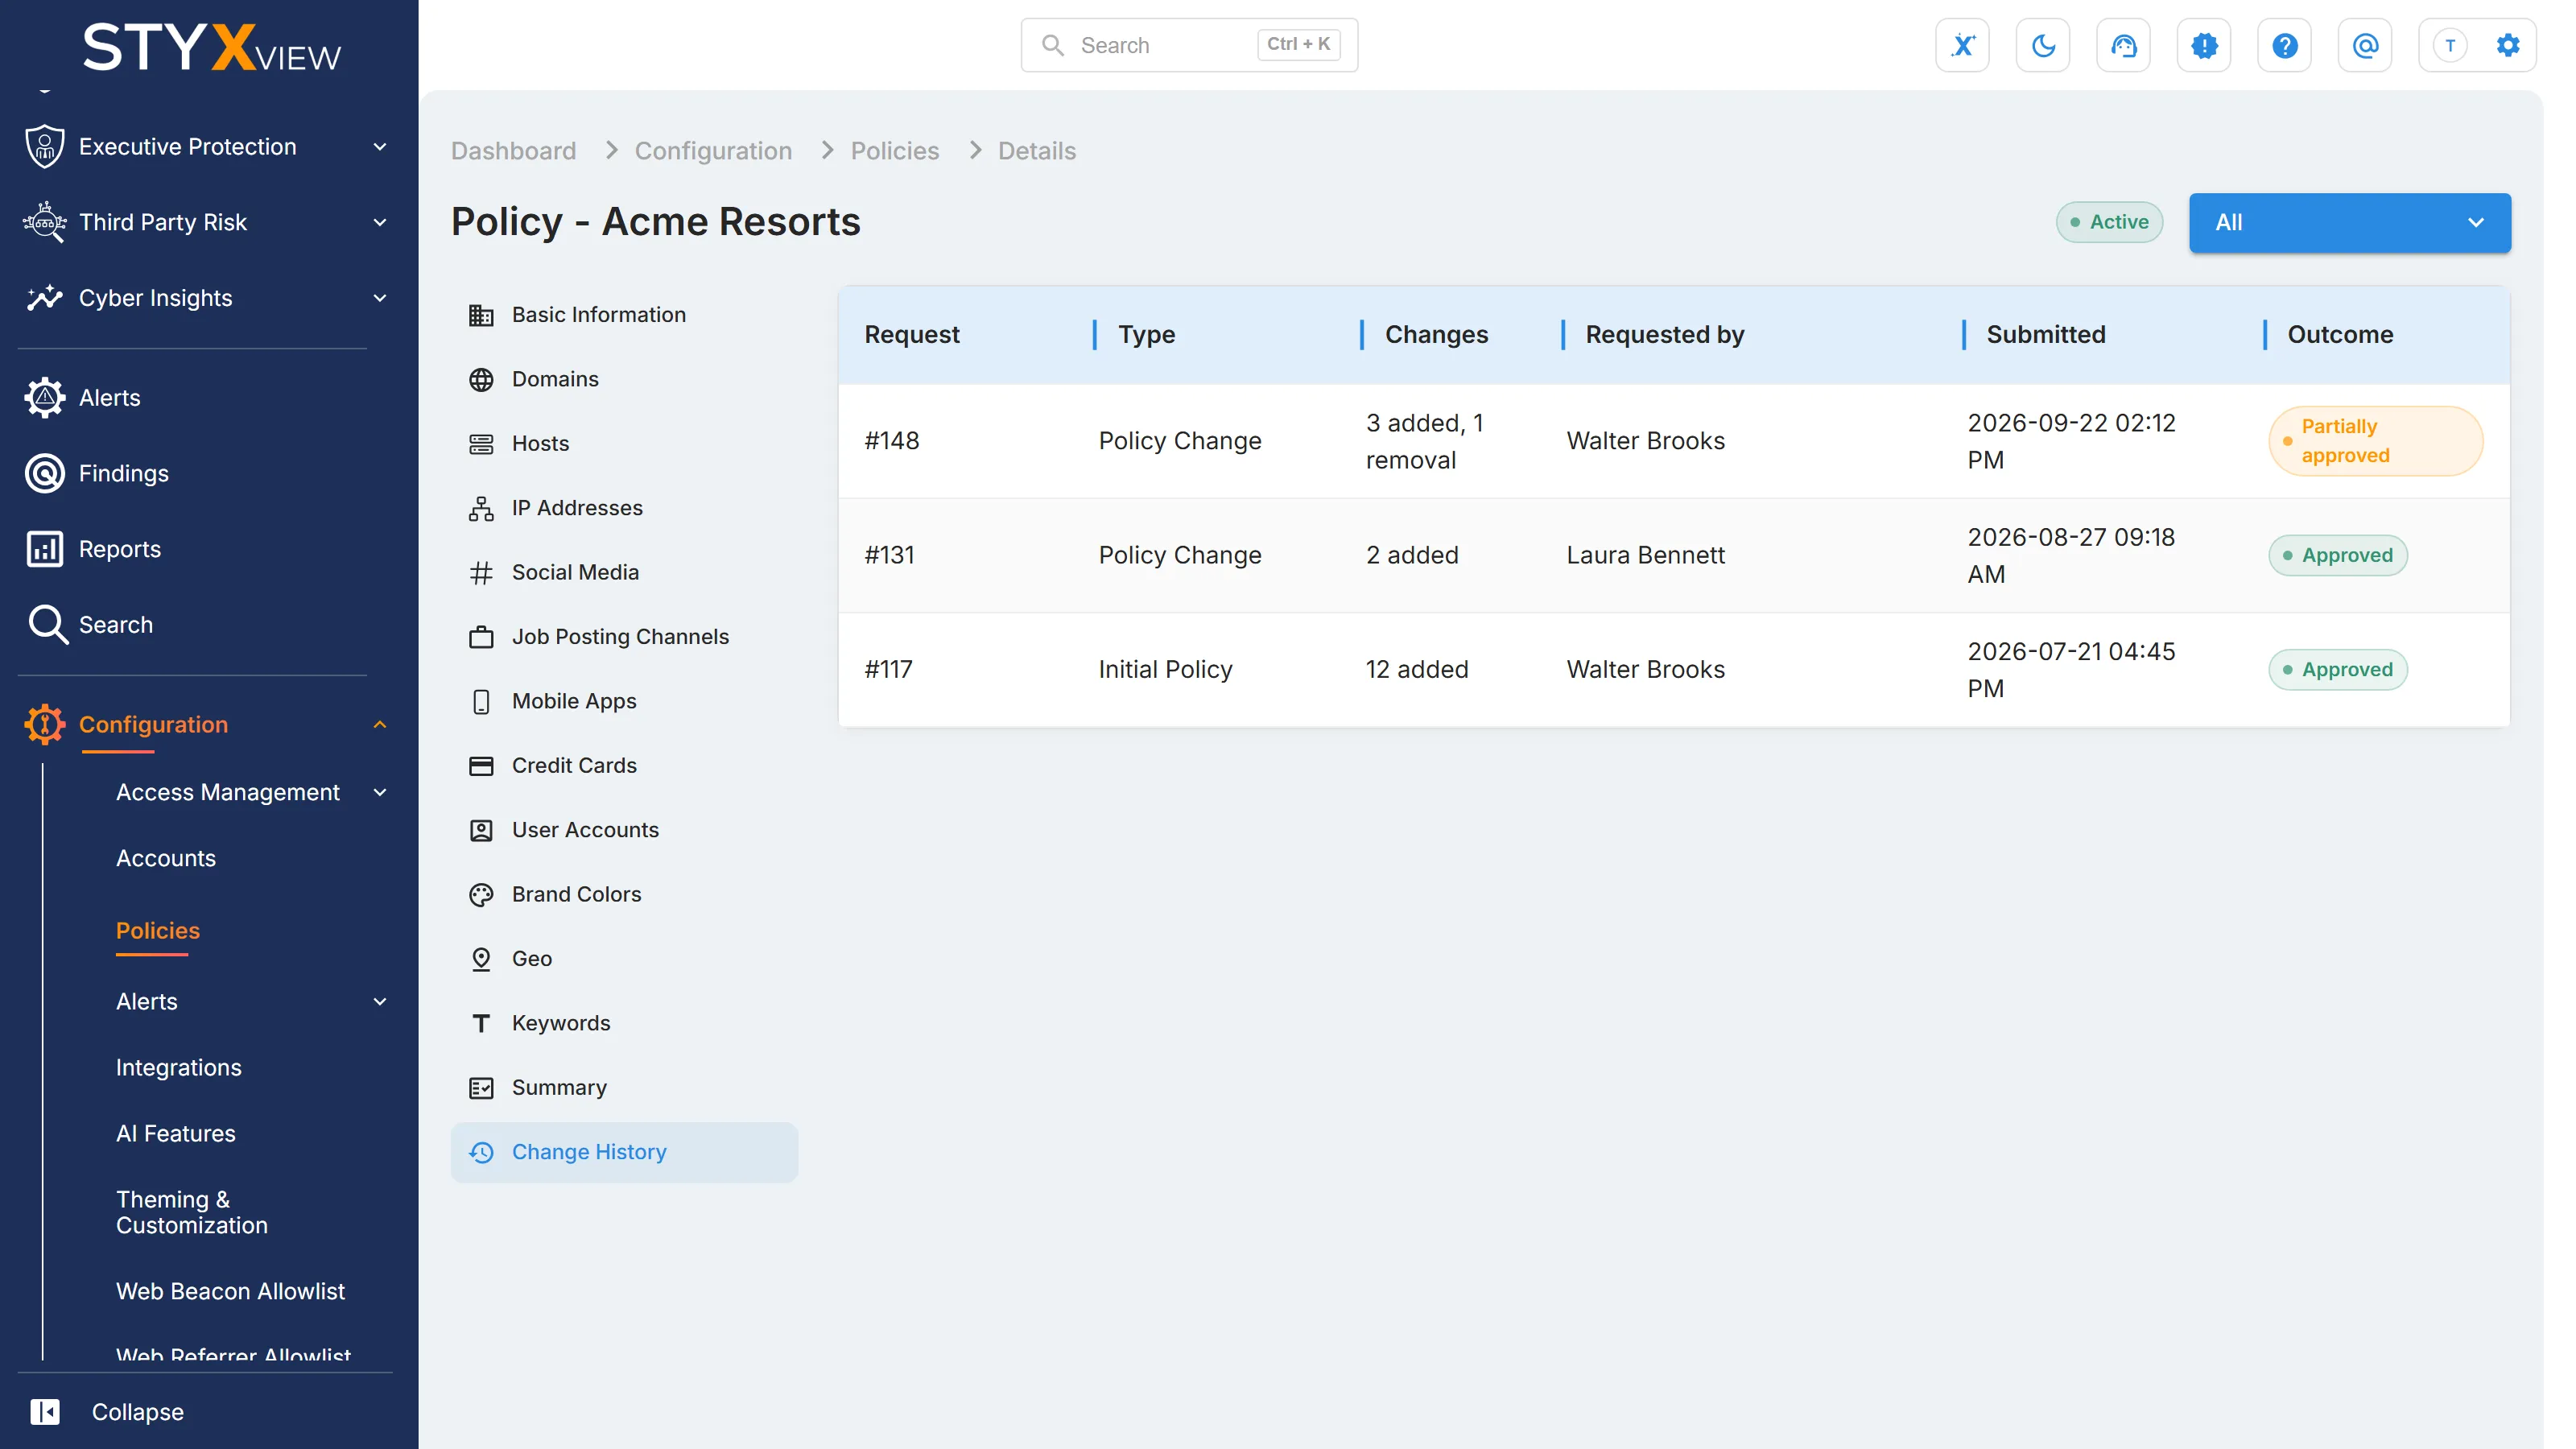
Section titled “Change History”"Change History" lists every submission on the policy:
| Column | What it shows |
|---|---|
| "Request" | The request number. |
| "Type" | "Initial Policy" for the first submission, "Policy Change" for later ones. |
| "Changes" | How many assets were added or flagged for removal. |
| "Requested by" | Who submitted it. |
| "Submitted" | When it was submitted. |
| "Outcome" | "Pending review", "Approved", "Denied", or "Partially approved". |
Open a request to see each asset in it, with its "Section", "Action" ("Added" or "Removal requested"), "Outcome", and the "Reason" for a denial.
Deleting a Policy
Section titled “Deleting a Policy”- On the Policies page, select the delete icon at the end of the policy's row.
- In the "Delete policy" dialog, select "Delete". To keep the policy, select "Cancel".
You can also delete policies from Accounts.