

Reports
The "Reports" page is where you schedule reports, download the reports that have run, and find the exports you have created from tables.
Navigation Path
Section titled “Navigation Path”In the left menu, select "Reports". The page opens on the "Schedule Reports" tab.
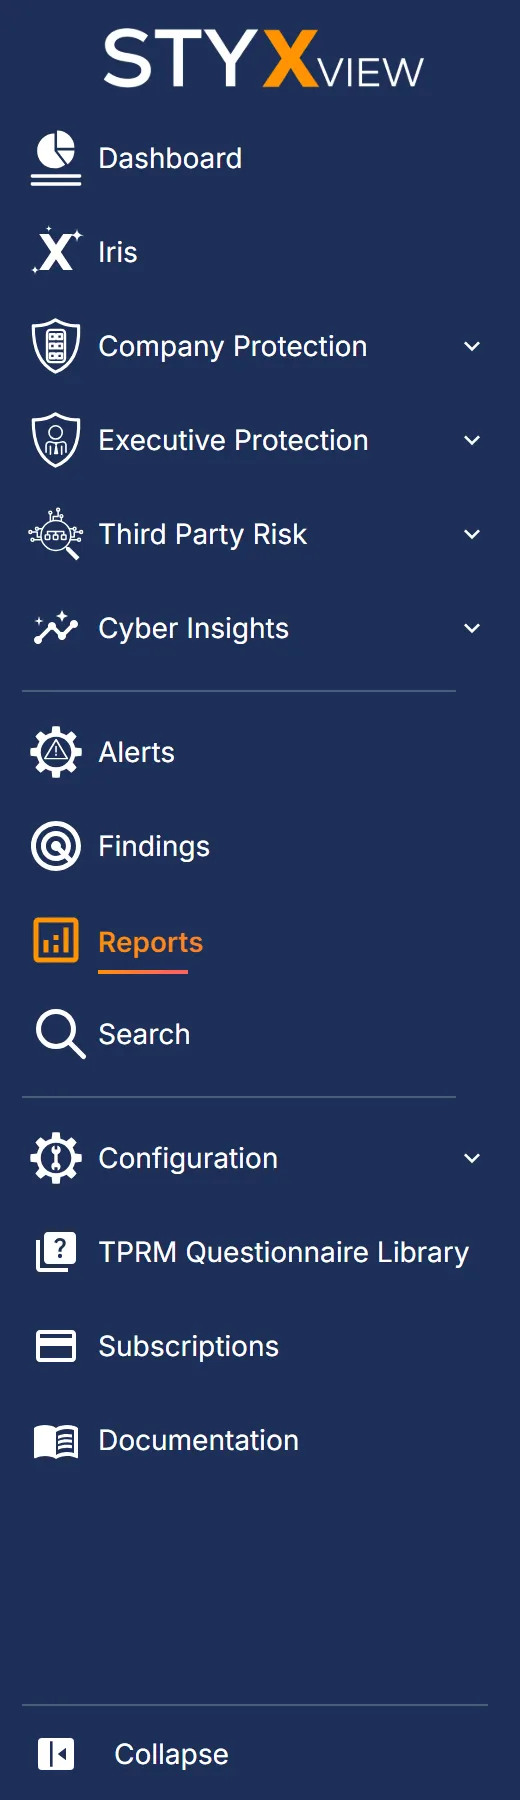
The page has five tabs:

| Tab | What it holds |
|---|---|
| Schedule Reports | The reports you have set up, one-time or recurring. |
| Generated Reports | The reports that have run, ready to download. |
| Archived Reports | Older reports, kept for download and reference. |
| Scheduled Exports | Your recurring exports of table data. |
| Generated Exports | Your exports that have run, ready to download. |
Exports are described in Export Functionality.
Report Branding
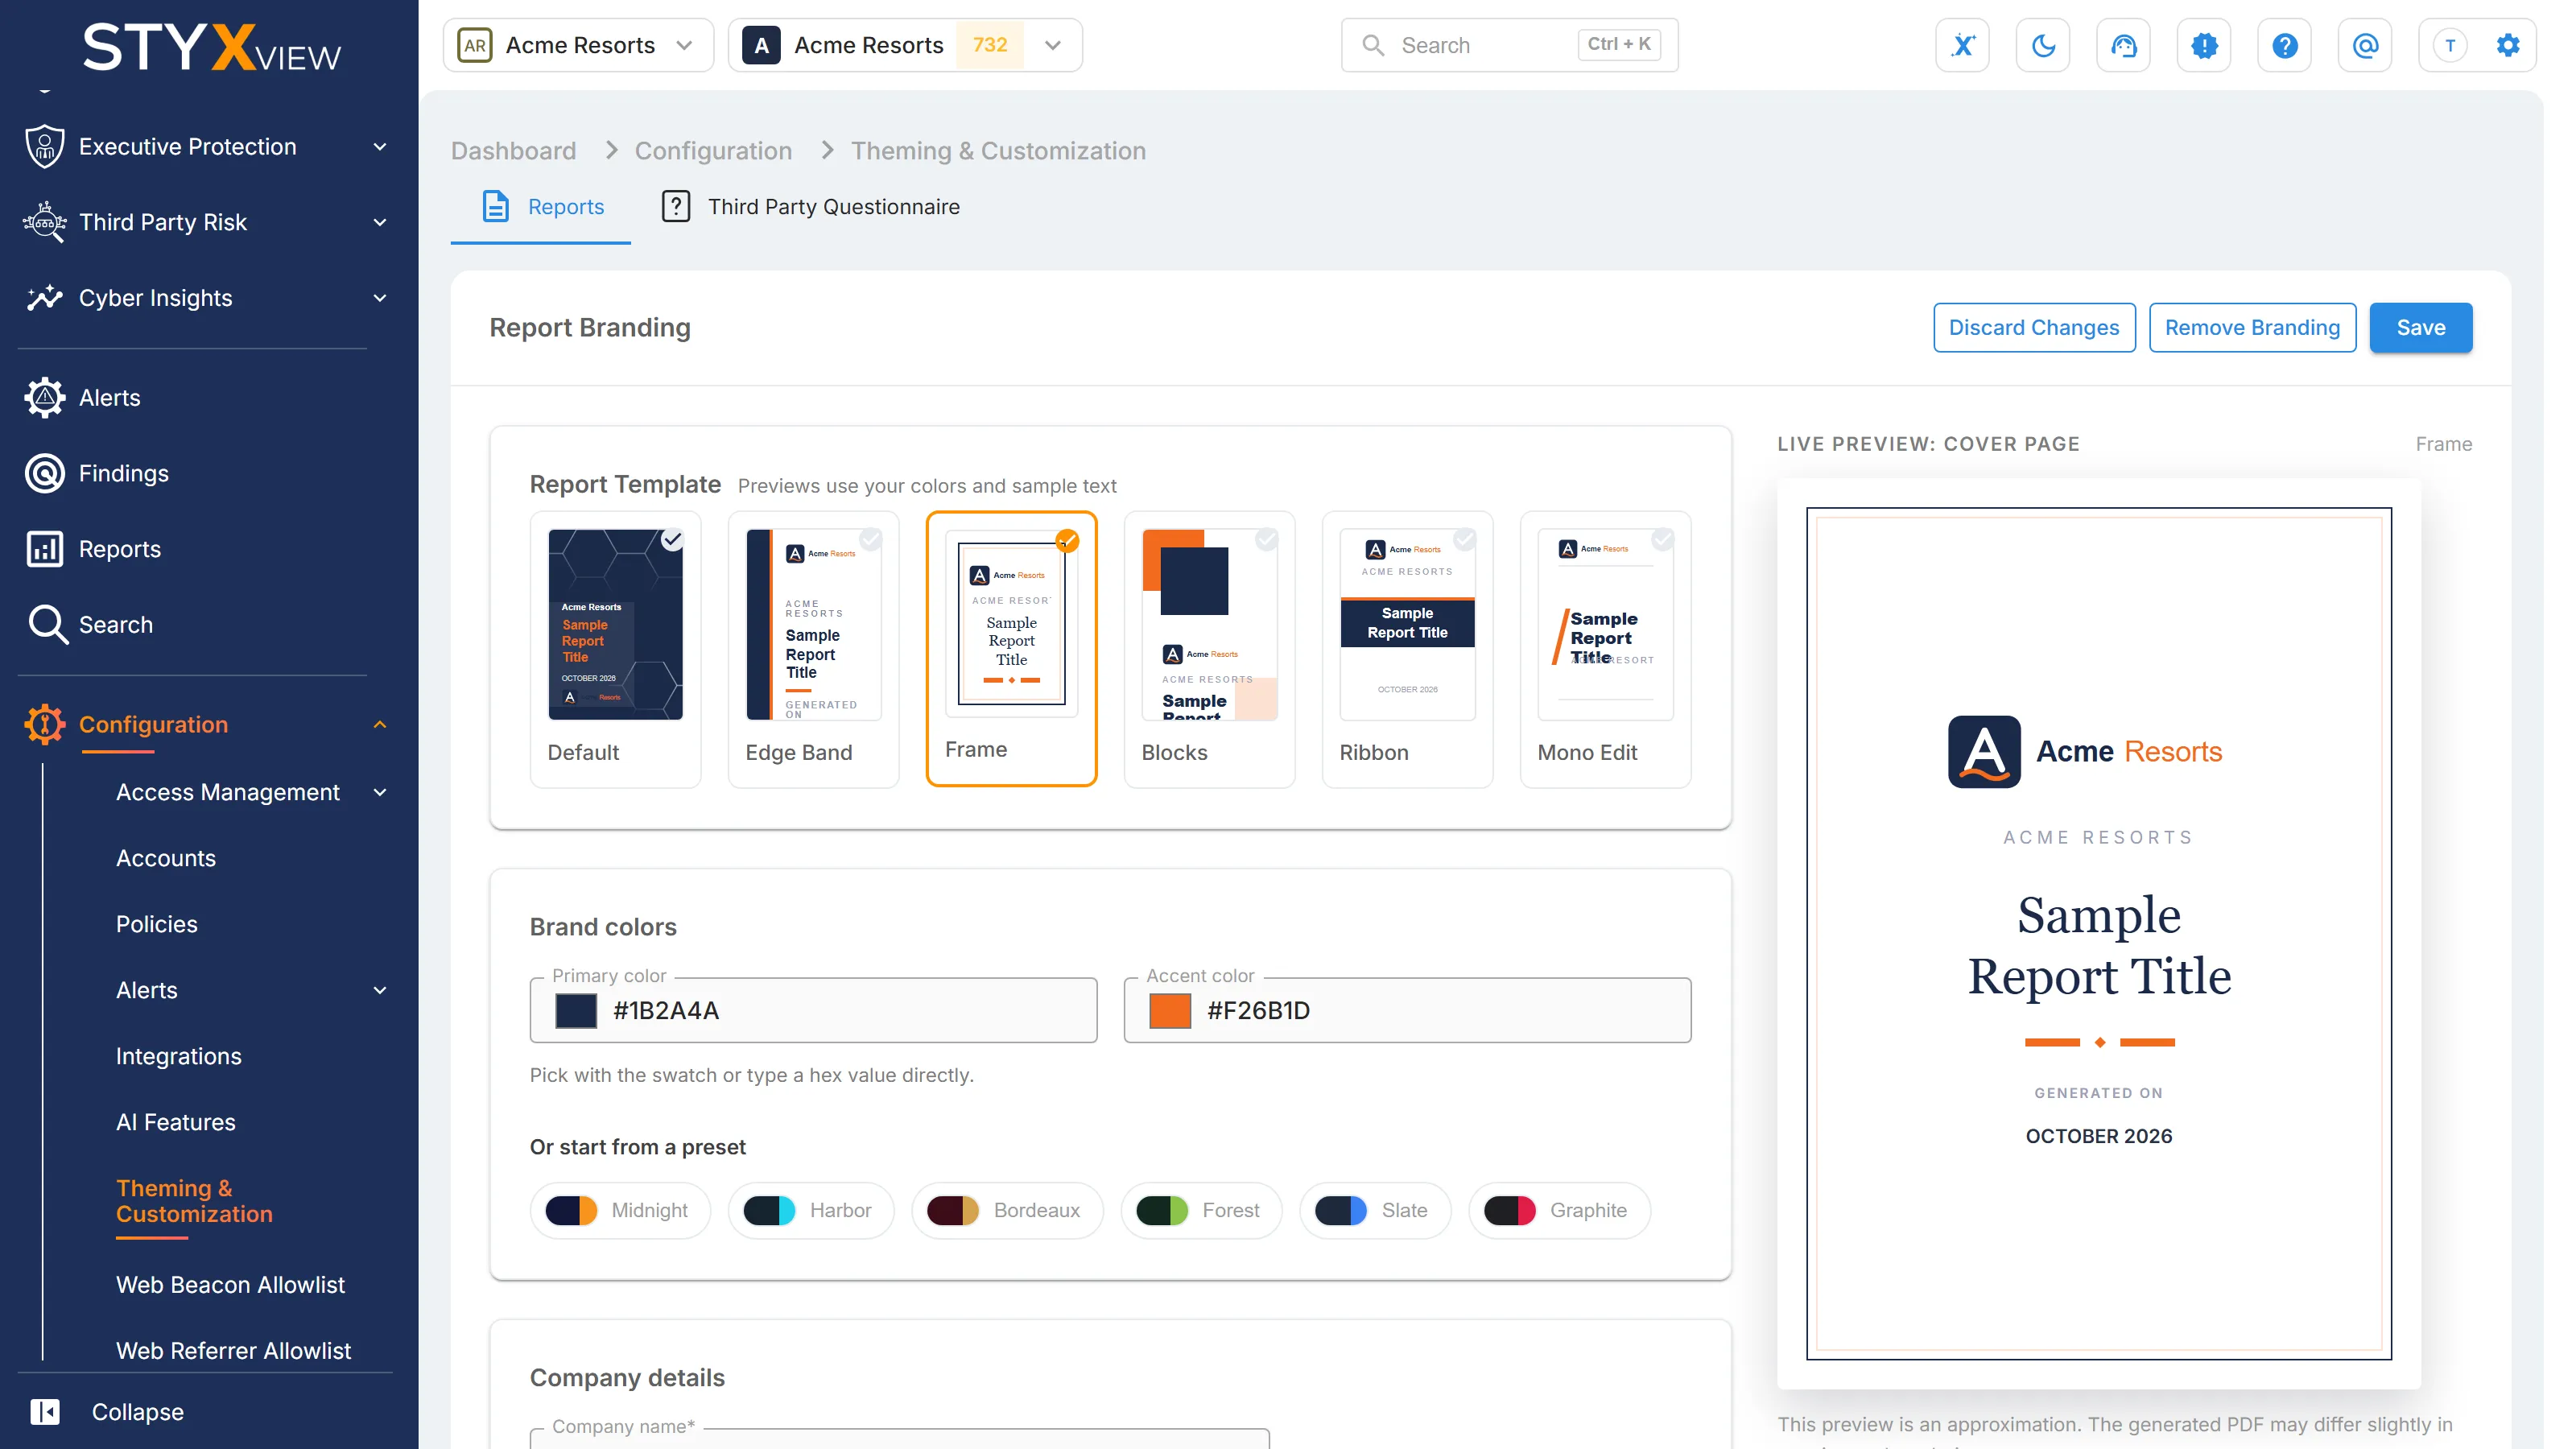
Section titled “Report Branding”An Admin can brand generated reports under "Configuration" > "Theming & Customization" > "Reports": choose a "Report Template", set the "Brand colors" or start from a preset, and enter the "Company details". The live preview shows the cover page as you change it. Select "Save" to apply the branding, or "Remove Branding" to return to the default. See Theming & Customization.
Schedule Reports
Section titled “Schedule Reports”"Schedule Reports" lists every report you have set up. A one-time report stays in the list after it runs, and its file appears under "Generated Reports".
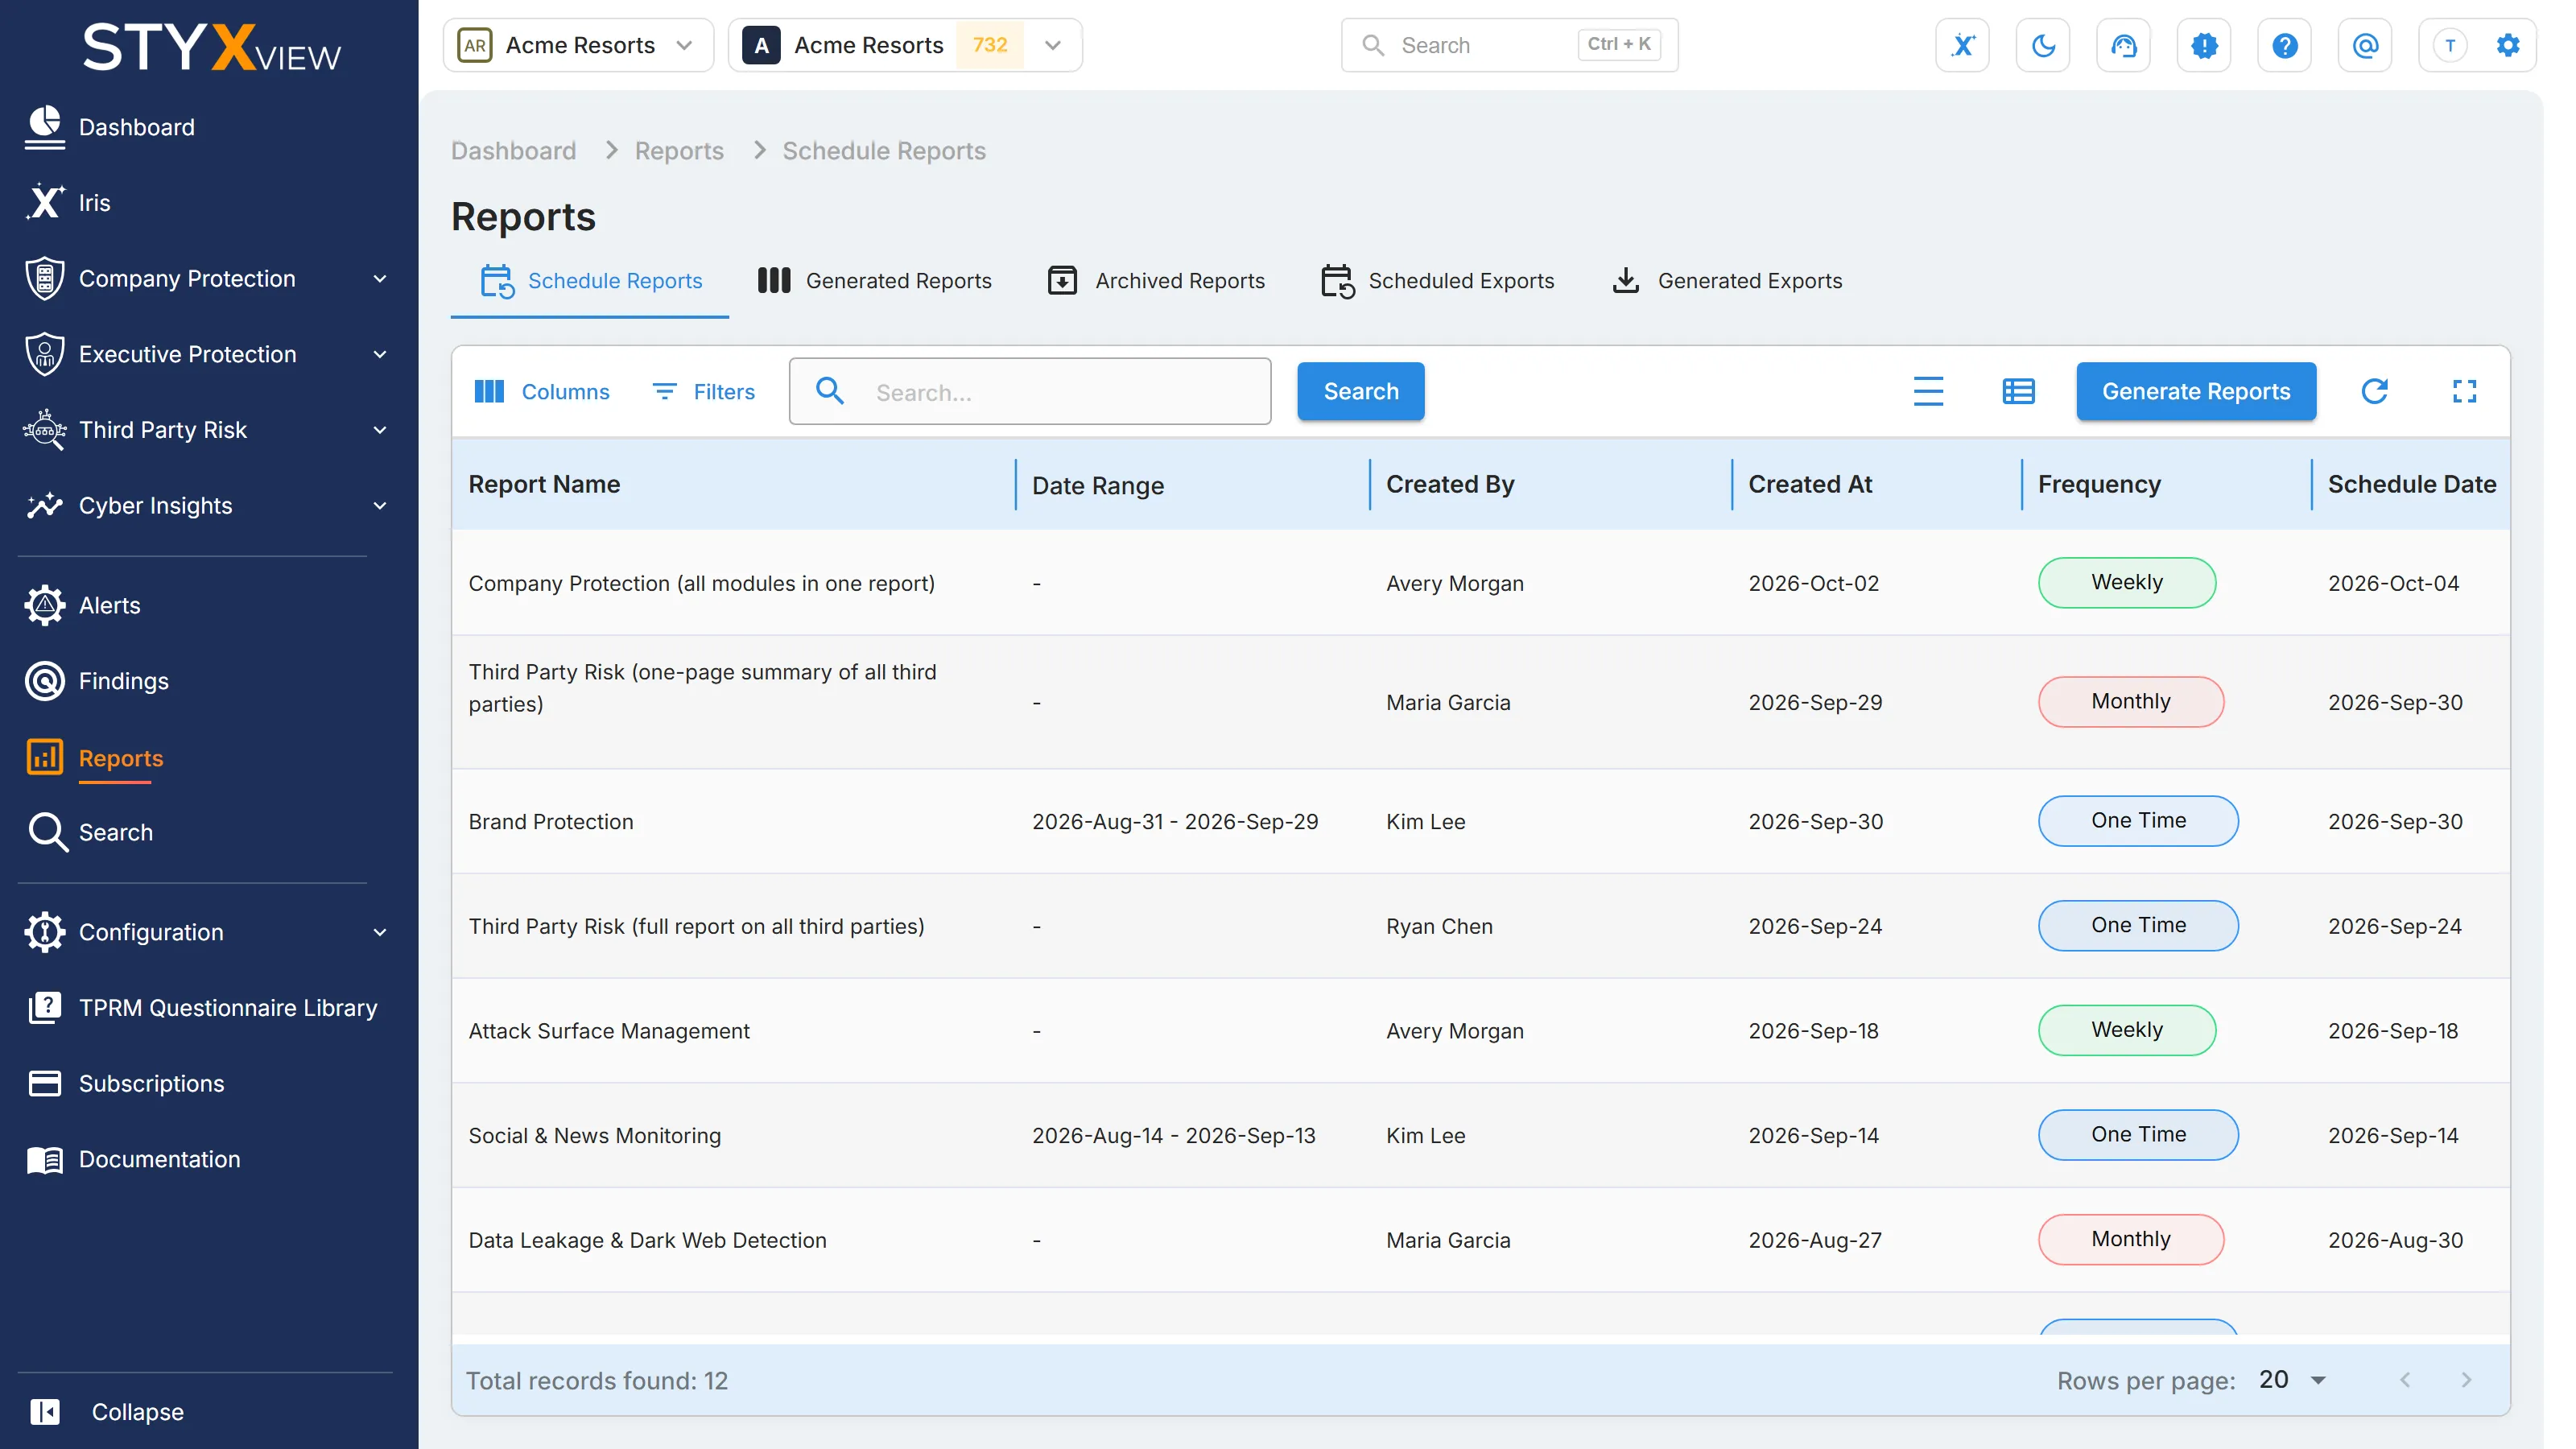
| Column | Description |
|---|---|
| Report Name | The template the report uses. |
| Date Range | The period the report covers, when one was set. |
| Created By | The user who scheduled the report. |
| Created At | When the report was scheduled. |
| Frequency | One Time, Weekly, or Monthly. |
| Schedule Date | The date a one-time report runs. |
| Schedule Time | The time the report runs. |
| Timezone | The time zone of the schedule. |
| Schedule Day of week | The day a weekly report runs. |
| Schedule Day of Month | Start of Month or End of Month, for a monthly report. |
| Actions | The delete icon. |
To delete a report, select its delete icon, then select "Delete" in the "Delete report" dialog.
Steps to Schedule a Report
Section titled “Steps to Schedule a Report”-
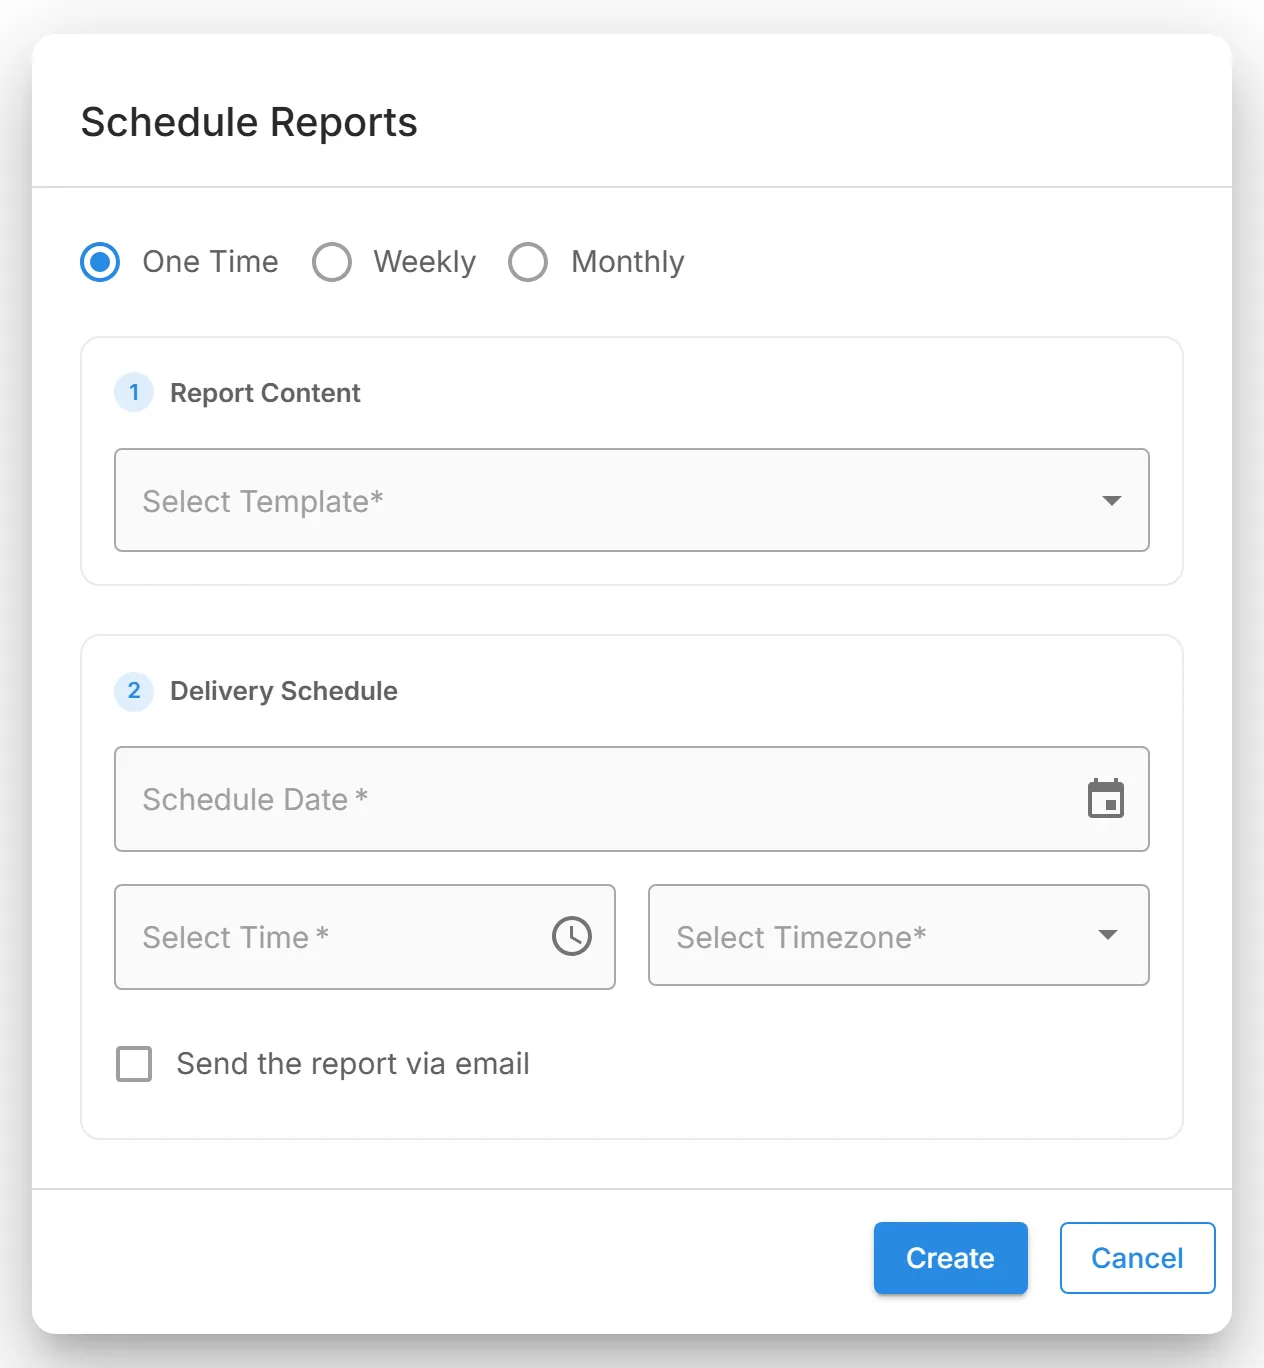
On the "Schedule Reports" tab, select "Generate Reports". The "Schedule Reports" dialog opens.

-
Choose how often the report runs: "One Time", "Weekly", or "Monthly".
-
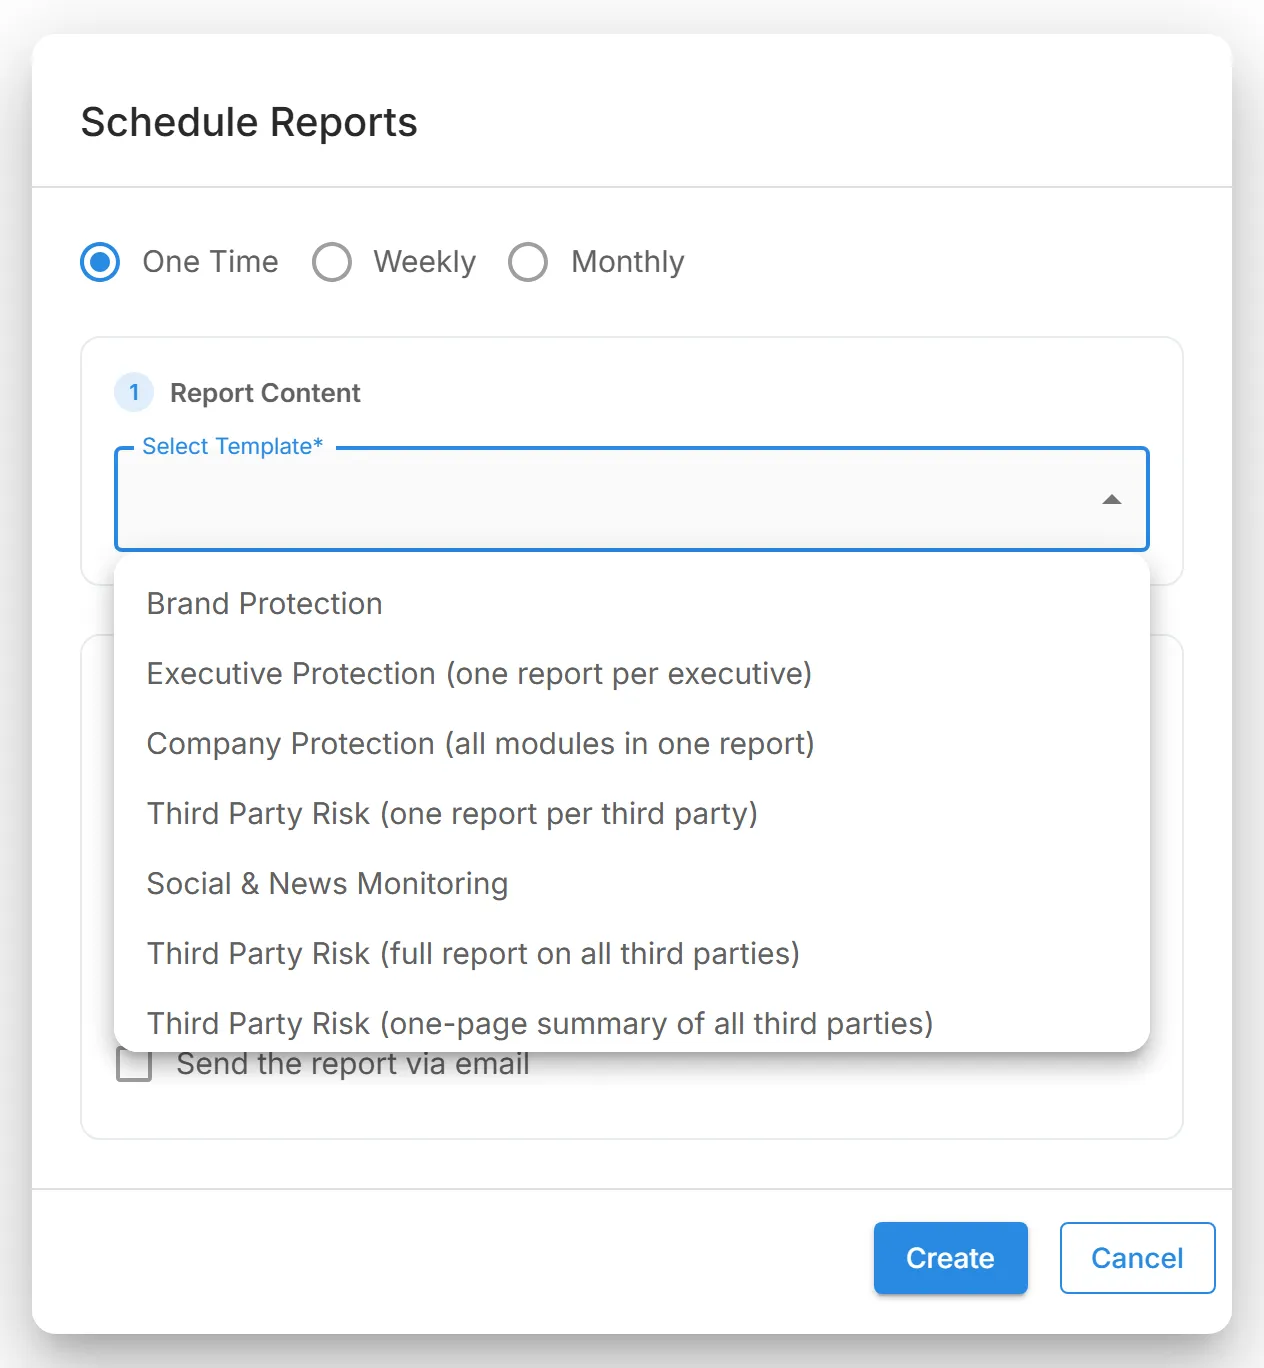
Under "Report Content", choose the report in "Select Template". The list shows the templates for the solutions your account has.
-
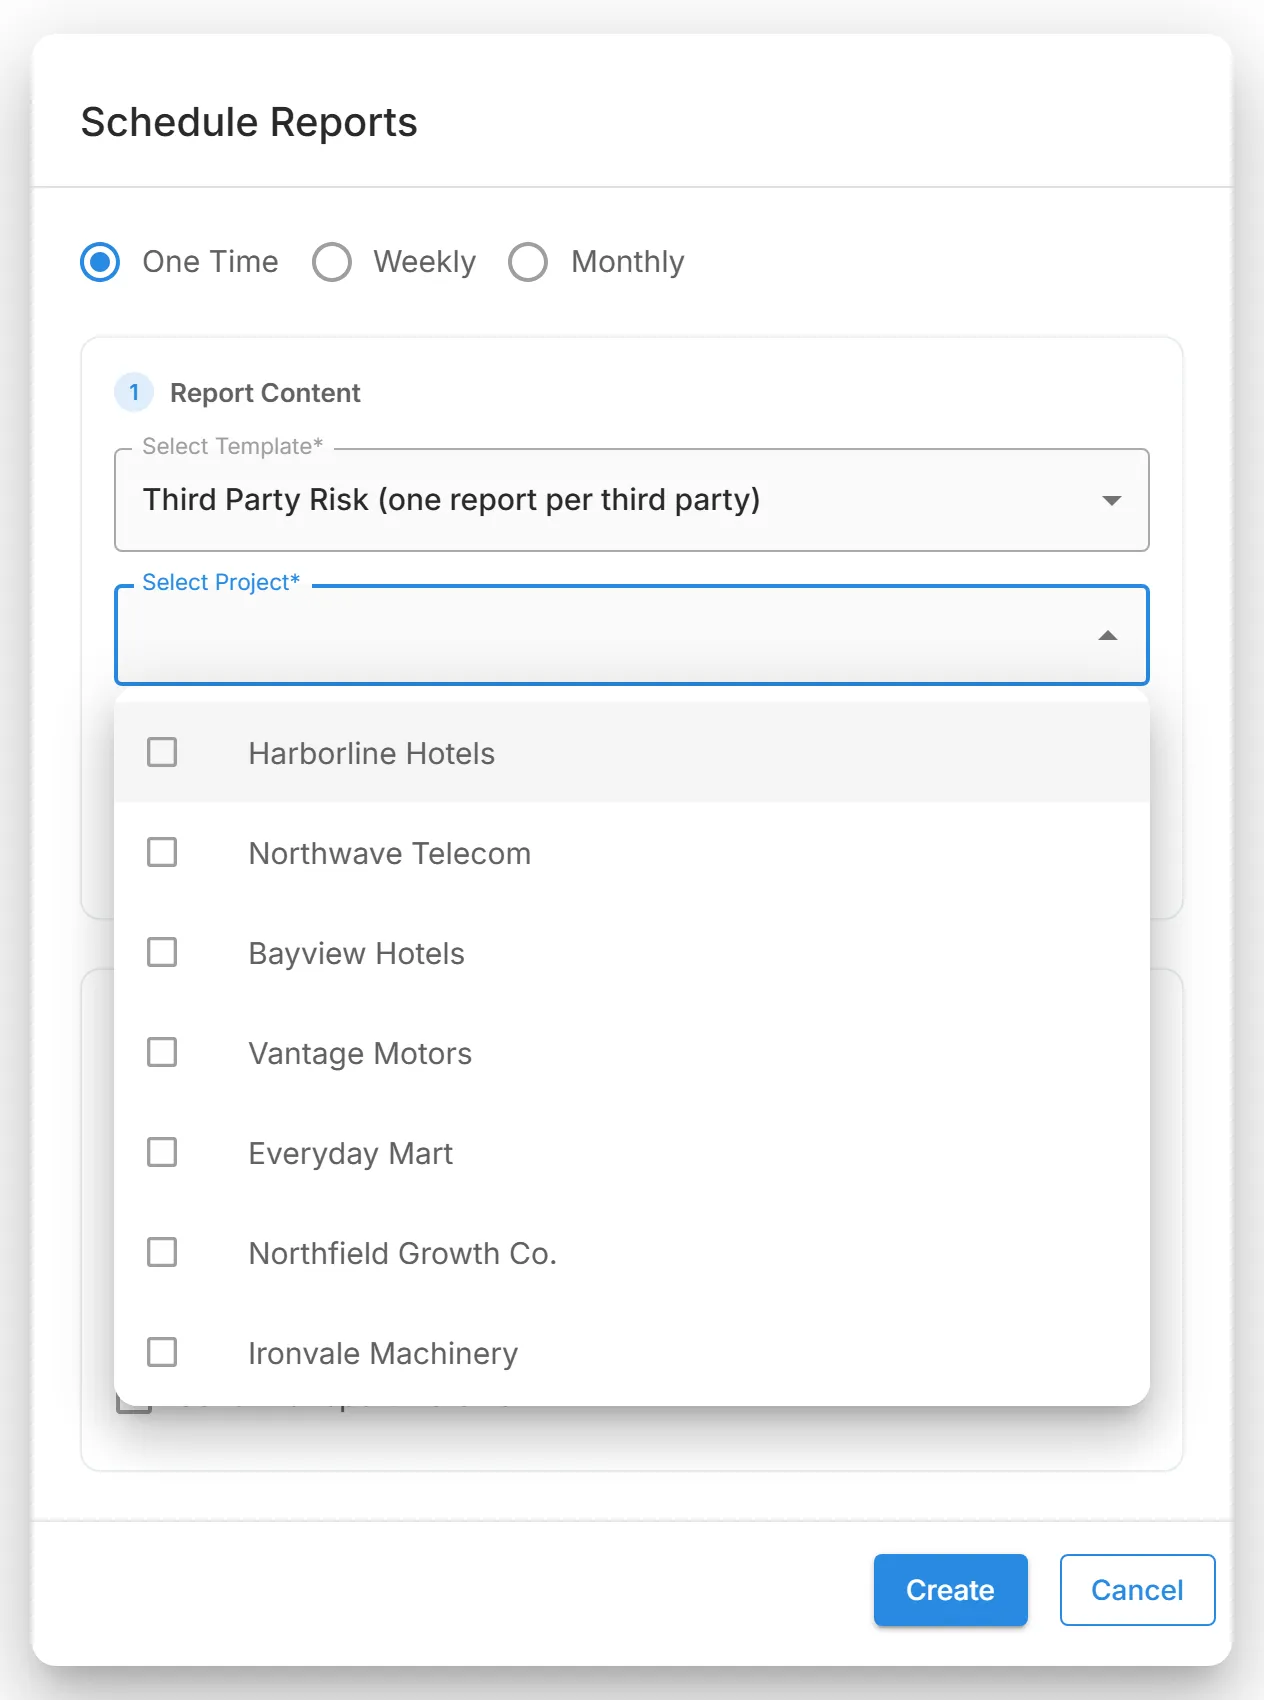
If you chose "Executive Protection (one report per executive)" or "Third Party Risk (one report per third party)", select one or more executives or third parties in "Select Project".
-
Optional, for a one-time report: limit the report to a period with "Start date (optional)" and "End date (optional)". If you set one date, set both. The period can be up to 12 months. Templates that do not support a period do not show these fields. If you leave both empty, the report is not limited to a period.
-
Under "Delivery Schedule", set when the report runs:
- One Time: pick the "Schedule Date".
- Weekly: pick the day in "Select Week Day".
- Monthly: pick "Start of Month" or "End of Month" in "Select Delivery Date".
-
Pick the time in "Select Time" and the time zone in "Select Timezone". The date and time must be in the future.
-
For a weekly or monthly report, set "Generation Start Date" and "Generation End Date". The report runs on schedule between these two dates.
-
Optional: select "Send the report via email" and choose one or more users of this account in "Select Recipient".
-
Select "Create" for a one-time report, or "Create And Schedule" for a weekly or monthly report. Select "Cancel" to close the dialog without saving.
Generated Reports
Section titled “Generated Reports”"Generated Reports" lists every report that has run, including each run of a recurring report.
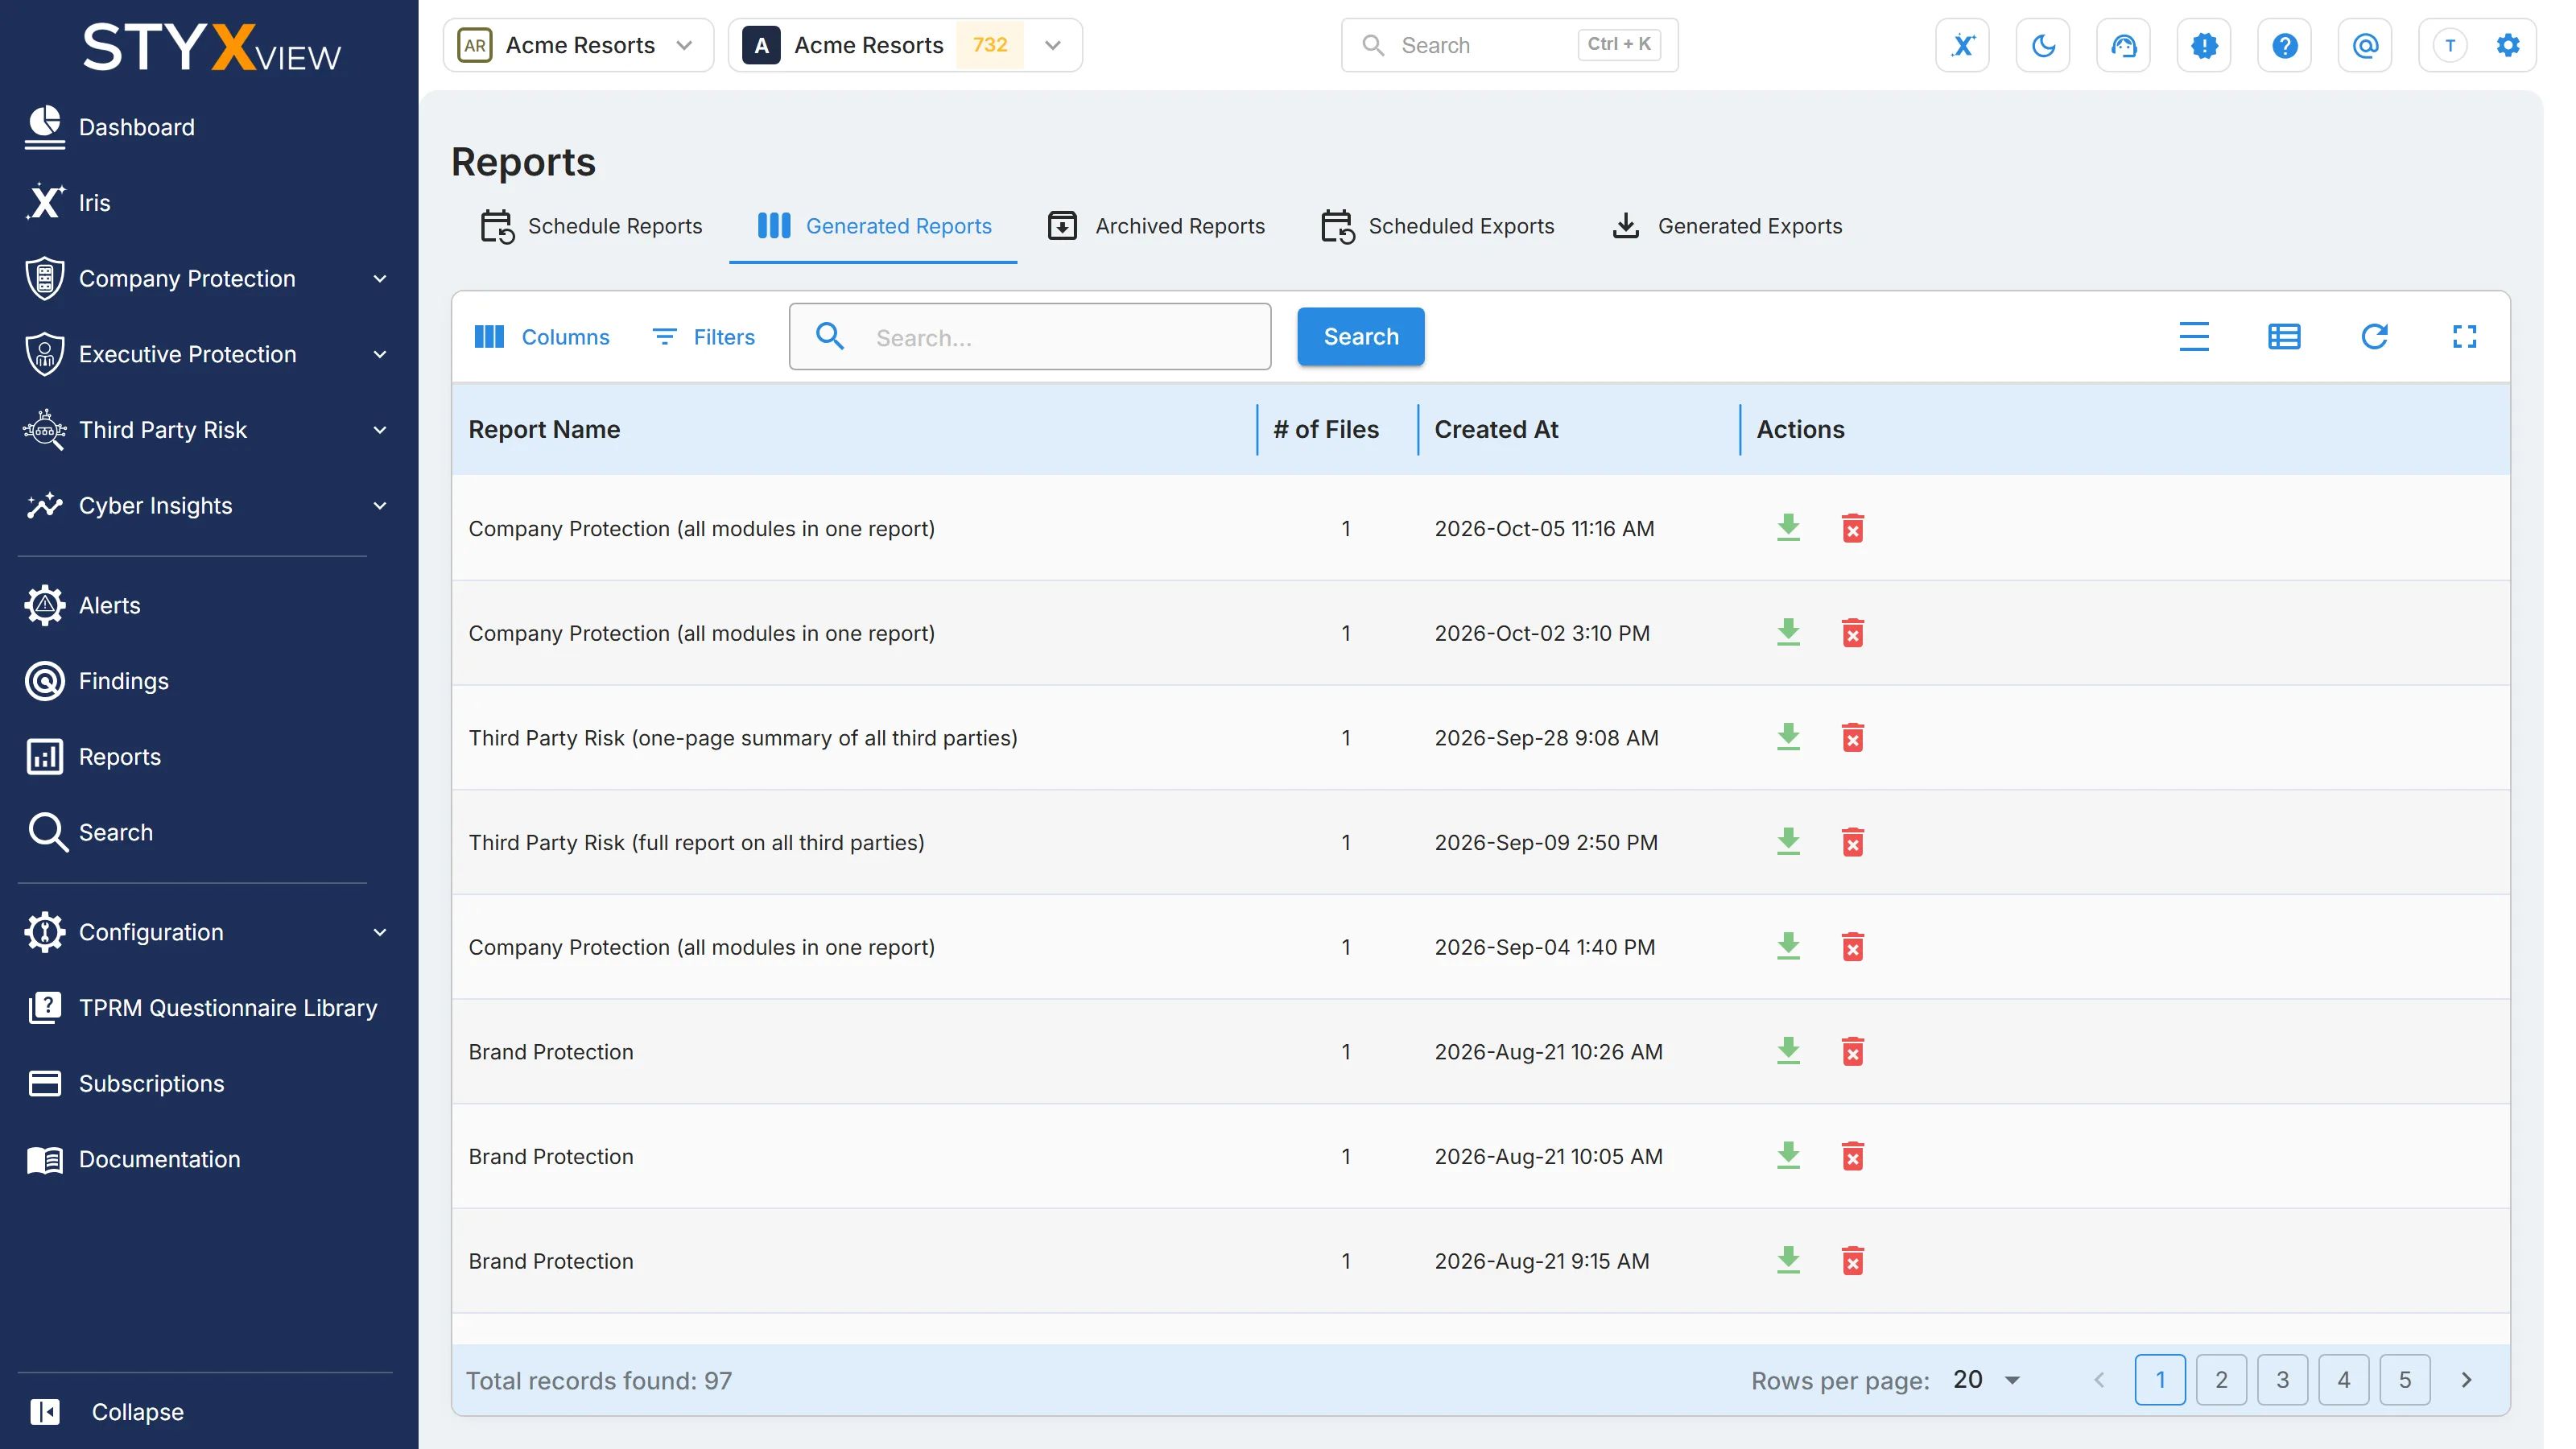
| Column | Description |
|---|---|
| Report Name | The template the report used. |
| # of Files | How many files the report produced. |
| Created At | When the report was generated. |
| Actions | The download and delete icons. |
- Download: select the download icon. The "Download Reports" dialog lists the report's files. Select a file to download it.
- Delete: select the delete icon, then select "Delete" in the "Delete report" dialog.
Archived Reports
Section titled “Archived Reports”"Archived Reports" keeps older reports for download and reference. Reports you schedule now appear under "Generated Reports", not here.
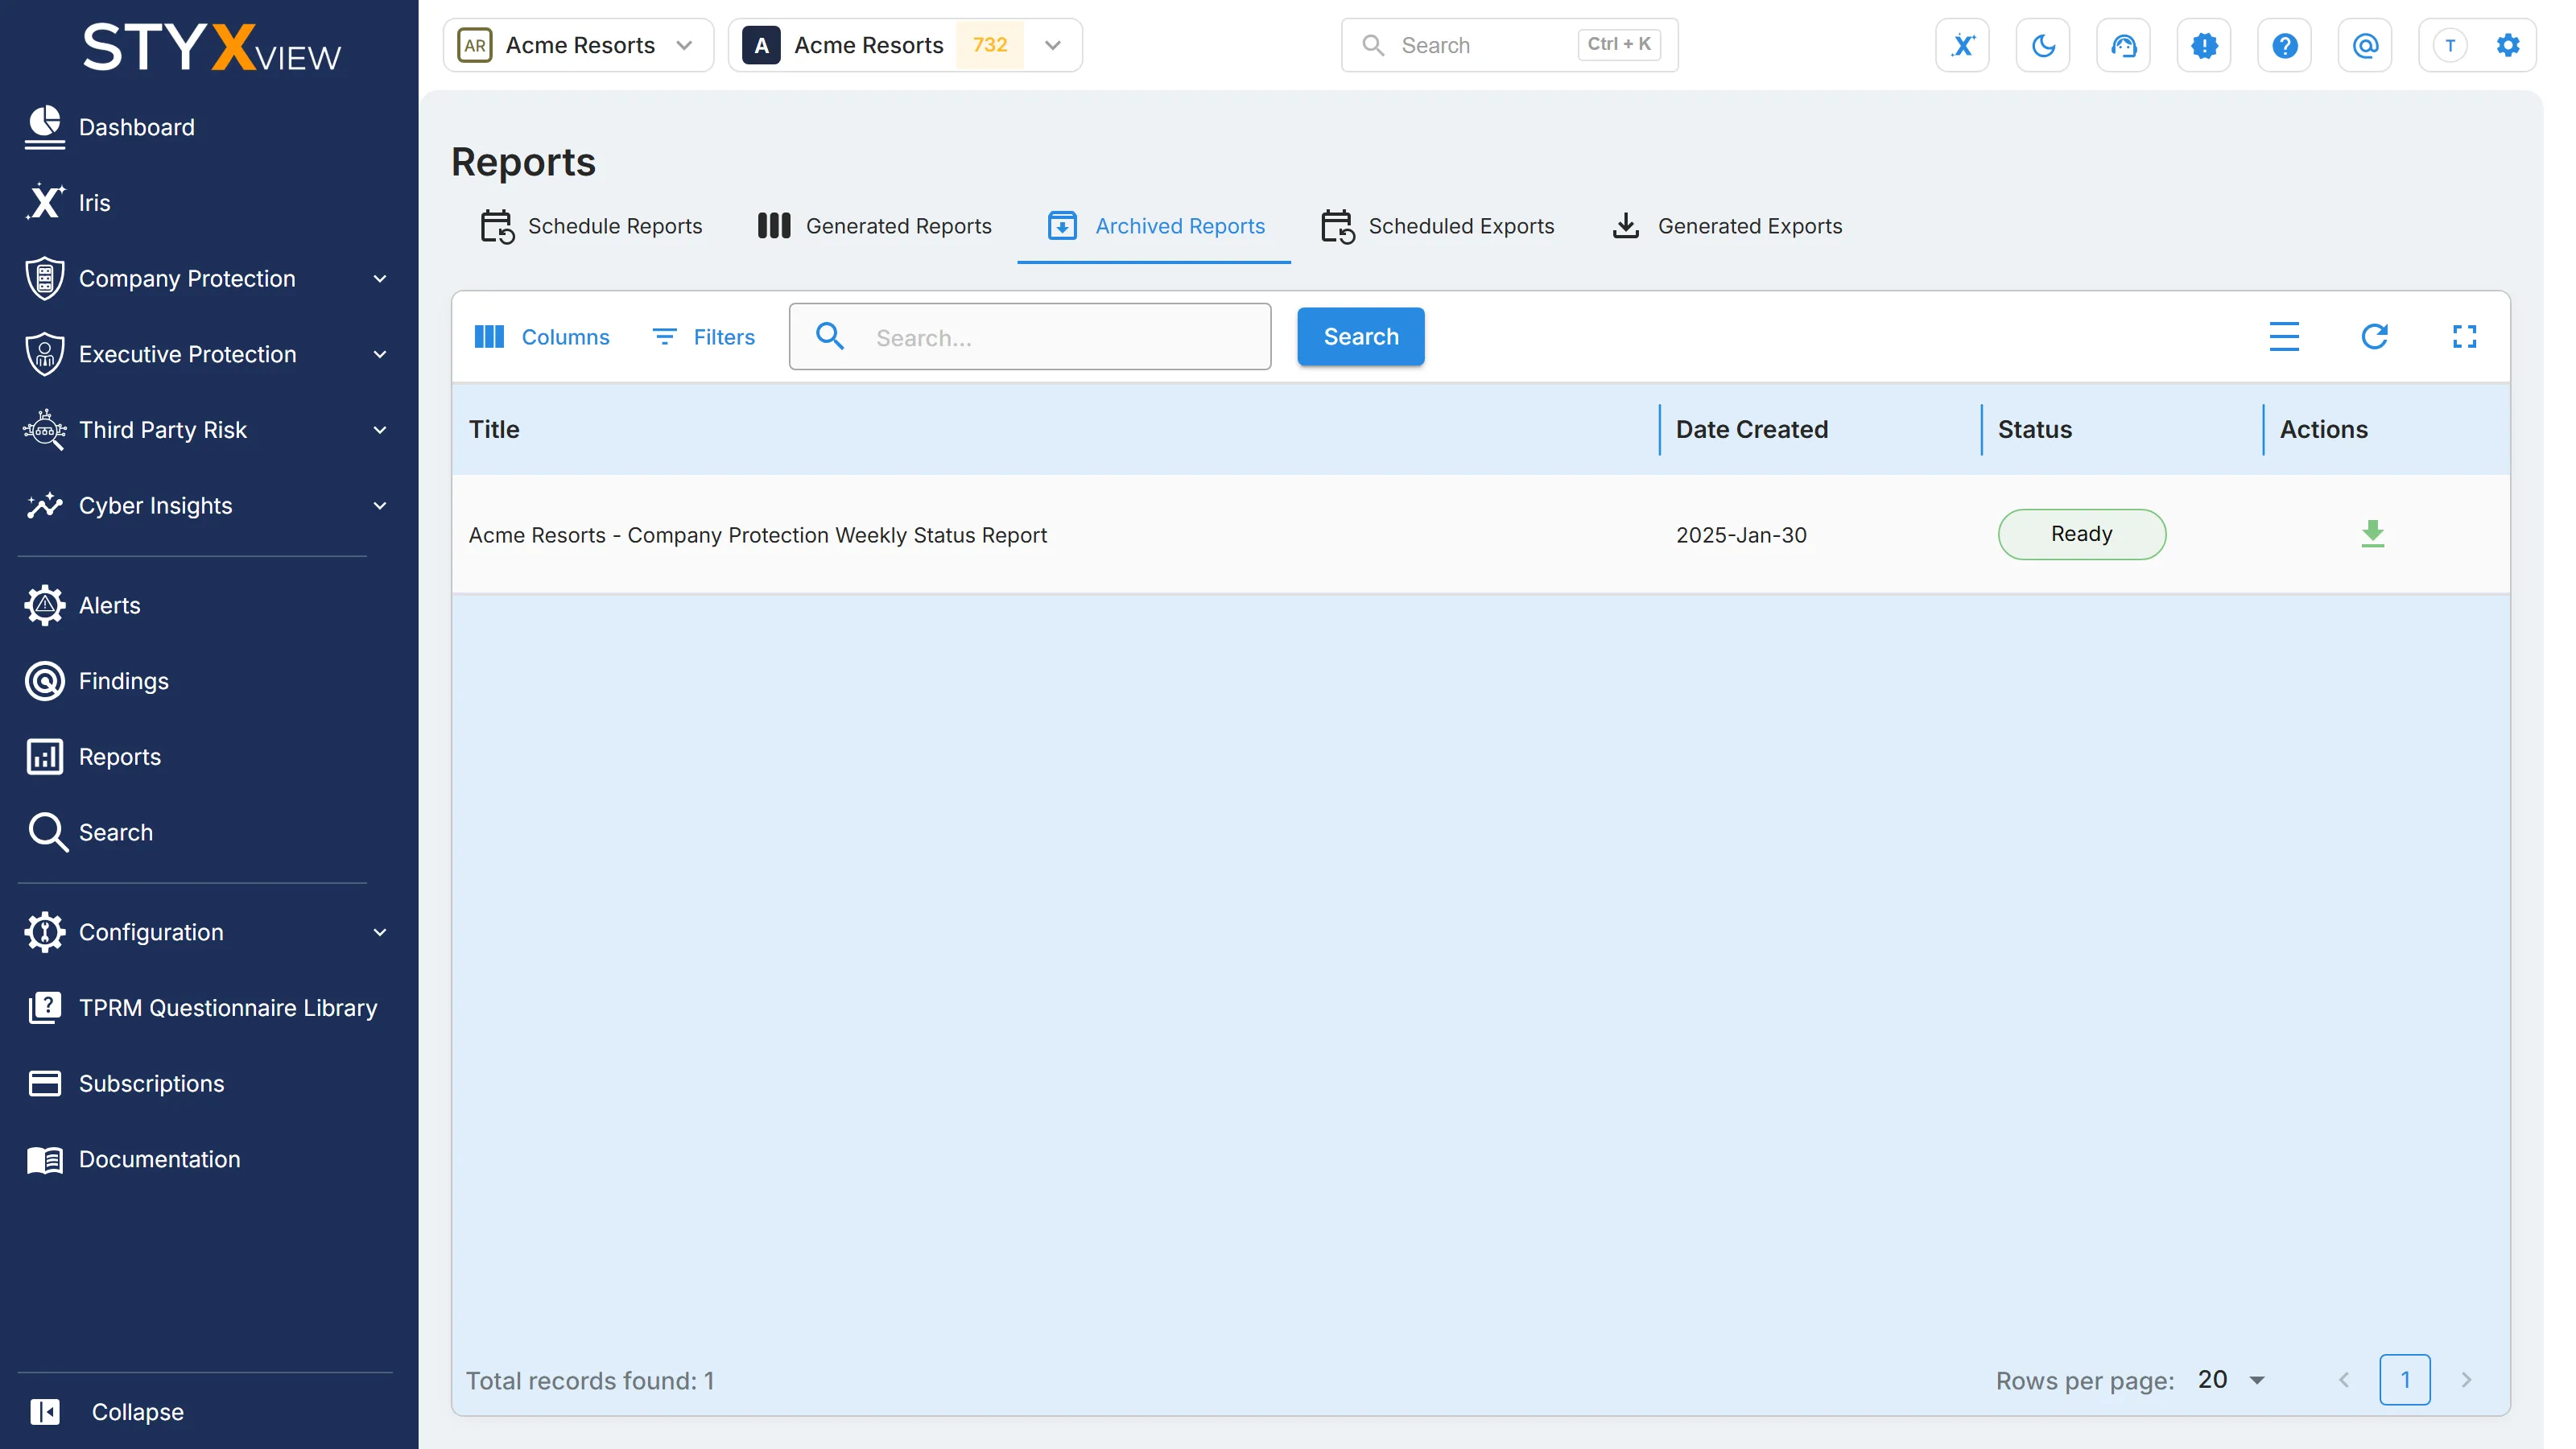
| Column | Description |
|---|---|
| Title | The name of the report. |
| Date Created | When the report was created. |
| Status | Ready when the file can be downloaded, or Pending. |
| Actions | The download icon. |
Scheduled Exports
Section titled “Scheduled Exports”"Reports" → "Scheduled Exports" lists your recurring exports. It shows Active schedules by default. Remove the Status filter to see expired ones too.
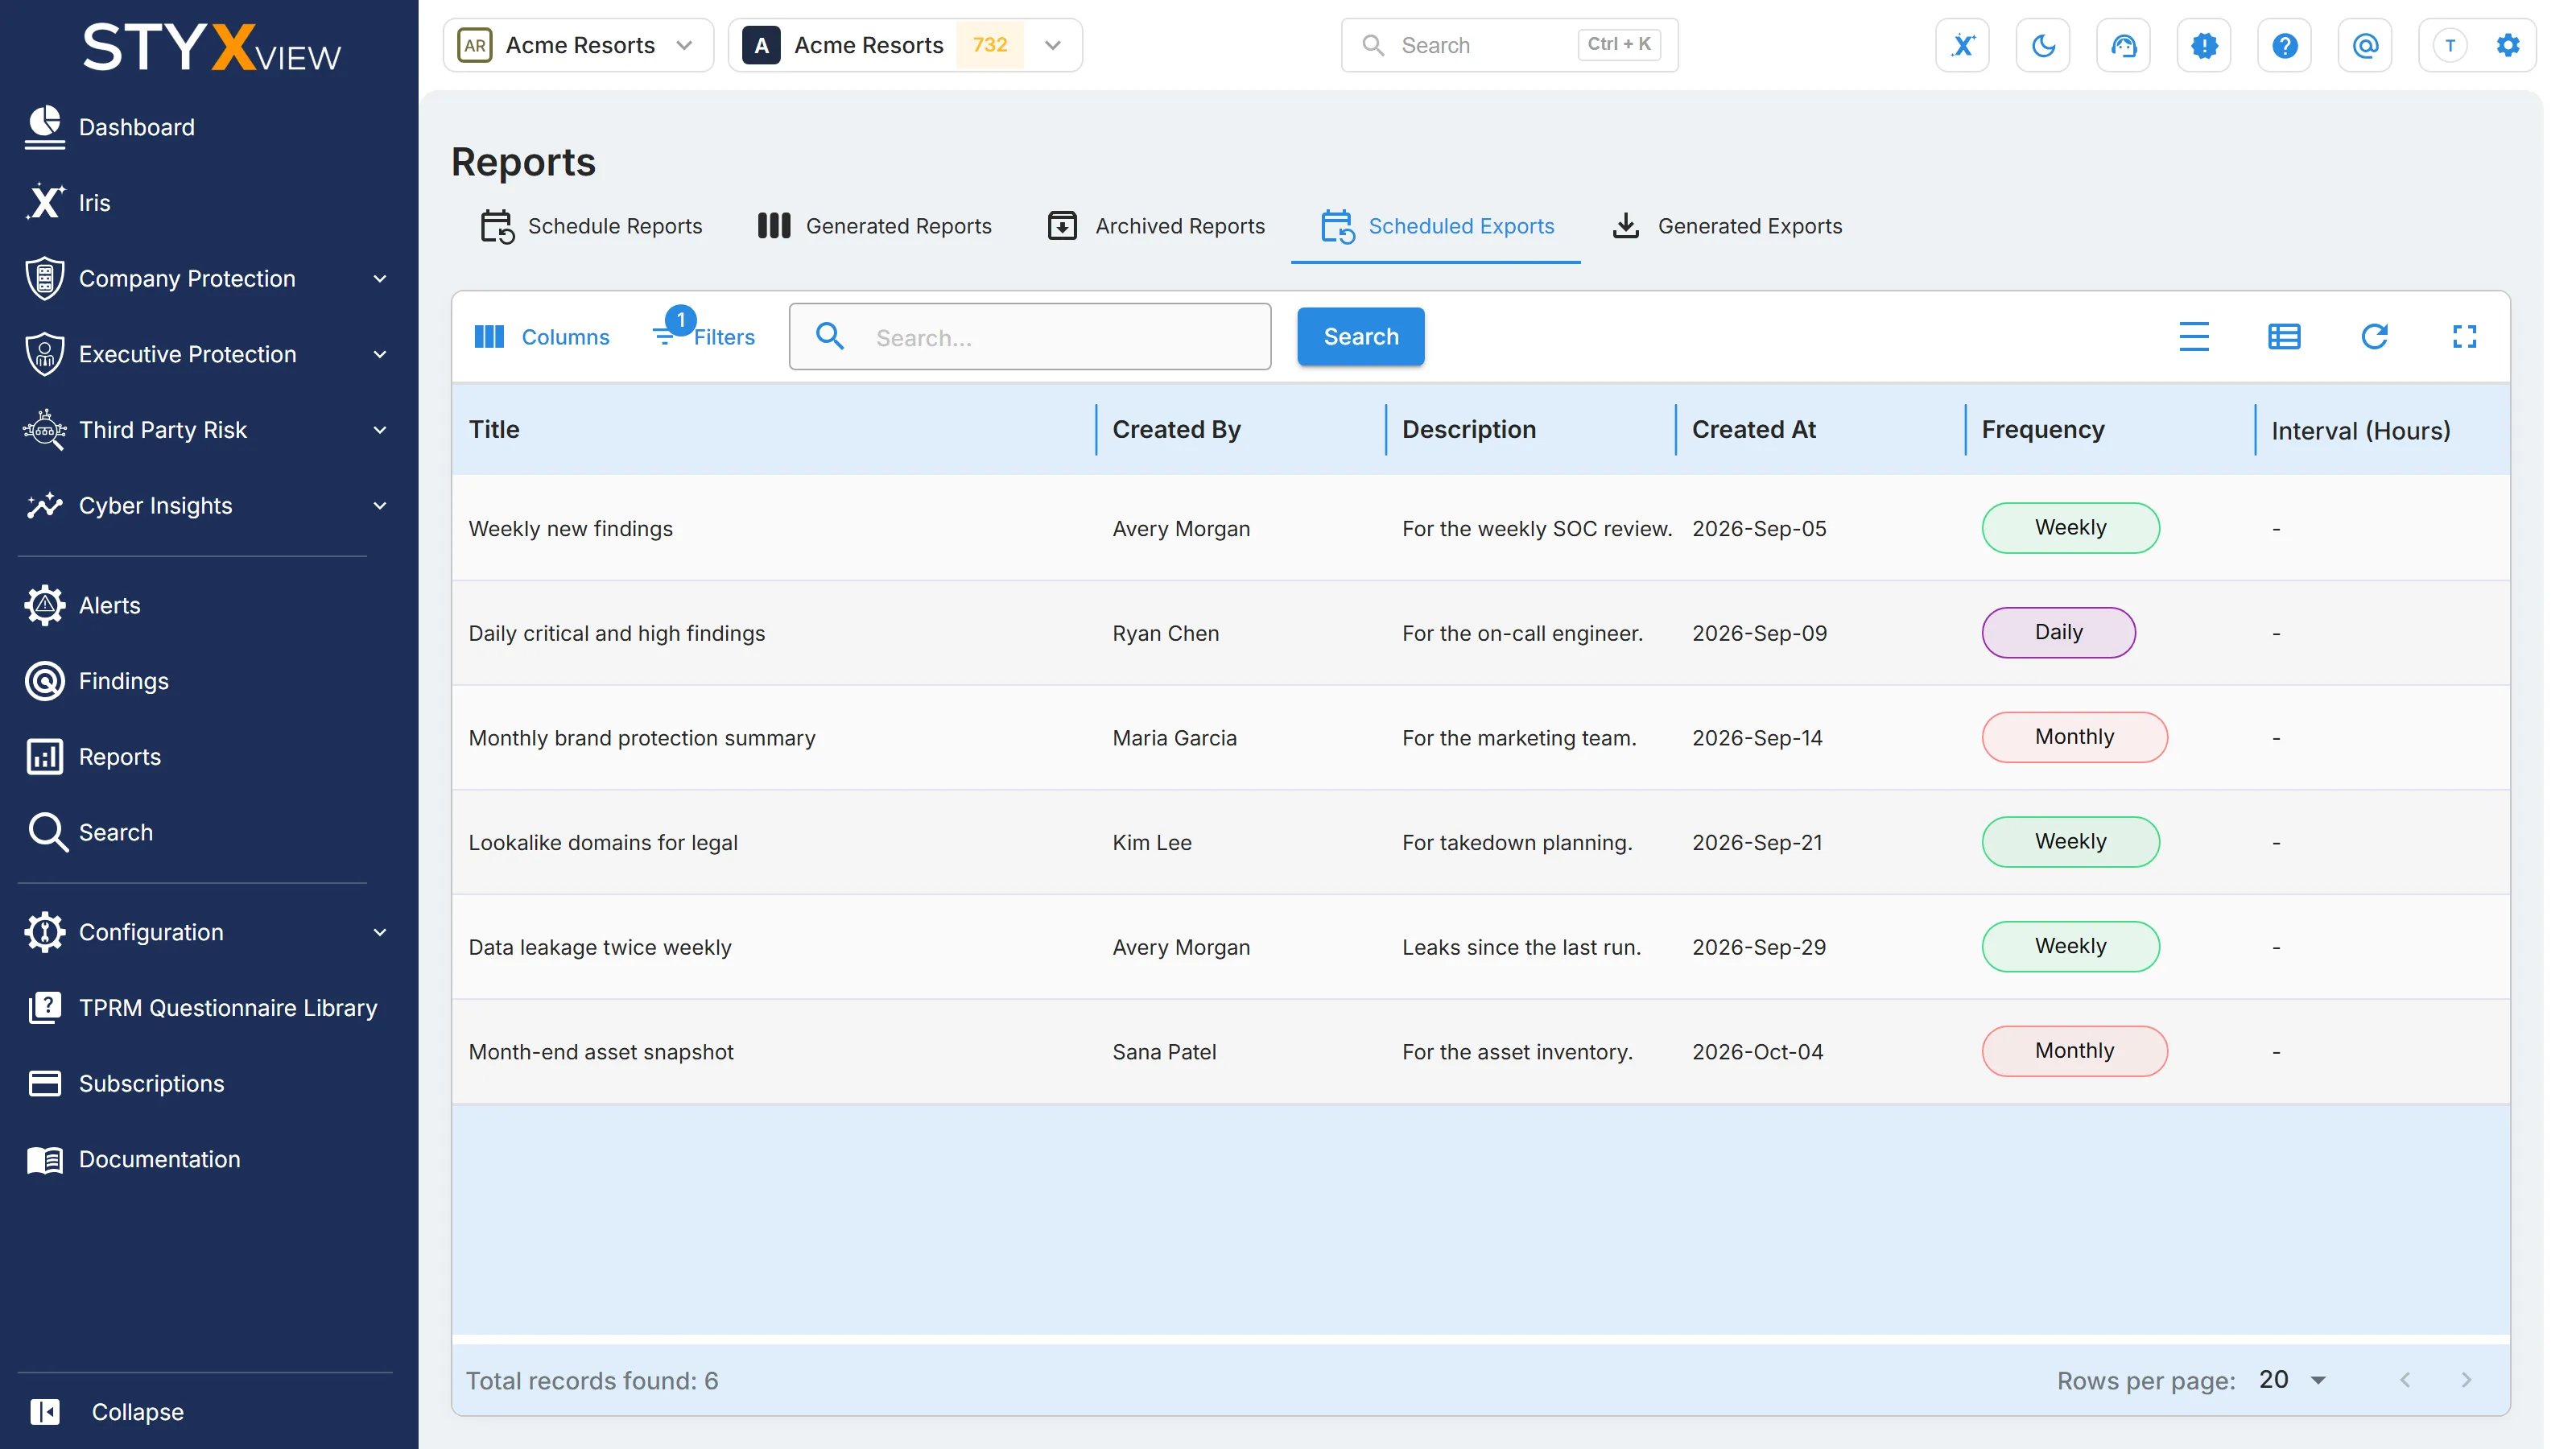
| Column | Description |
|---|---|
| Title | The table the export comes from. |
| Created By | The user who created the export. |
| Description | The description entered when the export was created. |
| Created At | When the export was created. |
| Frequency | How often the export runs. |
| Schedule Time | The time the export runs. |
| Timezone | The time zone of the schedule. |
| Schedule Day of week | The days a weekly export runs. |
| Schedule Day of Month | Start of Month or End of Month, for a monthly export. |
| Status | Active, or Expired once the end date has passed. |
| Actions | The delete icon. |
You cannot edit a schedule. To change one, delete it and create a new export. To delete a schedule, select its delete icon, then "Delete" in the "Delete export" dialog.
Generated Exports
Section titled “Generated Exports”"Reports" → "Generated Exports" lists every export that has run, once or on a schedule. A link in an export email opens this tab, filtered to that export.
| Column | Description |
|---|---|
| Doc ID | The export's identifier. |
| Title | The table the export comes from. |
| Created By | The user who created the export. |
| Description | The description entered when the export was created. |
| File Type | CSV, Excel, or ZIP. |
| Status | Completed, Pending, Failed, or Skipped. |
| Created At | When the export started. |
| Updated At | When the export last changed. |
| Actions | The download icon, available once the export is Completed. |
Pending means the export is queued or running. A large export can take a while. Skipped means a scheduled run found no new rows and was set to skip.